So, you’re staring into the abyss of your snack pantry, contemplating whether that sad, lonely cracker really counts as a dessert? And your sweet tooth is doing a full-blown opera performance? But the thought of a baking marathon makes you want to crawl under a blanket? Honey, I feel you. Hard. Welcome to the “I want something epic but also need to binge-watch my favorite show” club. Good news: I’ve got your back with a recipe so easy, you’ll wonder why you ever bought those ridiculously overpriced truffles.
Why This Recipe is Awesome
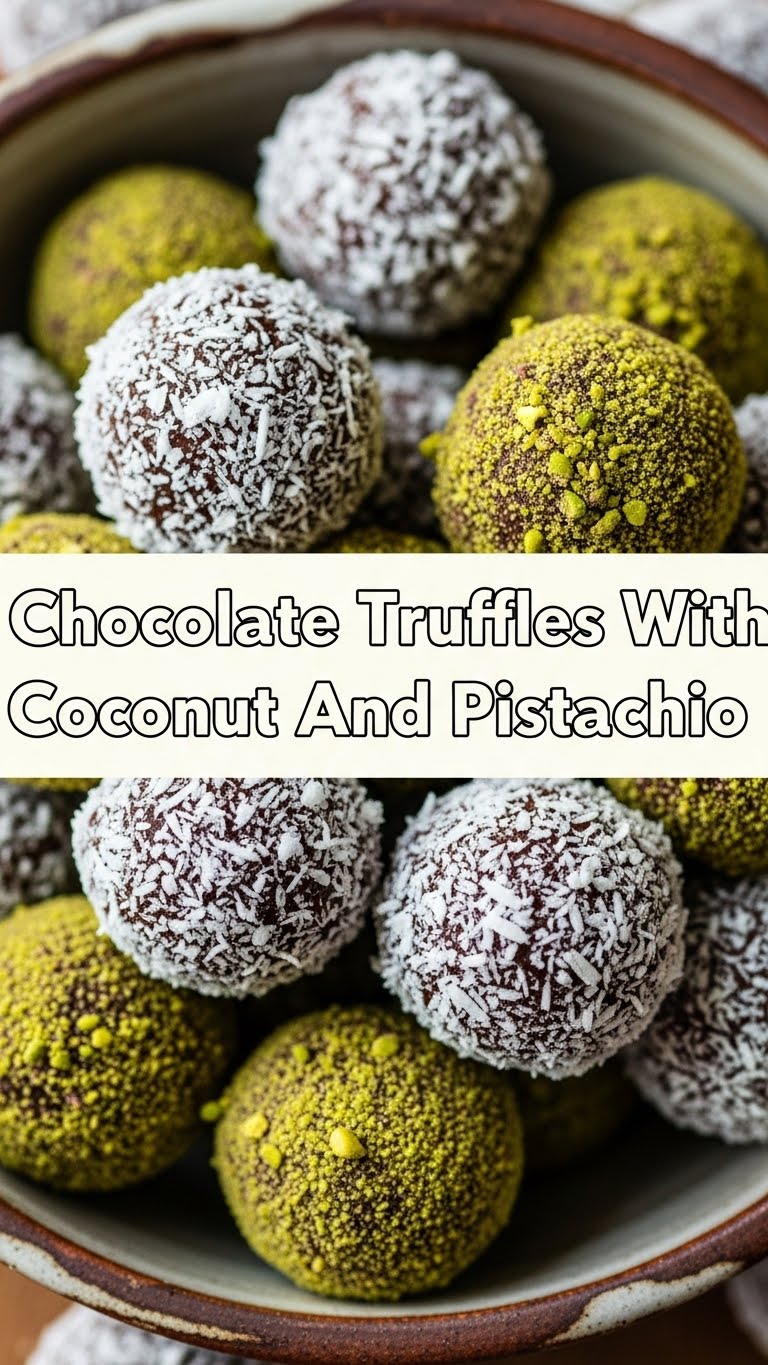
Okay, buckle up, buttercup, because this isn’t just a recipe; it’s a culinary superpower in your pocket. Seriously, these chocolate truffles with coconut and pistachio are the MVP of “I made this!” desserts. They’re rich, they’re decadent, they look incredibly fancy, and here’s the kicker: they’re **idiot-proof**. Even if your usual baking adventure ends with a smoke detector concert, you will nail these. They require minimal actual cooking time (read: more time for Netflix), and the combo of rich chocolate, tropical coconut, and nutty pistachio is just… *chef’s kiss*. It’s like a mini-vacation for your tastebuds, all without packing a single bag. Plus, they make you look like a total kitchen wizard without, you know, actually having to *be* one. Winning!
Ingredients You’ll Need
Gather ’round, my sweet-toothed conspirators! Here’s what you’ll need for these bite-sized nuggets of joy. Keep it real, keep it quality, and let’s make some magic.
- Good Quality Dark Chocolate (10-12 oz / 280-340g): This is NOT the time for waxy, sad baking chocolate chips. Go for a nice bar, 60-70% cacao. It makes a HUGE difference, trust me.
- Heavy Cream (3/4 cup / 180ml): The full-fat stuff. Don’t even *think* about light cream. We’re making truffles, not diet food.
- Unsalted Butter (2 tablespoons): Just a little bit for that extra silky texture. Room temp is fine, but cold works too since we’re melting it.
- Vanilla Extract (1 teaspoon): Pure vanilla, please. Imitation just doesn’t hit the same.
- Pinch of Salt: To make all those glorious flavors pop!
- Unsweetened Shredded Coconut (1/2 cup / ~45g): For rolling! Toasted or not, your call. I like toasted for extra oomph.
- Shelled Pistachios (1/2 cup / ~60g): Unsalty, if possible. Roughly chopped. Because fancy green nuts are just better.
Step-by-Step Instructions
Alright, let’s get this party started! Follow these simple steps and prepare for chocolatey bliss.
- Prep Your Chocolate: Grab your beautiful dark chocolate and chop it into small, uniform pieces. The smaller, the faster it melts evenly. Pop it into a medium-sized, heat-proof bowl.
- Heat Things Up: In a small saucepan, combine your heavy cream and butter. Heat it over medium heat, stirring occasionally, until it just barely starts to simmer around the edges. **Do not boil!** We’re gently warming, not making stew.
- Chocolate Bath Time: Immediately pour the hot cream mixture over your chopped chocolate. Let it sit there for about 5 minutes. This is crucial for melting the chocolate without scorching it. Resist the urge to stir!
- Whisk to Perfection: After its little soak, gently whisk the mixture from the center outwards until it’s perfectly smooth and glossy. Stir in the vanilla extract and that pinch of salt. Behold: ganache!
- Chill Out: Cover the bowl with plastic wrap and pop it into the fridge for at least 2-3 hours, or until it’s firm enough to scoop. If you’re impatient (like me), you can do about 45 minutes in the freezer, but keep an eye on it!
- Prep Your Toppings: While your ganache is chilling, spread your shredded coconut and chopped pistachios on separate plates or shallow bowls.
- Roll ‘Em Up: Once the ganache is firm, scoop out small amounts (about 1 tablespoon each) and roll them between your palms into cute little balls. Your hands will get messy, it’s part of the fun!
- Coat and Garnish: Immediately roll each truffle in either the shredded coconut or chopped pistachios (or a mix!). Gently press the toppings onto the truffle so they stick.
- Final Chill & Serve: Place your finished truffles on a parchment-lined plate or tray and chill them again for at least 30 minutes to firm up completely. Then, devour them with extreme prejudice!
Common Mistakes to Avoid
We all make ’em, right? Here’s how to sidestep some common truffle blunders, so your chocolate dreams don’t turn into a sticky nightmare.
- Using Subpar Chocolate: I said it once, I’ll say it again: **garbage in, garbage out!** Seriously, cheap chocolate tastes like cheap chocolate. Your truffles deserve better.
- Overheating the Cream: Boiling the cream can make your ganache greasy or split. We want a gentle simmer, not a raging inferno.
- Impatience is NOT a Virtue Here: Trying to roll warm ganache is like trying to wrangle a greased pig. It’s messy, frustrating, and ultimately, a sticky failure. **Chill that ganache fully!**
- Skipping the Salt: A tiny pinch of salt isn’t just for savory dishes. It magically enhances the chocolate flavor and cuts through the sweetness. Don’t skip it!
- Eating All the Ganache Before Rolling: Look, I get it. It’s delicious. But then you won’t have truffles. Exercise some self-control, future you will thank you. (Or just make a double batch, **IMO**.)
Alternatives & Substitutions
Feeling adventurous? Or maybe you’re missing an ingredient? No stress, here are some fun ways to mix things up!
- Change Up the Chocolate: Not a dark chocolate fiend? You could use milk chocolate (though it might be a bit sweeter) or even white chocolate! If using white chocolate, reduce the cream slightly as it’s typically softer.
- Different Nuts: Almonds, walnuts, pecans, hazelnuts – any finely chopped nut would be delicious as a coating or even mixed into the ganache. Just be sure to toast them for extra flavor!
- Alternative Coatings: Instead of coconut and pistachio, try rolling them in cocoa powder (classic!), sprinkles, finely crushed cookies (Oreos, Biscoff, etc.), or even a drizzle of contrasting melted chocolate.
- A Boozy Kick: After whisking the ganache smooth, add a splash (1-2 tablespoons) of your favorite liquor – Kahlúa, Grand Marnier, rum, or a nice Irish cream. Instant grown-up treat!
- Spices & Extracts: A pinch of cayenne for a Mexican hot chocolate vibe, a dash of almond extract, or a tiny bit of orange zest can totally transform the flavor profile.
FAQ (Frequently Asked Questions)
Got questions? I’ve got answers! (Mostly.)
- Do I have to use dark chocolate?
Technically no, but it gives the best balance against the sweetness of the other ingredients. Milk chocolate will be sweeter, white chocolate even more so. Adjust your expectations accordingly, sweet pea! - Can I skip the chilling time? I’m impatient!
Oh, honey. We just talked about this! You *can*, but you’ll have a sticky, melted mess rather than perfectly round truffles. Trust the process. **FYI**, good things come to those who wait (or just set a timer). - How long do these truffles last?
If you don’t eat them all in one sitting (which is a challenge, I know), they’ll keep in an airtight container in the fridge for up to 2 weeks. You can also freeze them for up to a month! Just thaw in the fridge. - What if my ganache is too runny after chilling?
Pop it back in the fridge for longer! It might just need more time. If it’s *still* runny after several hours, you might have used too much cream or not enough chocolate. You can try gently reheating it and adding a bit more chopped chocolate, then rechilling. - What if my ganache is too hard?
Oops! It might have chilled too long or too cold. Let it sit at room temperature for a bit, or microwave it for literally 5-10 seconds, then stir. Repeat if needed, very gently. - Can I make these vegan?
Absolutely! Use a good quality dairy-free dark chocolate, full-fat canned coconut cream (the thick part from the top of the can), and a plant-based butter alternative. Same process!
Final Thoughts
See? Told ya it was easy! You just whipped up some seriously impressive, incredibly delicious chocolate truffles. Give yourself a high-five (or, better yet, just eat another truffle). These are perfect for gifting (if you can part with them), bringing to a party, or just hoarding for yourself for those emergency chocolate cravings. Now go impress someone – or just yourself – with your new culinary skills. You’ve earned it, you magnificent truffle wizard!


