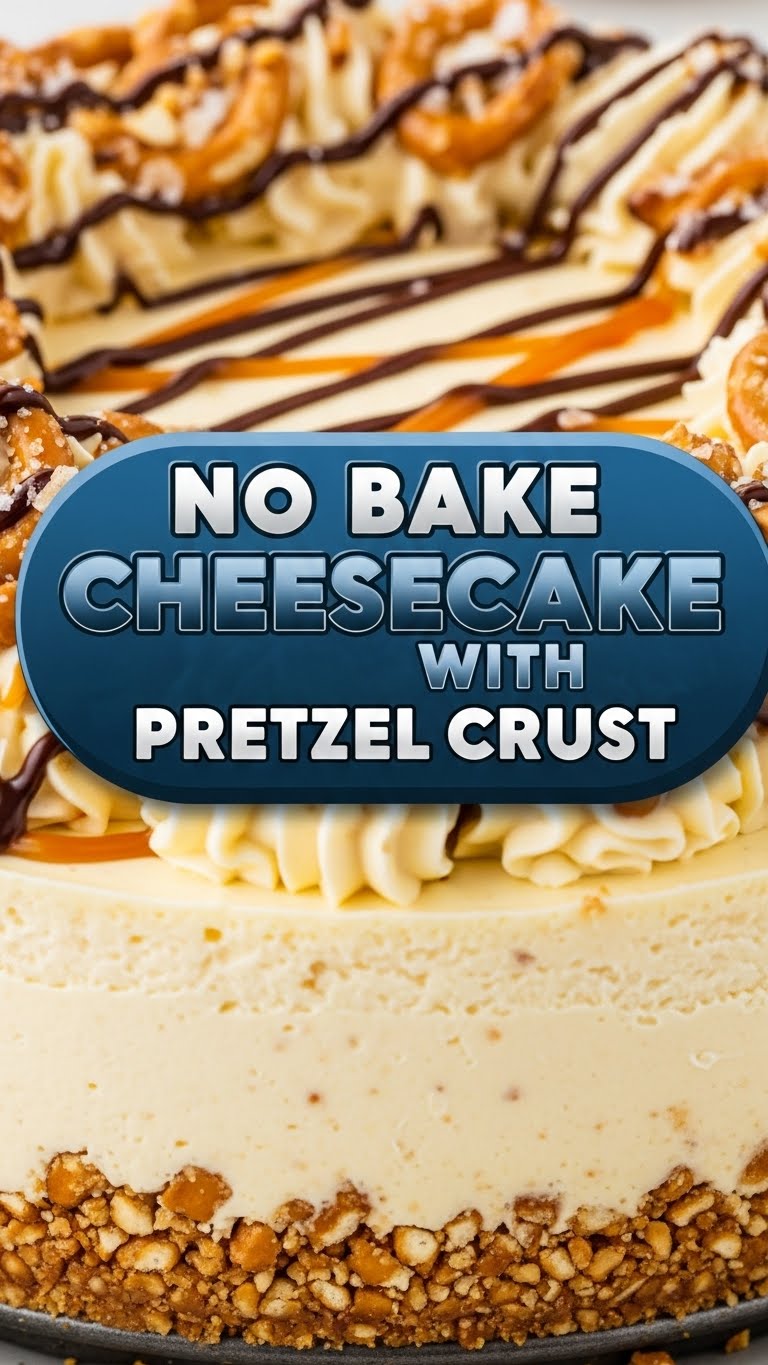
So you’re craving something ridiculously delicious, easy to make, and doesn’t require you to turn on your oven in this heat? Same, friend, same. You’re in luck because today we’re tackling the legendary No-Bake Cheesecake with a Pretzel Crust. It’s the perfect blend of sweet, salty, creamy, and crunchy. Basically, it’s a party in your mouth, and everyone’s invited.
Why This Recipe is Awesome
Let’s be real, turning on the oven can feel like an Olympic sport in certain climates. This recipe? Zero oven time. Zilch. Nada. It’s also pretty much **idiot-proof** – and trust me, if I can make it without a major kitchen meltdown, so can you. The pretzel crust is where the magic truly happens, bringing that irresistible salty crunch to balance the smooth, sweet cheesecake filling. It’s sophisticated enough to impress your dinner guests but simple enough for a Tuesday night treat. Plus, it just *looks* fancy without all the fuss. Your secret weapon, you might say.
Ingredients You’ll Need
- For the Pretzel Crust:
- 2 cups crushed pretzels: Grab a bag of your favorite pretzels and get ready to unleash some stress by crushing them. Thin ones work best!
- 1/2 cup (1 stick) unsalted butter, melted: The delicious glue that holds our salty heroes together.
- 2 tablespoons granulated sugar: Just a touch to sweeten the deal for our crust.
- For the Cheesecake Filling:
- 2 (8-ounce) packages cream cheese, softened: The star of the show. Make sure it’s *softened* – this is key, folks!
- 1 cup granulated sugar: For that classic sweet cheesecake taste.
- 1 teaspoon vanilla extract: A dash of warmth and classic flavor. Don’t skip it!
- 1 1/2 cups heavy cream, chilled: This is what makes it light, fluffy, and absolutely decadent.
Step-by-Step Instructions
- Crush Those Pretzels: Place pretzels in a large Ziploc bag and get smashing with a rolling pin (or your fists, if you’re feeling feisty). You want fine crumbs, but a few bigger pieces are totally fine for texture.
- Make the Crust: In a medium bowl, combine the crushed pretzels, melted butter, and 2 tablespoons of sugar. Mix until it’s all gloriously combined.
- Press and Chill: Press the pretzel mixture firmly into the bottom of a 9-inch springform pan. **Don’t skimp on the pressing!** Pop it in the fridge for at least 30 minutes to firm up.
- Whip the Cream Cheese: In a large bowl, using an electric mixer, beat the softened cream cheese, 1 cup of sugar, and vanilla extract until smooth and creamy. Scrape down the sides of the bowl to make sure everything is incorporated.
- Whip the Heavy Cream: In a separate, chilled bowl, whip the cold heavy cream until soft peaks form. Be careful not to over-whip it into butter – unless you want butter (you don’t, for this recipe).
- Combine & Conquer: Gently fold the whipped cream into the cream cheese mixture until just combined. Don’t overmix; you want to keep that light, airy texture.
- Assemble Your Masterpiece: Pour the cheesecake filling over your chilled pretzel crust. Smooth the top with a spatula.
- Chill Out: Cover the pan loosely with plastic wrap and refrigerate for at least 4-6 hours, or even better, overnight. **Patience is a virtue here!**
Common Mistakes to Avoid
- Not Softening Cream Cheese: Seriously, this is a biggie. If your cream cheese is cold, you’ll end up with lumps, and no one wants lumpy cheesecake.
- Skipping the Crust Chill: That crust needs to firm up. If you pour the filling on a warm, loose crust, it’ll be a sad, crumbly mess.
- Over-mixing the Filling: Once you add the whipped cream, gently fold. Over-mixing can deflate the air you worked so hard to incorporate, making your cheesecake dense instead of fluffy.
- Impatience is a Sin: Taking it out of the fridge too early. I know it’s tempting, but a properly chilled cheesecake is a firm, sliceable cheesecake. Trust the process!
Alternatives & Substitutions
Feeling adventurous, or maybe you’re out of something? No stress!
- Crust Swap: Not a pretzel fan (gasp!)? You can totally go classic with a graham cracker crust. Just swap the pretzels for graham cracker crumbs and adjust the sugar if needed. Or try digestive biscuits!
- Topping It Off: This cheesecake is amazing on its own, but feel free to get creative. Fresh berries, chocolate ganache, caramel sauce, or even a sprinkle of sea salt flakes (extra pretzel-y!) would be divine.
- Flavor Fun: Add a splash of lemon zest to the filling for a brighter taste, or a tablespoon of espresso powder for a coffee kick.
- Gluten-Free: Many brands now offer excellent gluten-free pretzels, so no one has to miss out on this sweet and salty dream!
FAQ (Frequently Asked Questions)
Got questions? I got answers!
- Can I use low-fat cream cheese? Well, technically yes, but why hurt your soul like that? For the creamiest, dreamiest cheesecake, full-fat is the way to go. You’re making cheesecake, not a health salad, IMO.
- How long does this masterpiece last? If you manage not to devour it all in one sitting, it’ll keep well covered in the fridge for 3-4 days. Good luck with that!
- Do I really need a springform pan? While not strictly necessary, it makes life infinitely easier for removal. If you don’t have one, line a regular 9-inch pie plate with parchment paper, leaving an overhang to lift it out.
- My crust isn’t sticking together, help! You probably need a tiny bit more melted butter. Add a tablespoon at a time until it resembles wet sand.
- Can I freeze this cheesecake? Yes! Wrap individual slices or the whole cheesecake (after it’s fully set) tightly in plastic wrap, then foil. It’ll last up to a month, though I doubt it will make it that long.
- What if my heavy cream won’t whip? Make sure both your cream and your bowl are very cold. Even chilling your beaters for a few minutes can help!
Final Thoughts
And there you have it! A ridiculously easy, unbelievably tasty, and incredibly impressive no-bake cheesecake with a pretzel crust. You’ve officially conquered dessert without breaking a sweat (or an oven). Now go forth and bask in the glory of your culinary genius. Share it, hoard it, do whatever your heart desires. You’ve earned it!
