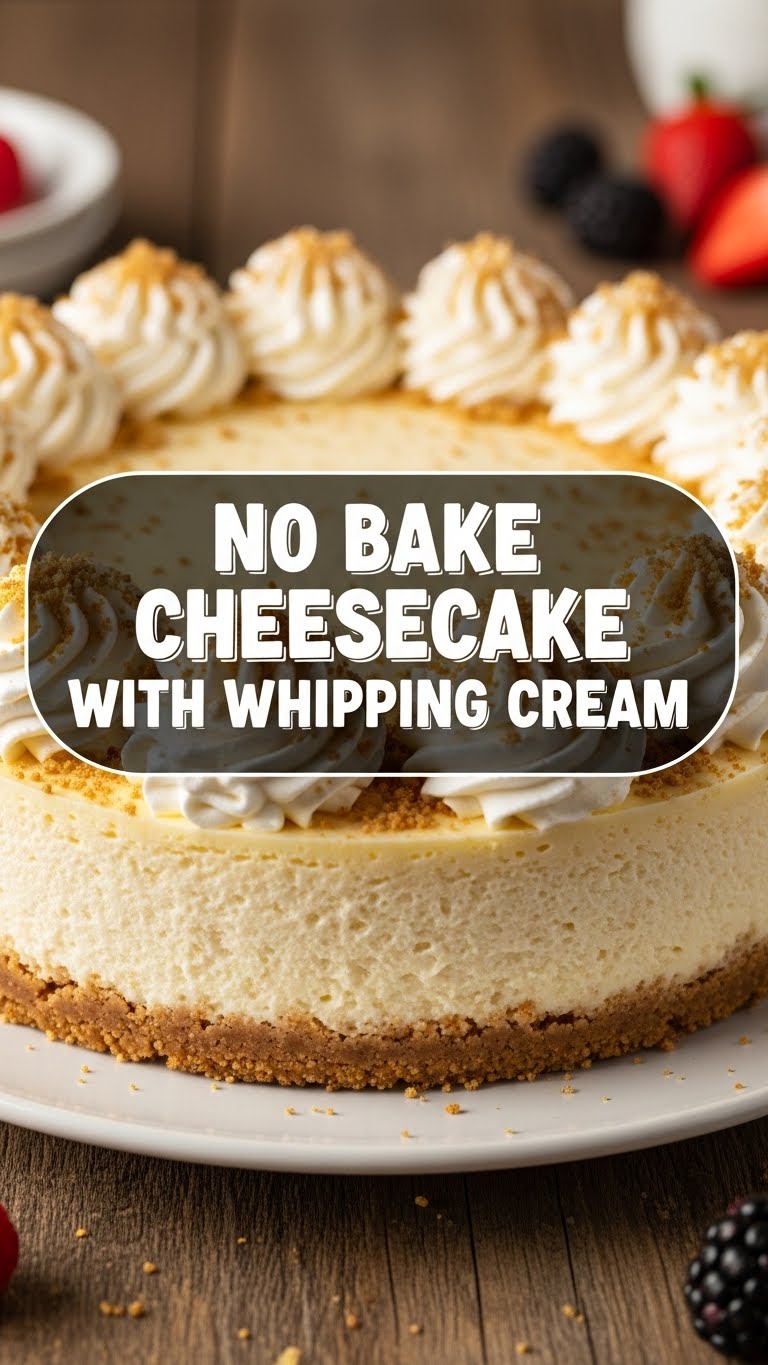
So you’re craving something ridiculously tasty but the thought of turning on the oven sends shivers down your spine? And, let’s be real, spending hours in the kitchen sounds like a cruel and unusual punishment right now? My friend, I feel you. And I’m here to save your dessert-loving soul with a recipe so simple, so delicious, you’ll wonder where it’s been all your life. Get ready for the easiest, creamiest, no-bake cheesecake ever!
Why This Recipe is Awesome
Because it’s practically magic, that’s why! Seriously, this isn’t just a recipe; it’s a life hack. We’re talking **no oven required**, which means no sweating over a hot stove, no waiting for things to cool, and no risk of burning down your kitchen (unless you get really creative with the microwave, but let’s not go there). It’s incredibly creamy, ridiculously flavorful, and so straightforward, it’s pretty much idiot-proof. Even I, a person who once set off the fire alarm making toast, can nail this. It’s also perfect for those impromptu dessert emergencies or when you just want to impress someone with minimal effort. You’re welcome.
Ingredients You’ll Need
Gather ’round, buttercups! Here’s your simple shopping list for pure bliss:
- 2 cups Graham Cracker Crumbs: Or digestive biscuits, or Oreos (if you’re feeling wild). Basically, anything that crumbles into a delicious base.
- ½ cup (1 stick) Unsalted Butter, melted: The glue that holds our crumbly dreams together.
- 2 blocks (8 oz each) Full-Fat Cream Cheese, softened: The absolute MVP. Make sure it’s nice and soft, otherwise, you’ll be fighting lumps. And who wants lumpy cheesecake?
- 1 cup Powdered Sugar (Confectioners’ Sugar): For that perfect, silky sweetness. Also helps stabilize things, FYI.
- 1 teaspoon Vanilla Extract: A splash of liquid happiness. Don’t skimp!
- 2 cups Heavy Whipping Cream, very cold: This is where the magic happens and things get light and fluffy. Keep it chilled, it makes a huge difference!
Step-by-Step Instructions
Alright, let’s get down to business. Prepare to be amazed by your own culinary prowess!
Crumbly Base Time:
Grab a medium bowl and toss in your graham cracker crumbs. Pour the melted butter over them and mix it all up until the crumbs are evenly coated and resemble wet sand. Now, press this glorious mixture firmly into the bottom of a 9-inch pie plate or springform pan. Use the back of a spoon or a flat-bottomed glass. Stick this in the fridge while you make the filling.
Cream Cheese Dream:
In a large bowl, beat the softened cream cheese with an electric mixer until it’s super smooth and fluffy. Add the powdered sugar and vanilla extract, then beat again until everything is well combined and there are no lumps left. We want creamy perfection!
Whip It Good:
In a separate, *very clean* bowl (seriously, no grease!), pour in your super cold heavy whipping cream. Using clean beaters, whip the cream on medium-high speed until it forms stiff peaks. You’ll know it’s ready when you lift the beaters and the peaks stand up proudly. Don’t over-whip, or you’ll end up with butter!
Combine Forces:
Gently fold about a third of the whipped cream into the cream cheese mixture until just combined. Then, add the rest of the whipped cream and fold until everything is beautifully incorporated and light. Be gentle here; we want to keep all that glorious air in the mixture.
Assemble & Chill:
Pour your amazing cheesecake filling over the chilled graham cracker crust. Smooth out the top with a spatula. Now comes the hardest part: chilling! Cover your cheesecake loosely with plastic wrap and **refrigerate for at least 4-6 hours, or even better, overnight.** This is crucial for it to set properly.
Serve & Enjoy:
Once it’s perfectly set, slice it up and serve! You can top it with fresh berries, chocolate sauce, or just enjoy it plain. It’s incredible either way!
Common Mistakes to Avoid
Even though this recipe is a breeze, there are a few little gotchas that can trip up even the best of us. Don’t worry, I’ve made them all so you don’t have to!
- Using Cold Cream Cheese: Attempting to beat rock-hard cream cheese straight from the fridge is a recipe for lumpy disaster and a very frustrated mixer. Let it hang out on the counter for at least an hour to soften up. Softened cream cheese is your best friend!
- Not Chilling Enough: Thinking ‘chill time’ is optional? Rookie mistake! If you try to cut into this beauty too soon, you’ll end up with a delicious (but very sad) puddle. **Seriously, give it the recommended chill time** – patience is a virtue here.
- Over-whipping the Cream: Whipped cream goes from fluffy peaks to lumpy butter surprisingly fast. Watch it carefully and stop as soon as you see those stiff peaks forming. It should still be smooth and light, not grainy.
- Ignoring Grease: Any trace of grease in your whipping bowl or on your beaters can prevent your heavy cream from whipping properly. Make sure everything is squeaky clean before you start whipping!
Alternatives & Substitutions
Feeling creative? This recipe is super flexible! Here are some ideas to shake things up:
- Crust Variations: Instead of graham crackers, try crushed Oreo cookies (for a chocolatey twist), vanilla wafers, or even shortbread biscuits. Just remember to adjust the melted butter if your chosen cookie is very oily or dry.
- Flavor Boosters: Add a tablespoon of lemon zest to the cream cheese mixture for a zesty kick, or a few tablespoons of cocoa powder for a chocolate cheesecake. A swirl of fruit puree or caramel sauce before chilling also works wonders.
- Topping Fun: The possibilities are endless! Fresh berries (strawberries, raspberries, blueberries, oh my!), chocolate shavings, a drizzle of fudge or caramel, a dollop of extra whipped cream, or a sprinkle of toasted nuts. Go wild!
- Dairy-Free Option: While I haven’t personally tried this, you can experiment with dairy-free cream cheese alternatives and coconut cream (chilled, thick part only) whipped up in place of heavy cream. Results may vary, but hey, it’s worth a shot if you have dietary restrictions!
FAQ (Frequently Asked Questions)
Got questions? I’ve got answers, delivered with a smile (and maybe a wink).
- “Can I use low-fat cream cheese?” You *can*, but why hurt your cheesecake’s soul like that? Full-fat gives you that rich, creamy texture we’re aiming for. Low-fat might make it a bit thinner or less luxurious. YOLO, right?
- “How long does it last in the fridge?” If you manage to hide it from yourself and any opportunistic housemates, it should last about 3-4 days in an airtight container. But honestly, good luck making it last that long!
- “Can I make individual cheesecakes?” Heck yes! Line a muffin tin with paper liners, fill with the crust and then the mixture, and chill. Perfect for portion control (or just eating three at once, no judgment).
- “My whipped cream isn’t whipping! What gives?” Is your cream super cold? Is your bowl and beaters super clean and grease-free? These are usually the culprits. Try chilling everything for 15 minutes, even the bowl!
- “Can I freeze this cheesecake?” Yes, you can! Wrap it tightly (once fully chilled and set) in plastic wrap, then foil, and freeze for up to 1 month. Thaw in the fridge overnight before serving. The texture might be slightly different, but still delish.
Final Thoughts
See? I told you it was easy! You just whipped up (pun intended) a gorgeous, delicious no-bake cheesecake without even breaking a sweat. You’re practically a culinary genius now, IMO. This dessert is perfect for literally any occasion – a weeknight treat, a fancy dinner party, or just because you deserve something amazing. So go ahead, impress someone – or just yourself – with your new incredible skills. You’ve earned it!

