So, you’ve got that undeniable, soul-deep craving for cheesecake, but the thought of baking an actual cake, dealing with water baths, and waiting for hours just makes you want to curl up and cry into a tub of ice cream? Same, friend, same. What if I told you there’s a way to get all that creamy, dreamy cheesecake goodness without the drama? Enter the humble, yet utterly glorious, Cheesecake Truffle with Chocolate Coating. It’s like a tiny, personal party in your mouth, and it requires zero oven time. You’re welcome.
Why This Recipe is Awesome
Because it’s basically magic, that’s why. This recipe is your new best friend for when you want to look like a culinary genius but actually put in minimal effort. It’s no-bake (hallelujah!), pretty much impossible to mess up (unless you forget how to count, maybe), and the end result is something so decadent, people will *beg* you for the recipe. Plus, who doesn’t love a bite-sized anything? Portion control, darling, portion control… or not. Your secret.
Ingredients You’ll Need
Gather ’round, pantry explorers! Here’s your hit list for these delightful little spheres of joy. Nothing too fancy, promise.
- 1 (8-ounce) block cream cheese: Make sure it’s full-fat and softened. Don’t even THINK about low-fat. We’re here for a good time, not a diet.
- 1/2 cup powdered sugar: Also known as confectioners’ sugar. The stuff that makes everything smooth and sweet.
- 1 teaspoon vanilla extract: The soul of dessert, IMO. Don’t skimp on the good stuff!
- 1 1/2 cups graham cracker crumbs: About 10-12 full sheets, crushed. You can buy them pre-crushed if you’re feeling lazy (no judgment here!). Oreos or Nilla Wafers work too, if you’re feeling rebellious.
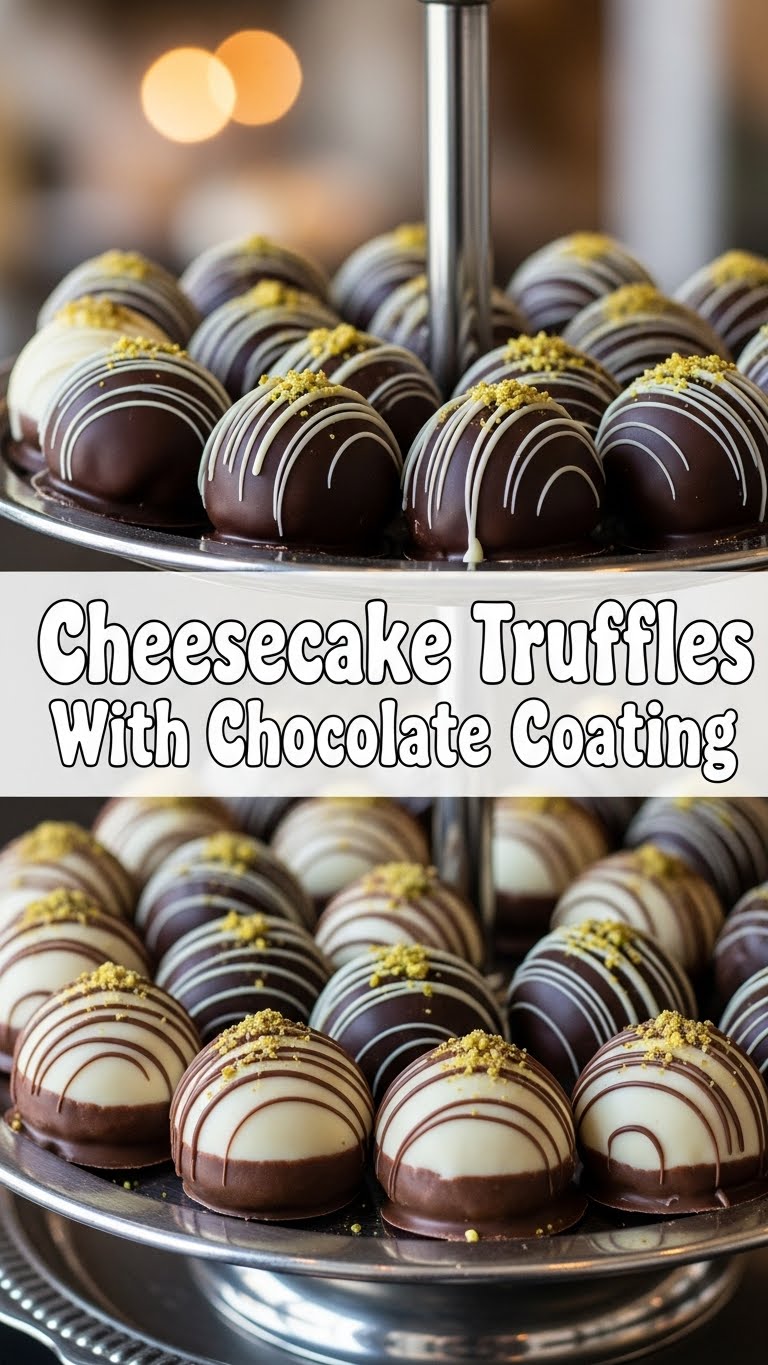
- 1 (12-ounce) bag chocolate chips: Semi-sweet, milk, dark – pick your poison! This is for the glorious coating.
- 1 tablespoon coconut oil or shortening: Just a little bit to make your chocolate coating smooth and shiny, like a perfect little tuxedo for your truffles. Trust me on this.
- Optional toppings: Sprinkles, more graham cracker crumbs, chopped nuts, a drizzle of white chocolate – go wild!
Step-by-Step Instructions
Alright, let’s get down to business. These steps are so simple, you could probably do them in your sleep. But please don’t, that sounds messy.
- Cream it up: In a medium bowl, beat the softened cream cheese, powdered sugar, and vanilla extract together until it’s smooth and lump-free. Use an electric mixer if you have one; your arm will thank you.
- Bring in the crumbs: Add the graham cracker crumbs to the cream cheese mixture. Mix until just combined. You want it to be a bit firm and moldable, not crumbly.
- Roll ’em out: Grab small portions of the mixture (about 1 tablespoon each) and roll them into neat little balls. Place them on a parchment-lined baking sheet.
- Chill out: Pop that baking sheet into the fridge for at least 30 minutes, or even an hour. Don’t skip this step! Cold truffles are happy truffles, and they coat much better.
- Melt the magic: While your truffles are chilling, melt your chocolate chips and coconut oil (or shortening) in a microwave-safe bowl. Heat in 30-second intervals, stirring well after each, until smooth and glossy. Alternatively, use a double boiler for a more controlled melt.
- Dip ’em good: Take your chilled truffles and, one by one, drop them into the melted chocolate. Use a fork or a dipping tool to fully coat, then tap off any excess chocolate.
- Garnish and set: Place the coated truffles back on the parchment-lined baking sheet. If you’re adding sprinkles or other toppings, do it now before the chocolate sets.
- Final chill: Return the truffles to the fridge for another 15-20 minutes, or until the chocolate is completely set. Then, dig in!
Common Mistakes to Avoid
Nobody’s perfect, and kitchen mishaps happen. But let’s try to dodge these common pitfalls with a little foresight and a lot of humor.
- Warm cream cheese + warm everything else = disaster: Make sure your cream cheese is softened, but not warm or melty. The mix needs to be firm enough to roll. If it’s too soft, add a tiny bit more powdered sugar or chill the mixture briefly before rolling.
- Skipping the chill: I said it once, I’ll say it again: chill your truffles! Trying to dip warm, soft truffles into melted chocolate is a recipe for a gooey, frustrating mess. You’ve been warned.
- Overheating chocolate: Zapping chocolate in the microwave for too long is a surefire way to get seized, clumpy chocolate that’s unusable. Go slow, stir often. Patience, young padawan.
- Being shy with the chocolate coating: Don’t just drizzle! Fully submerge those beauties. We want a nice, even shell for maximum deliciousness and structural integrity.
Alternatives & Substitutions
Feeling creative? Want to use what you’ve got? Here are some ideas to make these truffles uniquely *you*.
- Cookie Power: Not a graham cracker fan? No problem! Use crushed Oreos (for a chocolate cheesecake truffle!), Nilla Wafers, shortbread cookies, or even gingersnaps for a spiced twist.
- Chocolate Choice: While semi-sweet is classic, feel free to use milk chocolate for a sweeter profile, or dark chocolate for a richer, more intense flavor. White chocolate works too, but can be a bit trickier to melt.
- Flavor Boosters: Add a splash of almond extract, a tiny bit of lemon zest, or even a teaspoon of espresso powder to the cream cheese mixture for extra pizzazz.
- Topping Fun: Sprinkles are a given, but crushed nuts, shredded coconut, mini chocolate chips, or even a contrasting chocolate drizzle (like white chocolate on a dark chocolate coating) look amazing.
FAQ (Frequently Asked Questions)
Got questions? I’ve got answers! Mostly. Maybe with a side of sass.
- Can I make these ahead of time? Absolutely! They actually taste better the next day once all the flavors have had a chance to mingle. Store them in an airtight container in the fridge.
- How long do they last? In the fridge, they’re good for about a week. But honestly, they’ll probably be gone much, much faster.
- Can I freeze cheesecake truffles? You bet! Freeze them on a parchment-lined sheet until solid, then transfer to a freezer-safe bag or container for up to a month. Thaw in the fridge before serving.
- My chocolate seized! What now? Ugh, the worst. Unfortunately, seized chocolate is usually a goner. You can *sometimes* try adding a tiny bit of shortening or vegetable oil and stirring vigorously, but often it’s best to cut your losses and start with a fresh batch. Next time, go lower and slower with the heat!
- Can I use a different type of cookie for the base? Did you even read the “Alternatives & Substitutions” section, friend? 😉 Yes, absolutely! Oreos, Nilla Wafers, shortbread – go nuts!
- Do I need the coconut oil for the chocolate coating? It’s highly recommended! FYI, it helps thin out the chocolate just enough to make it super smooth for dipping and gives it a lovely shine. You can skip it, but your coating might be thicker and a bit duller.
Final Thoughts
And there you have it, folks! Your very own batch of ridiculously delicious, ridiculously easy cheesecake truffles. You’ve conquered the no-bake challenge and emerged victorious, probably with a few chocolate smudges on your nose – a sign of a job well done. Now go impress someone – or yourself – with your new culinary skills. You’ve earned it! Seriously, these things are addictive, so maybe make a double batch. Just sayin’.


