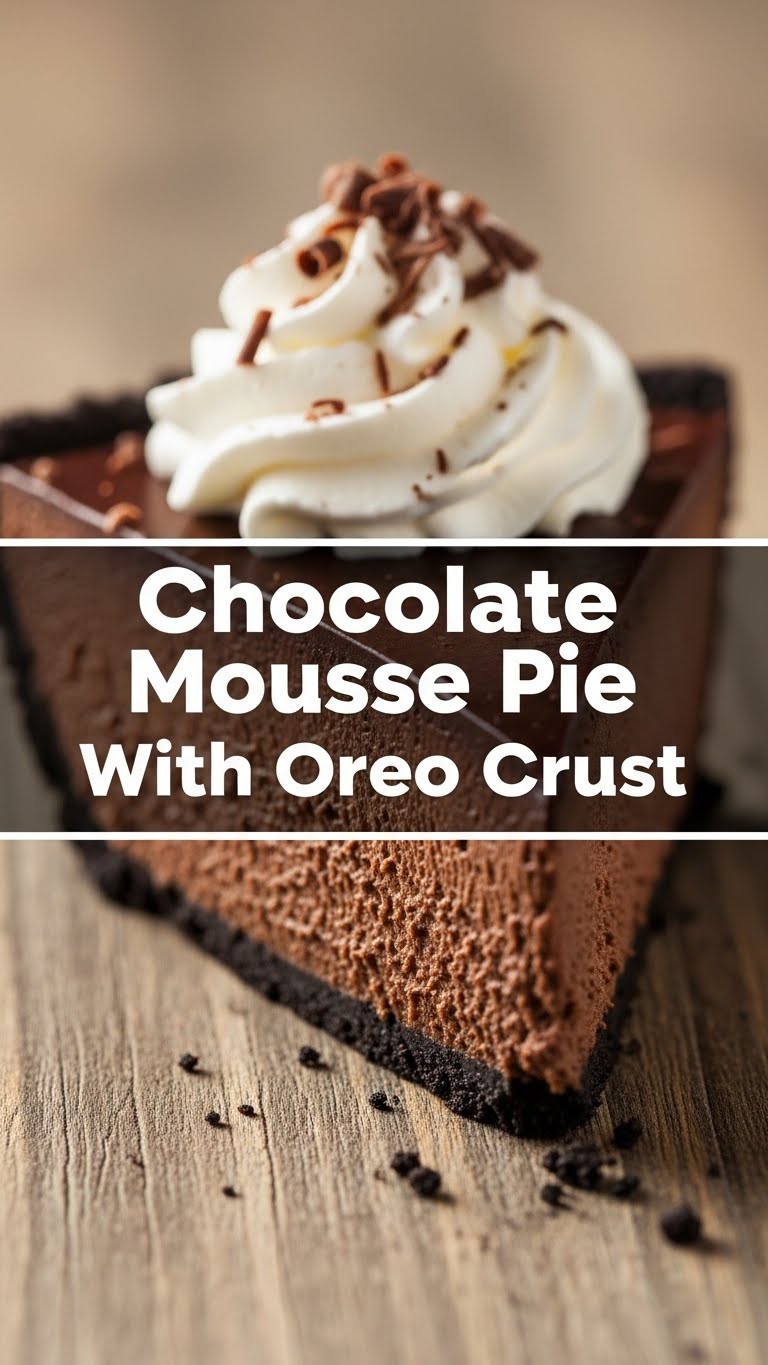
So you’re craving something rich, chocolatey, and utterly decadent, but the thought of spending hours in the kitchen makes you want to just order takeout? My friend, I get it. We’re about to make magic with minimal fuss: a Chocolate Mousse Pie with an Oreo Crust that’s so good, your future self will thank your current self. And maybe give you a high-five. This isn’t just a dessert; it’s a declaration of deliciousness that says, “I’m fancy, but also, I like things easy.”
Why This Recipe Is Awesome
Let’s be real, who has time for complicated baking projects anymore? Not us! This recipe is your new best friend for several glorious reasons:
- It’s like a warm hug in pie form, but cold. Confusing? Maybe. Delicious? Absolutely.
- No baking the filling! Hello, less stress and a cooler kitchen. We love a no-bake hero.
- It’s pretty much idiot-proof. Seriously, if I can do it after a long day, you can too.
- The Oreo crust? A literal game-changer. Why settle for plain when you can have *Oreo*?
- You’ll impress literally everyone, from your picky aunt to your “I only eat salad” friend. They won’t resist.
Ingredients You’ll Need
Gather your troops! Here’s what you’ll need to assemble this masterpiece. Keep it fun, people!
For the Crust:
- 25-30 Oreo cookies (that’s basically one standard package, ’cause why hold back?)
- 6 tablespoons unsalted butter, melted (the good stuff, no marg-a-rama, please)
For the Mousse Filling:
- 1.5 cups heavy cream, chilled (aka whipping cream, your arm workout for the day)
- 8 oz cream cheese, softened (let it chill out on the counter for a bit, get cozy)
- 1/2 cup granulated sugar (just enough sweetness, don’t go wild)
- 1 teaspoon vanilla extract (the secret sauce for everything delicious)
- 1.5 cups semi-sweet chocolate chips, melted and slightly cooled (don’t burn ’em, that’s sad)
- Pinch of salt (trust me, it brings out all the chocolatey goodness!)
Optional Garnish:
- Extra whipped cream, chocolate shavings, or more crushed Oreos (because more is always more).
Step-by-Step Instructions
Alright, apron on! Let’s get this deliciousness going. You got this!
- **Crust Time!** Grab your Oreos. Either throw them in a food processor until they’re fine crumbs or, for a good arm workout and stress relief, put them in a zip-top bag and smash the living daylights out of them with a rolling pin.
- Pour the melted butter over the crumbs and mix ’em up until they look like wet sand. Press this mixture firmly and evenly into a 9-inch pie plate. Use the bottom of a glass to get it nice and compact. Stick it in the fridge while you make the filling.
- **Mousse Magic!** In a medium, microwave-safe bowl, melt your chocolate chips. Do this in 30-second bursts in the microwave, stirring in between, or use a double boiler. **Let it cool slightly**—you don’t want it hot!
- In a large bowl, beat the softened cream cheese, sugar, and vanilla extract until it’s super smooth and creamy. No lumps allowed, okay? Nobody wants a lumpy mousse.
- Slowly drizzle in the slightly cooled melted chocolate, mixing until it’s fully combined and beautifully uniform. Add that pinch of salt here too; it really elevates the chocolate flavor.
- In a separate, **chilled bowl** (this is important, FY!!), whip the heavy cream until it forms stiff peaks. This is where the magic happens and your mousse gets light and airy.
- Gently fold about a third of the whipped cream into the chocolate mixture to lighten it up. Then, carefully fold in the rest of the whipped cream until just combined. **Don’t overmix**, or you’ll lose that lovely airy texture!
- Pour the luscious chocolate mousse into your chilled Oreo crust. Smooth the top with a spatula, making it look all professional and stuff.
- **Chill Out!** Cover the pie and refrigerate it for at least 4 hours, or even better, overnight. Patience, young padawan, it’s worth it.
- **Serve & Devour!** Before serving, dollop with extra whipped cream, sprinkle with chocolate shavings or more crushed Oreos. Slice, serve, and accept all the compliments!
Common Mistakes to Avoid
We’ve all been there, trust me. Learn from my past kitchen mishaps!
- **Not chilling your heavy cream:** Seriously, it’s a huge difference. Warm cream equals soupy sadness, not stiff peaks. Chill that bowl and whisk, too!
- **Overmixing the mousse:** Once the whipped cream is folded in, stop. You’ll deflate all that lovely air you just whipped into it.
- **Adding hot chocolate to the cream cheese:** Recipe for disaster (aka melted, grainy mess). Let that chocolate cool down, folks! It should be warm enough to be liquid, but not hot.
- **Not chilling the pie long enough:** Impatience is your enemy here. It needs time to set properly. Nobody wants a runny pie, right?
- **Using old, expired cream cheese:** Does anyone do this? Don’t. Just don’t. Your taste buds will thank you.
Alternatives & Substitutions
Feeling rebellious? Here are some ways to shake things up, or just make do with what you have.
- **Crust:** Graham cracker crust works if you’re not an Oreo fanatic (but, like, who are you?). Digestive biscuits also make a great base.
- **Chocolate:** Dark chocolate for a richer, more intense flavor. White chocolate if you’re feeling adventurous (though it might get super sweet, so adjust sugar). **My personal take? Semi-sweet is the sweet spot.**
- **Cream cheese:** Reduced-fat cream cheese *can* work, but it won’t be as rich or set as firmly. Go full-fat for the best results, IMO.
- **Dairy-free?** Use plant-based heavy cream (coconut cream works well if chilled overnight in the fridge and you only scoop out the thick part) and dairy-free chocolate chips. Just make sure your cream cheese substitute sets well.
FAQ (Frequently Asked Questions)
Got questions? I’ve got answers! (Mostly.)
- **Can I make this pie ahead of time?** Absolutely! It actually tastes better the next day, once all those flavors have a chance to mingle. Up to 2-3 days covered in the fridge is perfect.
- **Why is my mousse not setting?** Oh, the horror! Did you chill your cream? Did you whip it to stiff peaks? Was your melted chocolate too hot? These are the usual culprits. Re-read step 6 and 7, my friend!
- **Do I *have* to use a food processor for the crust?** Nope! A Ziploc bag and a rolling pin (or a hammer, if you’re feeling feisty) work just fine. Great stress relief!
- **Can I use a different type of cookie for the crust?** Of course! Nilla Wafers, shortbread, even chocolate chip cookies. But let’s be real, Oreos are king here.
- **My pie looks… lumpy. What happened?** Usually, this means your cream cheese wasn’t soft enough, or you added your chocolate while it was still too hot. Smooth, softened cream cheese is key!
- **How long does it last?** Covered in the fridge, it’s generally good for 3-4 days. But let’s be honest, it probably won’t last that long!
Final Thoughts
See? Wasn’t that way easier than you thought? You just whipped up a show-stopping dessert that tastes like you spent all day slaving over it (your secret’s safe with me). Now go impress someone—or yourself—with your new culinary skills. You’ve earned every single glorious, chocolatey bite. Enjoy, you magnificent baker, you!


