So you’re craving something tasty but too lazy to spend forever in the kitchen, huh? Same. High five! We’ve all been there, staring into the fridge, wishing a gourmet dessert would magically appear. Well, today, my friend, we’re making that magic happen. And guess what? It involves very little actual “cooking” and a whole lot of deliciousness.
Why This Recipe is Awesome
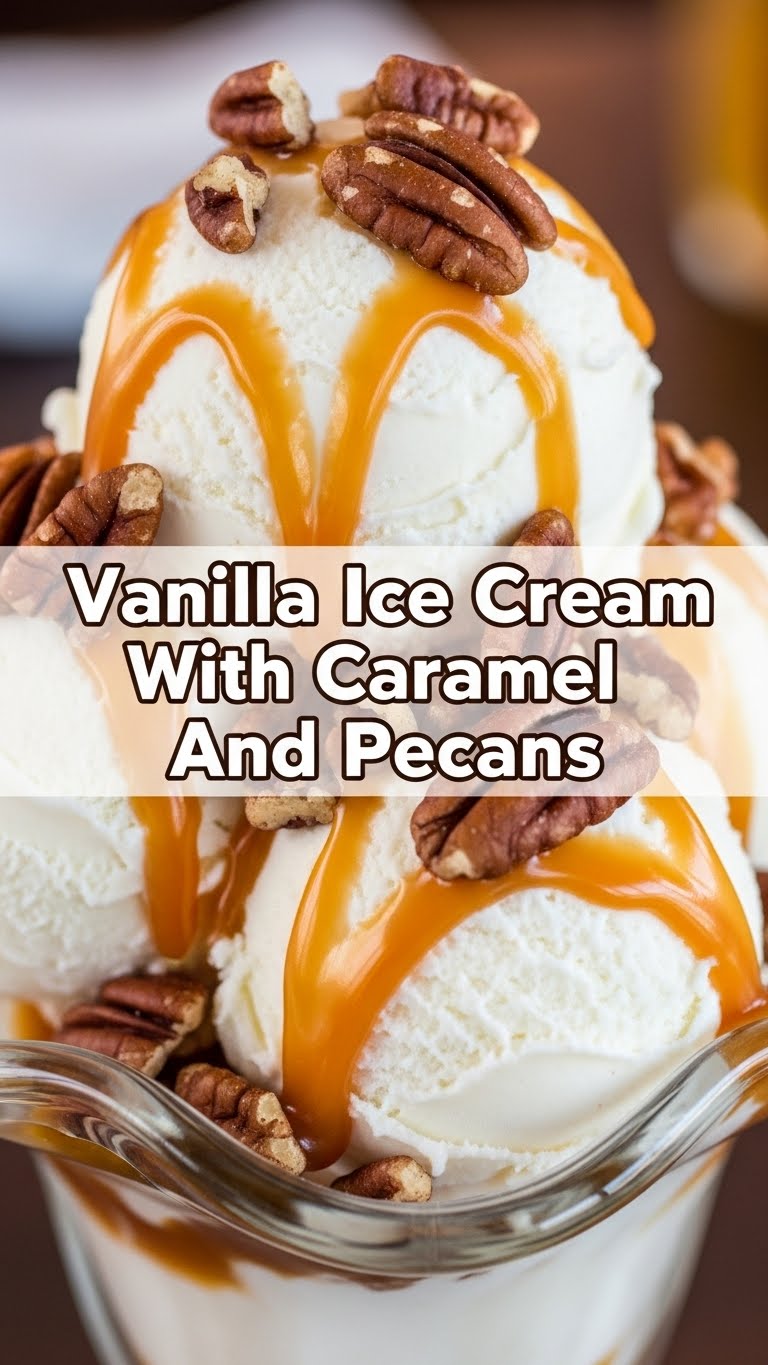
Let’s be real, homemade ice cream sounds fancy, intimidating even. But this isn’t your grandma’s churn-for-an-hour-then-wait-some-more kind of recipe. Oh no. This is the **no-churn, no-fuss, seriously-so-easy-you’ll-wonder-if-it’s-legal** kind of ice cream. We’re talking creamy, dreamy vanilla ice cream, swirled with luscious caramel, and studded with crunchy pecans. It’s the perfect trifecta of sweet, smooth, and crunchy.
Think about it:
- No special equipment needed (unless you count a hand mixer a “special equipment,” which, let’s be honest, it’s a kitchen staple).
- It tastes ridiculously good. Like, “I can’t believe I made this” good.
- It’s idiot-proof. Seriously, if I can do it without setting off the smoke detector, you’re golden.
- It’s got that fancy vibe without any of the fancy work. You’re basically a culinary wizard.
This recipe isn’t just awesome; it’s a **game-changer** for your dessert cravings. You’re welcome.
Ingredients You’ll Need
Gather ’round, my sweet-toothed companions! Here’s your shopping list. Keep it simple, keep it real.
- 2 cups (480ml) heavy cream: This is where the magic happens. Don’t even THINK about light cream. We’re making ice cream, not regrets.
- 1 (14-ounce/396g) can sweetened condensed milk: Your shortcut to sweetness and creaminess. Our secret weapon for no-churn goodness.
- 1 tablespoon pure vanilla extract: Go for good quality here. It’s “vanilla” ice cream, after all. Don’t cheap out; your taste buds deserve better.
- 1/4 teaspoon salt: Just a tiny pinch! It balances the sweetness and makes everything pop. Trust me on this.
- 1/2 cup caramel sauce: Store-bought is totally fine, IMO. Or make your own if you’re feeling ambitious (but remember, we’re not taking life too seriously today).
- 1/2 cup pecans, roughly chopped: For that delightful crunch. Toasted or raw, your call.
Step-by-Step Instructions
Alright, let’s get down to business. These steps are so easy, they practically make themselves. (Okay, maybe not, but close!)
- Chill Out: Pop your mixing bowl and whisk attachment (or beater blades) into the freezer for about 10-15 minutes. **A cold bowl makes for happy whipped cream!** This is a pro tip, people.
- Whip It Good: Pour your heavy cream into the chilled bowl. Using an electric mixer, beat the cream on medium-high speed until it forms stiff peaks. You want it fluffy and holding its shape, but not grainy (that’s over-whipped, and nobody wants butter ice cream).
- Sweeten the Deal: Gently fold in the sweetened condensed milk, vanilla extract, and that tiny pinch of salt. **Be gentle!** We don’t want to deflate all that lovely air you just whipped into the cream. Fold until just combined.
- Layer Up: Grab a loaf pan (or any freezer-safe container). Pour about half of your vanilla cream mixture into the bottom. Drizzle some caramel sauce over it, then sprinkle some chopped pecans.
- Repeat and Swirl: Add the remaining cream mixture, then drizzle generously with the rest of the caramel. Take a knife or a skewer and gently swirl the caramel through the ice cream. Sprinkle with the remaining pecans.
- Freeze for Glory: Cover the pan tightly with plastic wrap or a lid. Pop it into the freezer for at least 6 hours, or preferably overnight. Patience is a virtue, especially when ice cream is involved.
- Scoop and Devour: Once it’s firm, scoop yourself a generous serving (or five). Bask in the glory of your homemade masterpiece. You’ve earned this!
Common Mistakes to Avoid
Even though this recipe is pretty foolproof, there are a few little gotchas that can trip up even the best of us. Don’t say I didn’t warn you!
- Over-whipping the cream: We’re making ice cream, not butter. If your cream looks clumpy or grainy, you’ve gone too far. Start over, champ. It happens.
- Not chilling your equipment: Skipping step 1 is a rookie mistake. A cold bowl and whisk dramatically improve your whipping success rate. **Seriously, don’t skip this.**
- Being impatient with freezing: Pulling it out after two hours is like trying to eat a melted milkshake. Delicious, but not what we’re going for. Give it the time it needs to firm up.
- Using low-fat substitutes: “Can I use half-and-half?” “Can I use skim milk?” NO. Just no. The fat in the heavy cream is what gives us that creamy, non-icy texture without an ice cream maker. Don’t hurt your soul (or your ice cream) like that.
- Adding hot caramel: If your caramel is piping hot, it’s going to melt your beautiful whipped cream. Let it cool a bit. Warm is fine, scorching is not.
Alternatives & Substitutions
Feeling a little wild? Want to make it your own? I respect that! Here are a few ideas to shake things up:
- Nutty Swaps: Not a pecan fan? Swap them for walnuts, almonds, or even candied peanuts for a different crunch. Or heck, skip the nuts if you’re feeling rebellious.
- Caramel Cousins: Instead of caramel, try a rich chocolate fudge sauce, a sweet butterscotch, or even a berry compote for a fruity twist (though that kinda changes the whole caramel pecan vibe, but hey, you do you!).
- Extra Mix-ins: Go wild! Add mini chocolate chips, crushed pretzels (for that salty-sweet kick, yum!), chopped cookie pieces, or even mini marshmallows. The world is your oyster… or rather, your ice cream.
- Flavor Frenzy: Swap out half the vanilla extract for a bit of almond extract for a different aroma, or a dash of espresso powder for a coffee-caramel delight.
FAQ (Frequently Asked Questions)
Got questions? I’ve got answers. And probably a few bad jokes.
- Do I really not need an ice cream maker?
Nope! That’s the beauty of this no-churn magic. Your freezer does all the hard work. See? I told you it was easy!
- Can I use light cream or half-and-half instead of heavy cream?
Well, technically yes, but why hurt your soul like that? You’ll end up with an icy, disappointing mess. **Heavy cream is your non-negotiable best friend here.** Trust me, it’s worth it.
- How long does this homemade ice cream last in the freezer?
If you manage to not eat it all in one sitting (impressive!), it’ll last for about 1-2 weeks in an airtight container. After that, it might start getting a bit icy. But honestly, it rarely lasts that long.
- My caramel sauce is too thick to drizzle. What do I do?
Just pop it in the microwave for 10-20 seconds, or gently warm it in a saucepan on low heat until it’s more pourable. Just make sure it’s not hot when you add it to the cream mixture!
- Can I skip the pecans?
You *can*, but why would you want to miss out on that glorious crunch and nutty flavor? The pecans really complete the experience. But hey, if you’re allergic or just not feeling the nuts, your ice cream, your rules!
- Why is my ice cream icy instead of creamy?
Usually, this means not enough fat (did you use light cream?! I warned you!) or it wasn’t covered properly during freezing. Make sure your container is sealed tight to prevent ice crystals from forming.
- Can I make this ahead of time for a party?
Absolutely! That’s one of the best things about it. Make it the day before, pop it in the freezer, and pull it out when you’re ready to impress. You’ll look like a culinary genius with minimal effort. Win-win!
Final Thoughts
So there you have it, folks! A ridiculously easy, unbelievably delicious recipe for Vanilla Ice Cream with Caramel and Pecans. It’s the kind of dessert that makes you feel accomplished without actually breaking a sweat. Now go forth and make glorious ice cream!
Seriously, go whip up a batch. You’ll thank me later. Your taste buds (and possibly your couch) are waiting. Now go impress someone—or yourself—with your new culinary skills. You’ve earned it!


