So, you’re craving something ridiculously tasty but the thought of spending hours slaving away in the kitchen makes you want to curl up with a tub of store-bought ice cream and call it a day, huh? Same, friend, same. But what if I told you there’s a way to have your cake AND eat it too, with minimal fuss and maximum deliciousness? Enter: the homemade Ice Cream Cake with Chocolate Chips. It’s like a party in your mouth, but one you actually *want* to be at.
Why This Recipe is Awesome
Because let’s be real, who doesn’t love ice cream? And who doesn’t love cake? This recipe takes the best of both worlds and smashes them together into one glorious, no-bake (mostly!) dessert that will make you feel like a culinary wizard, even if your usual go-to is microwave popcorn. It’s seriously idiot-proof; I didn’t even mess it up, and that’s saying something. Plus, it’s super customizable, looks impressive, and requires zero actual baking, which means less time cleaning up flour explosions and more time enjoying your masterpiece.
Ingredients You’ll Need
Gather your troops, folks! Here’s what you’ll need to make this magic happen:
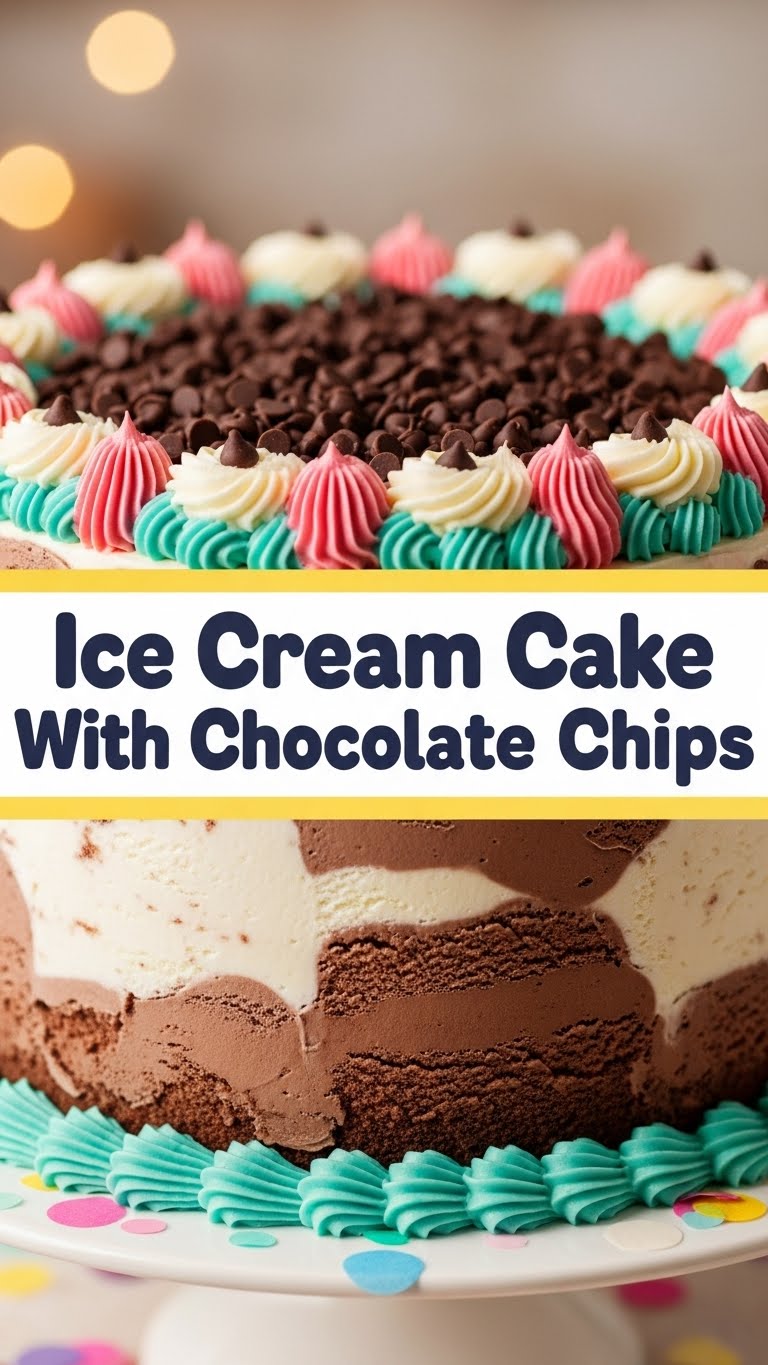
- 1 ½ packs (about 30 cookies) Chocolate Sandwich Cookies: Like Oreos. Don’t skimp. These are the foundation of your future happiness.
- 6 tablespoons Unsalted Butter: Melted. This is the glue that holds our bad decisions (and delicious crust) together.
- 1.5 quarts (about 6 cups) Chocolate Chip Ice Cream: Or vanilla, or cookies and cream, or whatever floats your boat. If it’s plain vanilla, grab extra chocolate chips.
- ½ cup Hot Fudge Topping: Or chocolate syrup. Warm it slightly for easy drizzling.
- 1 tub (8 oz) Whipped Topping: Like Cool Whip, thawed. Or, if you’re feeling fancy, make your own fresh whipped cream.
- ½ cup Mini Chocolate Chips: For sprinkling, because you can never have too many chocolate chips.
Step-by-Step Instructions
Get ready for the easiest “baking” adventure of your life. Follow these steps, and you’ll be an ice cream cake pro in no time!
- Crush the Cookies: Take those chocolate sandwich cookies and crush them into fine crumbs. You can use a food processor for speed (my preferred method) or put them in a zip-top bag and unleash your inner Hulk with a rolling pin.
- Make the Crust: In a medium bowl, mix the crushed cookie crumbs with the melted butter until well combined. Press this mixture firmly into the bottom of a 9-inch springform pan. Use the back of a spoon or your clean hands. Pro Tip: Line your pan with parchment paper first! It makes getting the cake out a breeze. Pop it into the freezer for at least 15-20 minutes to set.
- Soften the Ice Cream: While the crust chills, take your ice cream out of the freezer and let it sit on the counter for about 10-15 minutes to soften slightly. It should be spreadable, not melty.
- Layer the Ice Cream: Spread the softened ice cream evenly over the chilled cookie crust. Smooth it out with an offset spatula or the back of a spoon. Freeze for at least 1-2 hours, or until firm.
- Add the Toppings: Once your ice cream layer is firm, drizzle the warm hot fudge over it. Then, spread the thawed whipped topping evenly over the fudge layer.
- Sprinkle the Joy: Generously sprinkle those mini chocolate chips (and any other sprinkles you have lying around) over the whipped topping.
- Final Freeze: Cover the cake loosely with plastic wrap and freeze for at least 4 hours, or preferably overnight, until completely firm. This is crucial for clean slices!
- Serve and Devour: When ready to serve, remove the cake from the freezer about 10-15 minutes beforehand to allow for easier slicing. Release the springform pan and slice away! Prepare for applause.
Common Mistakes to Avoid
Even though this recipe is pretty foolproof, there are a few rookie errors that can happen. Learn from my past blunders, my friend!
- Impatience is NOT a Virtue Here: Not freezing each layer long enough is a big one. You’ll end up with a messy, sad puddle instead of a beautiful layered cake. Seriously, let it chill.
- Over-softening the Ice Cream: You want it spreadable, not liquid. If it’s too soft, it won’t hold its shape, and you’ll have a hard time getting a nice, even layer.
- Forgetting to Line the Pan: Unless you enjoy chiseling your masterpiece out of the pan and ruining its beautiful edges, use parchment paper on the bottom and maybe even strips up the sides of your springform pan. Trust me on this.
- Skimping on the Freeze Time: “Just 2 hours, it’ll be fine!” No, it probably won’t. Give it a good, solid 4+ hours, or better yet, make it the day before. A well-frozen cake is a happy cake.
Alternatives & Substitutions
Feeling adventurous? This recipe is your canvas! Here are a few ideas to switch things up:
- Crust Swaps: Not an Oreo fan? You can use graham cracker crumbs, Biscoff cookies, or even crushed pretzels for a salty-sweet twist!
- Ice Cream Extravaganza: Use ANY flavor of ice cream you like! Swirl two different flavors together for a marbled effect. Coffee ice cream with chocolate chips? Yes, please. Mint chip? Oh, you fancy, huh?
- Topping Transformation: Instead of hot fudge, try caramel sauce, strawberry topping, or even a layer of peanut butter sauce. Add chopped nuts, sprinkles, candy bar pieces, or fresh berries for extra flair. IMO, a little sprinkle of sea salt flakes on the hot fudge layer is next-level.
- Whipped Cream Upgrade: While Cool Whip is convenient, homemade whipped cream with a touch of vanilla extract and powdered sugar is *chef’s kiss*.
FAQ (Frequently Asked Questions)
Got questions? I’ve got (casual) answers!
- Can I use regular chocolate bars instead of chips? Absolutely! Just chop them up into smaller pieces. Might even give it a fancier, gourmet vibe.
- How long does this ice cream cake last in the freezer? Covered tightly with plastic wrap and then foil, it should be good for about 1-2 weeks. But honestly, who can resist it that long?
- Do I *really* need a springform pan? While a springform pan makes life incredibly easy, you can use a regular 9-inch cake pan if you line it completely with plastic wrap, leaving an overhang on the sides to lift the cake out. It’s a bit trickier, but totally doable.
- Can I make this ahead of time for a party? Oh heck yes! This cake thrives on being made ahead. In fact, it needs the chill time to really set up perfectly, making it the ultimate stress-free party dessert.
- What if my ice cream is too hard to spread? Just let it sit out on the counter for another 5-10 minutes. Patience, padawan. It’ll get there.
- Can I add liquor to this for an adult version? For sure! A little Kahlua brushed on the crust or mixed into the ice cream (sparingly!) could be a fun twist. Just remember, alcohol lowers the freezing point, so it might be a tad softer.
- Is it really this easy, or are you just saying that? I swear on my favorite spatula, it really is that easy! You’ll be surprised at how simple yet impressive it is. FYR, you got this.
Final Thoughts
And there you have it! A show-stopping, crowd-pleasing, utterly delicious Ice Cream Cake with Chocolate Chips that required minimal effort and maximum satisfaction. You just made something amazing, and frankly, you deserve a medal (or at least a huge slice of this cake). Now go impress your friends, your family, or just your couch with your newfound culinary skills. You’ve earned it!


