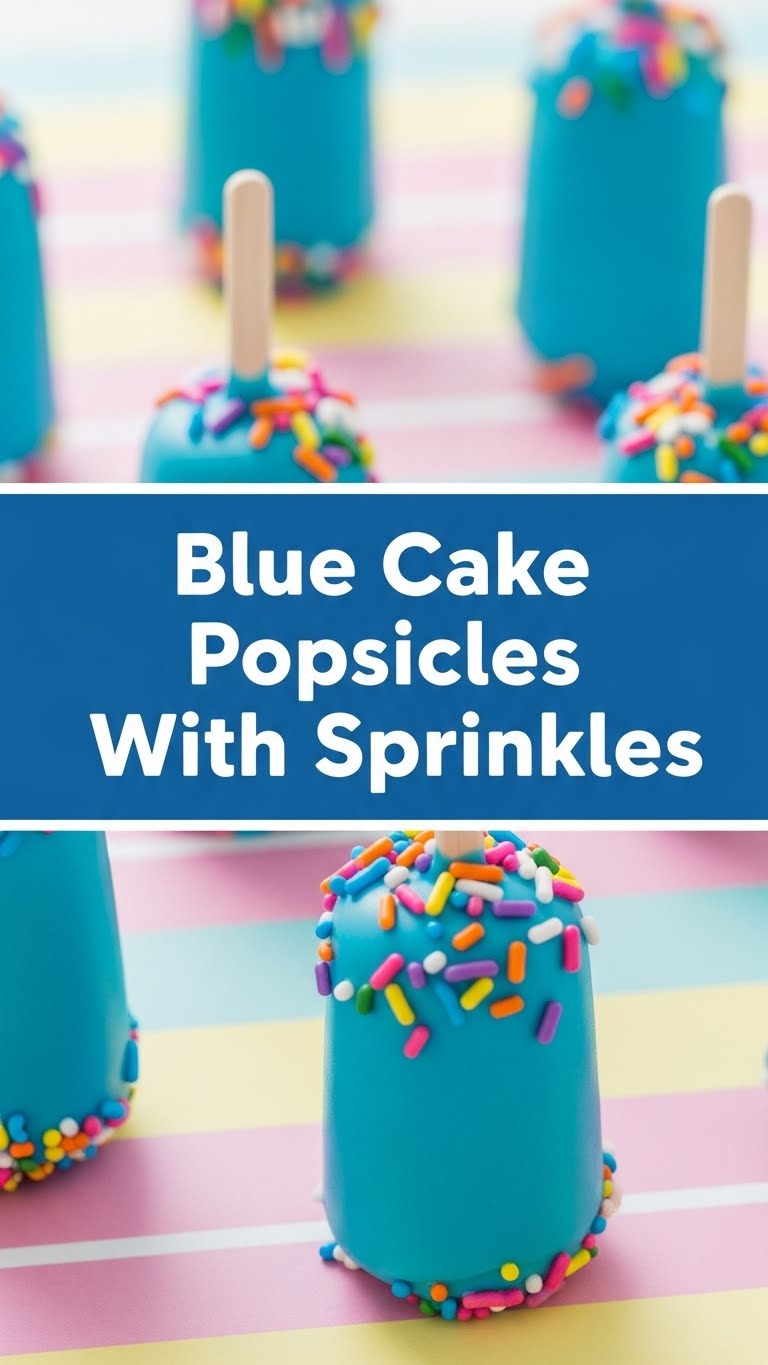
So, you’re craving something ridiculously fun, visually stunning, and just a tiny bit whimsical? And maybe, just maybe, you’re not in the mood for a culinary marathon? Honey, I feel you. We’re about to make Blue Cake Popsicles with Sprinkles, and trust me, your inner child (and your actual adult self who just wants something pretty and delicious) is going to do a happy dance.
Why This Recipe is Awesome
Because it’s basically the culinary equivalent of a glitter bomb, but edible and cold! Seriously though, this recipe is a triple threat: it’s surprisingly easy, incredibly customizable, and guaranteed to make anyone smile. Think of it as a cake pop that grew up and decided to get a job as a popsicle. It’s also pretty much **idiot-proof** – if I can do it without setting off the smoke alarm, you totally got this. Plus, blue food with sprinkles? Instant mood lifter. Science, probably.
Ingredients You’ll Need
- 1 pre-made vanilla cake or a basic boxed vanilla cake mix: Don’t bake, just buy one. Life’s too short for unnecessary baking when you just want a popsicle. If you’re feeling ambitious, bake one, but let it cool completely!
- 1 can (16 oz) vanilla frosting: The good ol’ pre-made stuff. We’re not judging here.
- Blue food gel coloring: Gel is key, people! It’s vibrant and won’t thin out your frosting like liquid coloring does.
- Rainbow sprinkles: Because if you’re going blue, you might as well go all out. Jimmie sprinkles work great!
- Popsicle molds: Any shape works, but the classic ones are, well, classic.
- Popsicle sticks: You know, for holding. Unless you like really cold, sticky fingers. Your call.
Step-by-Step Instructions
- First things first, if you baked a cake, make sure it’s **completely cooled**. No warm cake crumbs, please. If you bought one, skip ahead, you genius. Crumble the entire cake into a large bowl. You want fine crumbs, so get in there with your hands and break it all up.
- Next, open that can of vanilla frosting. Scoop about half to two-thirds of it into the bowl with your cake crumbs. You’ll add more if needed. Add a good few drops of your blue food gel.
- Now, get your hands dirty (or use a sturdy spoon, but hands are more fun!). Mix the cake crumbs, frosting, and blue gel until it’s all uniformly blue and has the consistency of play-doh. It should be moldable but not sticky. If it’s too dry, add a bit more frosting; too wet, add a few more crumbs (if you have them, otherwise, just embrace the squish).
- Once your blue cake mixture is perfect, it’s time to fill those popsicle molds. Press the mixture firmly into each mold. **You want to pack it in there tightly** to avoid air pockets and crumbly popsicles.
- Insert your popsicle sticks. Make sure they’re straight and well-anchored in the middle of the cake mixture.
- This is the fun part: sprinkles! Gently roll or press the filled molds (or just the tops) into a plate of rainbow sprinkles. You can also sprinkle them directly onto the surface before freezing. Get generous!
- Pop those beauties into the freezer. Let them chill out (literally) for at least 4-6 hours, or even better, overnight. Patience is a virtue, especially when deliciousness is involved.
- When they’re rock solid, gently remove them from the molds. A quick dip of the mold in warm water for a few seconds can help them slide out easily.
Common Mistakes to Avoid
- Not cooling your cake: This is a big one. Warm cake + frosting = greasy, sad mush. Give it time, champ.
- Not packing the molds tightly: If you’re too gentle, your popsicles will fall apart when you try to eat them. Be firm!
- Using liquid food coloring: It thins out your mix, making it harder to mold and potentially leading to a less vibrant blue. Go gel or go home (kidding, but seriously, gel is better).
- Impatience: Pulling them out of the freezer too soon. They need to be frozen solid to hold their shape. Don’t rush perfection.
Alternatives & Substitutions
Feeling adventurous, or just don’t have exactly what I listed? No worries, we’re flexible!
- Cake flavor: Yellow cake, chocolate cake, Funfetti cake – literally any plain-ish cake will work. Imagine chocolate cake with blue frosting and sprinkles? Oh my!
- Frosting flavor: Cream cheese, chocolate, strawberry… whatever floats your boat! Just remember the blue food gel might clash a bit with certain colors, but who cares if it tastes good?
- Coloring: If blue isn’t your jam, pick your favorite! Pink, green, purple… make it a rainbow if you want.
- Sprinkle variations: Edible glitter, different shaped sprinkles, nonpareils, even mini chocolate chips for some texture. Let your imagination run wild!
- No popsicle molds? You can roll the mixture into balls, stick them on lollipop sticks, and freeze them as traditional cake pops. You just won’t get the popsicle shape, but they’ll still be delicious!
FAQ (Frequently Asked Questions)
- Can I use homemade cake and frosting? Absolutely! If you’re feeling extra fancy and have the time, go for it. Just ensure the cake is completely cooled before crumbling.
- My mixture is too sticky, what do I do? Uh oh! You probably added too much frosting. If you have extra cake crumbs, add a few more. If not, try chilling the mixture in the fridge for 20-30 minutes; it might firm up a bit.
- How long do these last in the freezer? If stored in an airtight container, they can last up to 2-3 weeks. But honestly, will they even make it past day two? Doubtful.
- Can I make these without sprinkles? Well, you *can*, but why would you want to hurt their feelings like that? Sprinkles are the soul of these popsicles! But yes, functionally, they’ll still work.
- What if I don’t have popsicle sticks? You can use sturdy skewers (cut them down if too long), or even just freeze them in small silicone molds and eat them straight out of the mold.
Final Thoughts
There you have it, folks! Your very own batch of ridiculously fun, gorgeous, and delicious Blue Cake Popsicles with Sprinkles. These aren’t just a treat; they’re a statement. A statement that says, “I know how to have fun, and I also know how to make amazing desserts without breaking a sweat.” Now go forth and impress someone—or better yet, yourself—with your new culinary superpowers. You’ve earned it!
