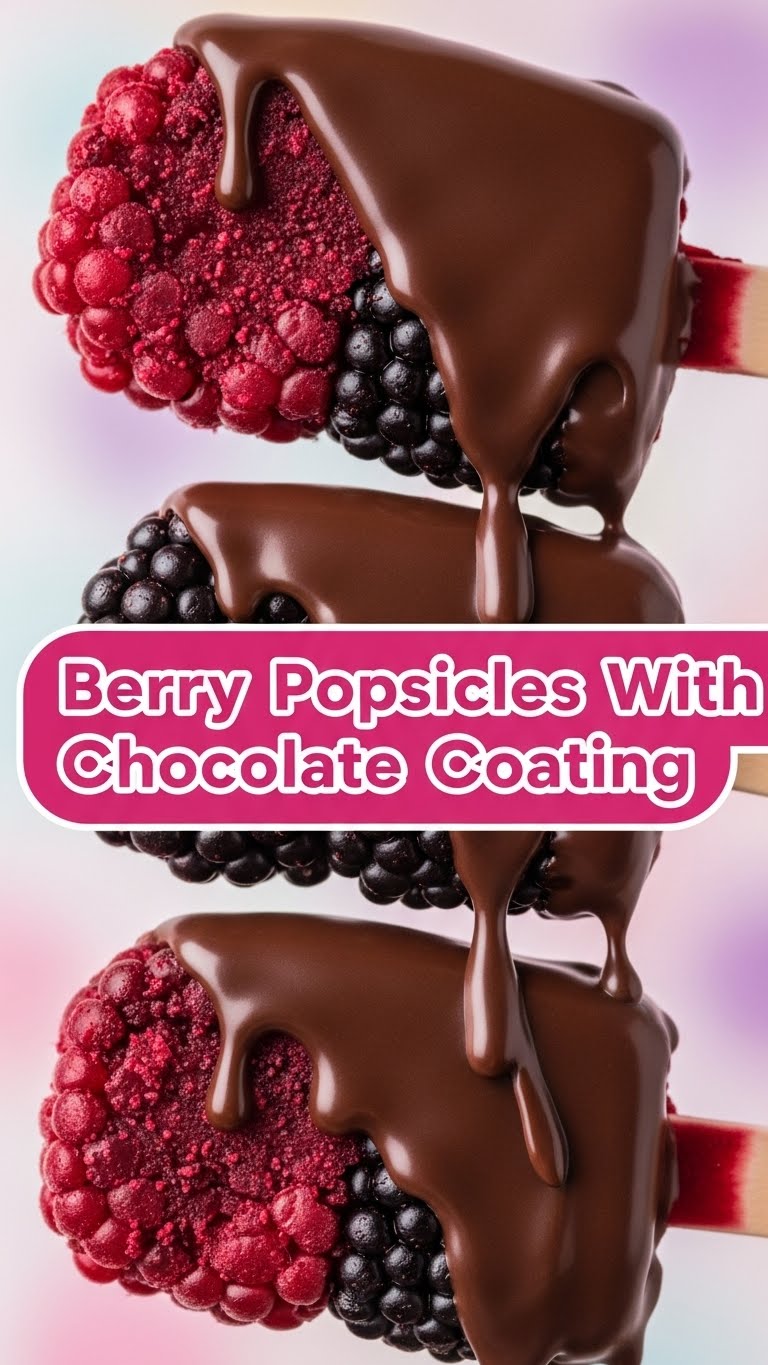
Ever found yourself staring into the abyss of your fridge, wishing for something cool, sweet, and ridiculously easy to make? Same, friend. Especially when the sun decides to turn up the heat like it owes us a tan. Good news: I’ve got your back with these Berry Popsicles. They’re basically a hug in frozen form, with a fancy chocolate jacket, and honestly, they’re so simple you’ll wonder why you ever bought those store-bought ones. Seriously, let’s get you chilling out.
Why This Recipe is Awesome
Okay, let’s be real. In the grand scheme of kitchen conquests, this recipe is less “epic battle with a soufflé” and more “chilling on the couch with a good book.” It’s **super simple**, uses minimal ingredients you probably already have, and tastes like a little slice of summer heaven. Plus, that chocolate shell? It makes you look like a gourmet wizard without even trying. Seriously, it’s pretty much idiot-proof; even I didn’t mess it up, and that’s saying something.
It’s also totally customizable, guilt-free (mostly), and the perfect antidote to a hot day or a sudden craving for something sweet but not *too* decadent. What’s not to love?
Ingredients You’ll Need
Gather your little posse of deliciousness. Here’s what we’re rounding up:
- Mixed Berries: About 2 cups. Fresh or frozen, your call! Think strawberries, raspberries, blueberries – the more the merrier. Frozen berries actually make a thicker base, which is a bonus.
- Sweetener of Choice: 2-4 tablespoons. Honey, maple syrup, agave, or even a little sugar. Adjust to your sweet tooth’s desire. Just a kiss of sweetness, not an entire passionate embrace.
- Lemon Juice: 1 tablespoon. Freshly squeezed, please! This little guy brightens up all those berry flavors and keeps things from being too cloyingly sweet. It’s the zing to wake things up.
- Water: 1/4 – 1/2 cup. Use just enough to help your blender do its job without making it too watery. We want pops, not berry soup.
- Dark Chocolate: 1 cup, chopped or chips. Go for a good quality one, because, well, you’re worth it. This is for that fancy AF coating.
- Coconut Oil: 1-2 tablespoons. **This is key!** It makes your chocolate super smooth and ensures it hardens quickly into that satisfying “snap” coating. Don’t skip it unless you want sad, lumpy chocolate.
Step-by-Step Instructions
Alright, apron on (optional, but makes you feel official), let’s get this party started!
- Blend Your Berry Magic: Toss your mixed berries, sweetener, lemon juice, and the smaller amount of water (1/4 cup) into a blender. Blend until super smooth. If it’s too thick to blend easily, add a tiny bit more water, one tablespoon at a time, until it’s pourable but still luscious.
- Taste and Adjust: Give your berry purée a quick taste. Does it need more sweetness? More lemon zing? Adjust now before it’s too late! Remember, flavors mellow slightly when frozen.
- Fill ‘Em Up: Carefully pour the berry mixture into your popsicle molds. Don’t fill them all the way to the brim, leave a little room for expansion. Insert your popsicle sticks.
- Freeze Fest: Pop those filled molds into the freezer. Let them chill out (literally!) for at least 4-6 hours, or ideally, overnight. You want them **rock hard** before the next step. Patience is a virtue, especially when popsicles are involved.
- Melt the Good Stuff: Once your popsicles are fully frozen, it’s time for the chocolate fun. In a microwave-safe bowl or a double boiler, combine your chopped dark chocolate and coconut oil. Heat in 30-second intervals (microwave) or over simmering water, stirring until completely smooth and glorious.
- Dip Dip Hooray!: Take out your *firmly frozen* popsicles. Working quickly, gently dip each popsicle into the melted chocolate, letting any excess drip off. The cold popsicle will make the chocolate harden almost instantly.
- Final Freeze: Lay your chocolate-coated popsicles on a parchment-lined tray or plate and pop them back into the freezer for a final 10-15 minutes to fully set the chocolate. This prevents any melty mishaps later.
Common Mistakes to Avoid
Nobody’s perfect, but we can definitely sidestep some common blunders that might ruin your popsicle dreams. Trust me, I’ve made them all so you don’t have to!
- Not Blending Enough: Rookie mistake! Chunky bits in your pops are fine if you like them, but if you’re aiming for smooth, blend, blend, blend until it’s silkier than a cat on a satin pillow.
- Overfilling Molds: They expand, people! Leave a little headspace or you’ll have an icy disaster in your freezer. You’ve been warned.
- Impatience is NOT a Virtue Here: Trying to dip partially frozen popsicles? Don’t even think about it. The chocolate will just slide off, and you’ll be left with a sad, naked pop and chocolate soup. **Freeze them completely solid!**
- Skipping the Coconut Oil: Unless you want a thick, gloppy, hard-to-dip chocolate that cracks off, don’t skip the coconut oil. It’s the secret sauce for a smooth, thin, snappy coating.
- Wet Popsicles: Make sure your popsicles are as dry as possible before dipping. Any moisture will make the chocolate seize up or not stick properly.
Alternatives & Substitutions
Feel free to get creative! This recipe is a fantastic canvas for your culinary whims.
- Fruit Power: Not feeling berries? No problem! Swap them for mango, peaches, kiwi, pineapple, or even a mix of tropical fruits. Mango pops with a lime kick are **IMO**, next-level.
- Sweetener Swaps: Agave, stevia, or just plain old granulated sugar work just fine instead of honey or maple syrup. Adjust the quantity based on sweetness level.
- Chocolate Choices: Milk chocolate? White chocolate? Go for it! Or, if you’re not a chocoholic (gasp!), you can totally skip the coating. The berry pops are delicious all on their own.
- Creamy Dreamy: For a creamier popsicle, add a splash of coconut milk, yogurt, or even a little heavy cream to your berry mixture before blending. Talk about luxurious!
FAQ (Frequently Asked Questions)
Got questions? I’ve got answers. Probably. Let’s see…
Can I use any kind of berries?
Absolutely! Mix and match to your heart’s content. Strawberries, raspberries, blueberries, blackberries – they all play nice together. Frozen ones are often cheaper and just as good here, FYI.
Do I *have* to use a sweetener?
Well, technically no. If your berries are super ripe and sweet, you might not need much, or any! But for most, a little bit helps bring out their best flavor. Taste test before freezing!
How long do these beauties last in the freezer?
If stored properly in an airtight container, they can last up to 2-3 weeks. But honestly, who are we kidding? They rarely make it past a few days in my house.
What if I don’t have popsicle molds?
No molds? No problem! Small paper cups (like Dixie cups) with wooden craft sticks work wonderfully. Just make sure to freeze them until firm enough to insert the sticks without them toppling over.
My chocolate is too thick for dipping! Help!
Ah, a common predicament! Just add another half-teaspoon or full teaspoon of coconut oil to your melted chocolate and stir well. It should loosen up perfectly for that silky dip.
Can I skip the lemon juice?
You can, but I wouldn’t recommend it. The lemon juice isn’t just for tartness; it really brightens and enhances the natural sweetness of the berries. It’s like a secret weapon for flavor!
Can kids help make these?
OMG, yes! Blending (with supervision!), pouring, and especially the dipping part are super fun for little hands. Just be prepared for a bit of a mess… and maybe a few berries “disappearing” during prep. It’s all part of the fun!
Final Thoughts
See? I told you it was easy! Now you’ve got a batch of seriously delicious, homemade berry popsicles with a snazzy chocolate coating. You’ve basically just leveled up your snack game and earned yourself some major bragging rights. Go ahead, take a bow. Or better yet, grab one of those pops and enjoy the fruits (literally!) of your labor.
Now go impress someone—or yourself—with your new culinary skills. You’ve earned it!
