So, you’ve scrolled past one too many “easy weeknight dinners” and thought, “But what about *dessert*?” I hear you. And I raise you… FRIED ICE CREAM. Yeah, you read that right. We’re about to dive into a recipe that sounds ridiculously fancy but is, in reality, so simple it’s almost insulting. We’re talking maximum “wow” factor for minimal effort. Get ready to impress everyone (including yourself) with this absolute gem!
Why This Recipe is Awesome
Let’s be real, who doesn’t love a good party trick, especially one you can eat? This fried ice cream recipe with vanilla wafers is basically a magic show for your mouth. It’s got that delightful hot-and-cold contrast, a satisfying crunch, and a creamy center that will make you question all your life choices before this moment. Plus, it’s pretty much **idiot-proof**. Seriously, if I didn’t mess it up, you’re golden. You’ll look like a gourmet chef who just returned from a culinary boot camp, but your secret is safe with me (and everyone who reads this, I guess). The best part? No weird ingredients, no hours of slaving away. Just pure, unadulterated dessert bliss.
Ingredients You’ll Need
- **Good Quality Vanilla Ice Cream (about 4-6 scoops):** This is the star of the show, so don’t skimp! The better the ice cream, the happier your taste buds will be.
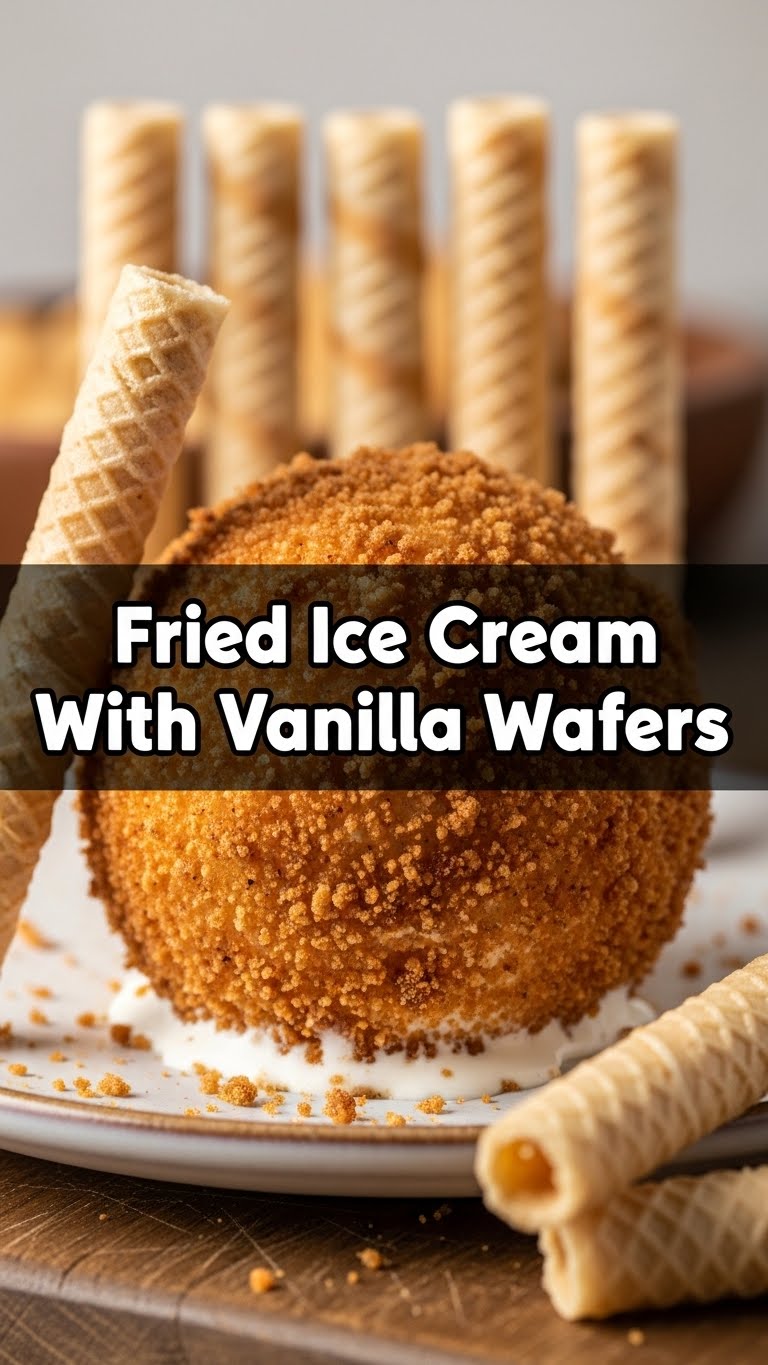
- **1.5 cups Vanilla Wafers:** Our crispy, crunchy hero. Grab a box, you’ll need ’em for the coating. (The generic ones are totally fine, BTW.)
- **2 tablespoons Unsalted Butter (melted):** Because everything’s better with butter, *amirite*? This helps bind the coating.
- **2-3 cups Neutral Oil for Frying:** Think canola, vegetable, or peanut oil. We’re not deep-frying a whole turkey, but enough to get those ice cream balls nice and golden.
- **Optional Toppings:** Whipped cream, chocolate syrup, caramel sauce, a sprinkle of cinnamon… live a little!
Step-by-Step Instructions
- **Scoop ’em Good:** Get your absolute hardest, coldest ice cream from the freezer. Scoop 4-6 balls (about the size of a tennis ball) and place them on a parchment-lined baking sheet. **The colder and firmer the ice cream, the better!** Pop them back into the freezer for at least 4 hours, or ideally, overnight.
- **Crush Those Wafers:** While your ice cream is chilling, put your vanilla wafers into a zip-top bag. Get out any pent-up aggression and crush them into fine crumbs. You can use a rolling pin, the bottom of a heavy glass, or even a food processor if you’re feeling fancy.
- **Butter Up:** Pour your melted butter into a shallow bowl. In another shallow bowl, spread out your crushed vanilla wafers.
- **Coat and Freeze Again:** Take your super-frozen ice cream balls out of the freezer. One by one, quickly roll each ball in the melted butter, ensuring it’s fully coated. Then, immediately roll it in the crushed vanilla wafers, pressing gently to make sure the crumbs stick. Place the coated balls back on the parchment-lined tray.
- **Final Freeze:** This is crucial! Put the coated ice cream balls back into the freezer for at least another 2-3 hours. **This double freeze is your secret weapon against a melty disaster.**
- **Heat the Oil:** When you’re ready to fry, pour your oil into a heavy-bottomed pot or Dutch oven. You’ll need about 2-3 inches of oil. Heat it over medium-high heat until it reaches **375°F (190°C)**. If you don’t have a thermometer, drop a tiny crumb of wafer in; if it sizzles vigorously, it’s ready.
- **Fry Time (Quickly!):** Carefully lower 1-2 ice cream balls into the hot oil using a slotted spoon. Fry them for only **15-20 seconds** until the coating is golden brown. We’re going for a quick crisp, not a full meltdown.
- **Serve Immediately:** Remove the fried ice cream with your slotted spoon, letting any excess oil drip off. Place on a plate, add your favorite toppings, and serve right away!
Common Mistakes to Avoid
- **Not Freezing Enough:** This is the #1 culprit for a sad, soupy mess. Seriously, don’t rush the freezing steps. **Overnight is your best friend.**
- **Overcrowding the Pot:** Frying too many ice cream balls at once will drop the oil temperature, leading to greasy, soggy, and melted results. Fry in batches!
- **Oil Not Hot Enough (or Too Hot):** Too cool, and your ice cream melts before the coating crisps. Too hot, and the coating burns before you even get a chance to say “Yum.” Invest in a thermometer, or at least test with a crumb.
- **Not Crushing Wafers Finely:** Large chunks won’t stick well and will give you an uneven, less appealing coating. Aim for fine crumbs.
- **Forgetting the Butter:** The melted butter layer is essential for the wafer crumbs to adhere properly. Don’t skip it!
Alternatives & Substitutions
Feeling adventurous? This recipe is super flexible!
- **Cookie Swap:** Instead of vanilla wafers, try crushed Oreos (the classic!), Graham crackers, corn flakes, or even crushed pretzels for a salty-sweet kick. **Oreo fried ice cream is next-level, just FYI.**
- **Ice Cream Flavors:** While vanilla is the traditional choice, feel free to experiment. Chocolate, strawberry, coffee, or even mint chocolate chip could be surprisingly delicious. Just make sure it’s a firm, scoopable ice cream.
- **Sauce It Up:** Beyond chocolate and caramel, consider a berry compote, a drizzle of honey, or even a dollop of Nutella for an extra layer of decadence.
- **Less Frying Fear?** If deep-frying gives you the jitters, you can try pan-frying in about an inch of oil. It’s a bit trickier to get an even golden crust all around, but totally doable if you’re careful.
FAQ (Frequently Asked Questions)
**Can I use any old ice cream?**
Well, technically yes, but why hurt your soul like that? A good quality ice cream holds its shape better and tastes infinitely better. Splurge a little, you deserve it!
**What if I don’t have a deep fryer?**
No problem! A heavy-bottomed pot or Dutch oven works perfectly. Just be careful with the hot oil and don’t overfill it.
**How long do I *really* need to freeze the ice cream?**
Seriously, **overnight is truly best for the initial freeze**. After coating, another 2-3 hours ensures rock-solid success. Don’t test the ice cream gods on this one.
**Can I make these ahead of time?**
Absolutely! You can prepare the coated ice cream balls and keep them in an airtight container in the freezer for up to a week. Just fry them when you’re ready to serve. This is a pro move for entertaining!
**My ice cream keeps melting in the oil, what gives?**
Usually, it’s one of two things: your ice cream wasn’t frozen solid enough, or your oil wasn’t hot enough. Make sure both are on point before you start frying.
**Is it actually “fried” all the way through?**
Nope! Only the exterior gets a super quick dunk in hot oil, forming that crispy shell. The inside stays gloriously cold and creamy. That’s the magic!
Final Thoughts
And there you have it, my friend! You’ve just unlocked a new level of dessert mastery. This fried ice cream with vanilla wafers is simple enough for a Tuesday night treat but impressive enough for a dinner party. Go forth and conquer your dessert cravings! Now go impress someone—or yourself—with your new culinary skills. You’ve earned it!


