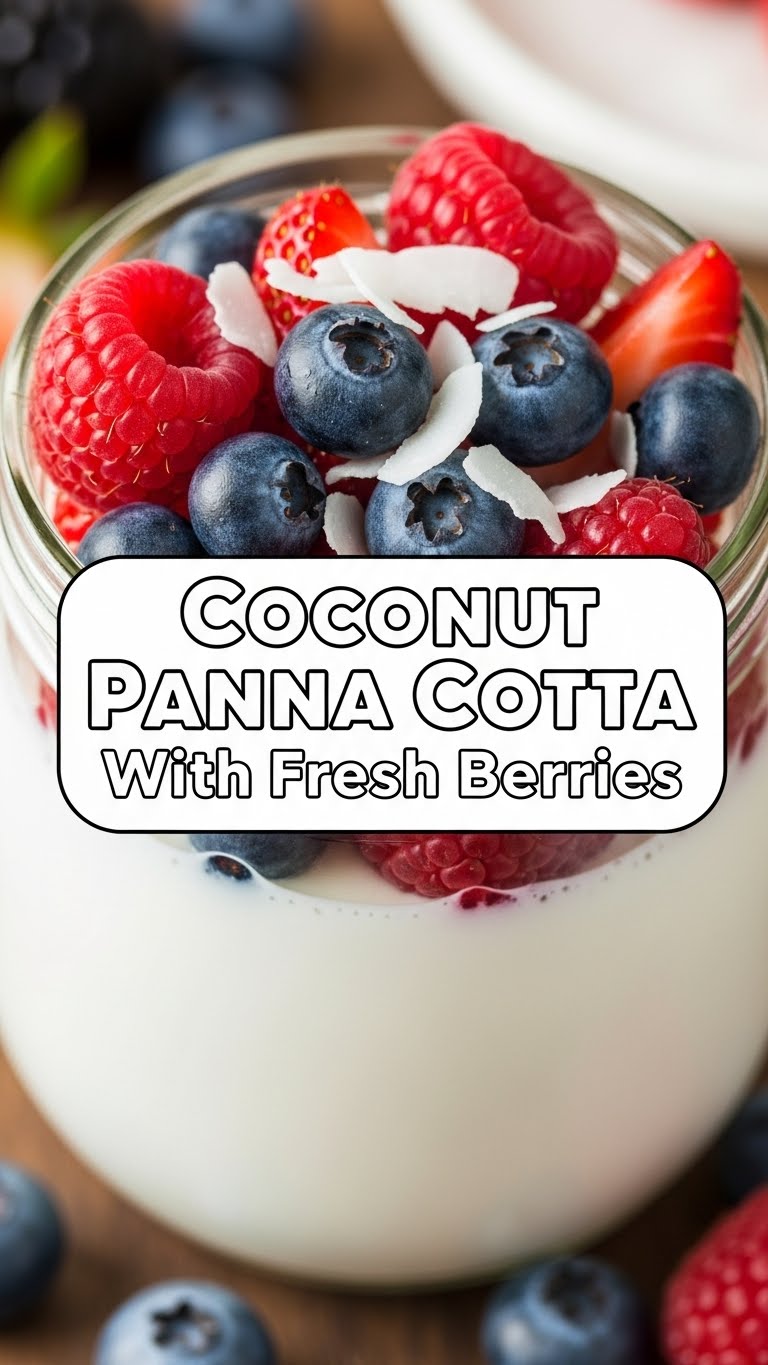
So, you’ve scrolled through enough food porn on Instagram and now you’re craving something ridiculously delicious, but the thought of spending hours in the kitchen makes you want to just order pizza? Been there, done that, bought the T-shirt. But what if I told you there’s a dessert that screams “fancy” but is actually laughably easy to make? Enter your new best friend: Coconut Panna Cotta with Fresh Berries. Get ready to impress everyone (including yourself) with minimal effort. You’re welcome.
Why This Recipe is Awesome
Okay, let’s be real. We all want to look like culinary geniuses without actually having to go to culinary school. This panna cotta? It’s basically a magic trick. It’s so simple, even I couldn’t mess it up (and trust me, my kitchen has seen some things). You barely need to cook anything, there’s no oven involved, and it chills in the fridge like a boss. Plus, it’s dairy-free thanks to our tropical friend, the coconut, making it a crowd-pleaser for almost everyone. It’s light, refreshing, and tastes like a mini-vacation in a ramekin. What’s not to love?
Ingredients You’ll Need
Gather ’round, my fellow lazy gourmands! Here’s your shopping list. Don’t worry, it’s short and sweet.
- Full-Fat Coconut Milk (2 cans, 13.5 oz/400ml each): Go full-fat or go home! This is where all that creamy goodness comes from. Don’t skimp, trust me.
- Granulated Sugar (1/3 cup): Just enough sweetness to make you happy, not enough to send you into a sugar coma.
- Unflavored Gelatin (2 packets, 0.25 oz/7g each): The real MVP here, turning liquid magic into wobbly, spoonable perfection. Don’t fear the gelatin!
- Cold Water (1/4 cup): For blooming that gelatin. Sounds fancy, but it just means letting it soak a bit.
- Vanilla Extract (1 teaspoon): A hug in a bottle for all desserts.
- Pinch of Salt: To balance everything out and make the flavors sing. Like a tiny, subtle pop star.
- Fresh Mixed Berries (1-2 cups): Strawberries, blueberries, raspberries, blackberries – pick your faves! Or all of them, because why not?
- Optional Garnish: A sprig of mint, maybe a few toasted coconut flakes if you’re feeling extra fancy.
Step-by-Step Instructions
Alright, apron on (or don’t, I won’t judge), let’s get this party started!
- First things first: Grab a small bowl and sprinkle those gelatin packets over the cold water. Give it a gentle stir and let it sit for about 5-10 minutes. This is called “blooming” and it makes sure your panna cotta isn’t chunky later. Don’t skip this step!
- While your gelatin is doing its thing, pour both cans of coconut milk into a medium saucepan. Add the granulated sugar and that tiny pinch of salt.
- Heat the mixture over medium-low heat, stirring occasionally, until the sugar has fully dissolved. You don’t want it to boil, just get warm enough to melt the sugar. Think of it as giving the sugar a nice warm bath.
- Take the saucepan off the heat. Now, add your bloomed gelatin mixture to the warm coconut milk. Stir it continuously until the gelatin has completely dissolved. There should be no grainy bits left, just smooth sailing.
- Stir in the vanilla extract. Give it a good whisk to make sure everything is perfectly combined and smelling heavenly.
- Carefully pour the mixture into individual ramekins, small glasses, or whatever cute little serving dishes you have. This recipe usually makes 4-6 servings, depending on size.
- Pop those beauties into the fridge and let them chill for at least 4 hours, or even better, overnight. Patience is a virtue, especially when dessert is involved.
- When you’re ready to serve, top your perfectly wobbly panna cotta with a generous handful of fresh mixed berries. Add mint or toasted coconut if you’re feeling extra. Devour immediately!
Common Mistakes to Avoid
Nobody’s perfect, but we can avoid some face-palm moments, right? Here are a few pitfalls to dodge:
- Skimping on full-fat coconut milk: Trying to be “healthy” with light coconut milk will result in a sad, watery panna cotta. Don’t do it. Your taste buds will thank you.
- Not blooming the gelatin: Just dumping gelatin straight into hot liquid is a recipe for lumpy disaster. That blooming step is non-negotiable, people!
- Boiling the coconut milk: Gently warming is key. Boiling can affect the texture and sometimes even separate the coconut milk. We want smooth, not chunky, remember?
- Impatience with chilling: Pulling it out of the fridge too early will give you a puddle, not a panna cotta. Give it the time it needs to firm up. Seriously, it’s worth the wait.
- Overlooking the salt: That tiny pinch isn’t just for show. It really helps to deepen the flavors and cut through the sweetness. Don’t skip it!
Alternatives & Substitutions
Feeling adventurous or missing an ingredient? No stress, we can totally hack this!
- Gelatin alternative: If you’re vegetarian/vegan, you can try using agar-agar powder instead of gelatin. Just make sure to follow the package instructions, as the ratio might be different. Agar-agar usually needs to boil to activate, so adjust your steps accordingly.
- Sweetener swap: If granulated sugar isn’t your jam, you can use maple syrup or agave nectar. You might need to adjust the amount slightly to taste, and remember liquid sweeteners can affect the final texture a tiny bit.
- Flavor variations: Instead of just vanilla, try adding a splash of rum extract for a piña colada vibe, or a teaspoon of almond extract. You could even infuse the coconut milk with a few lime zest strips or a cinnamon stick while it warms (just remember to strain them out!).
- Berry swap: No fresh berries? No problem! A quick berry compote (just simmer frozen berries with a little sugar) works wonderfully. Or go tropical with mango cubes or passion fruit pulp.
FAQ (Frequently Asked Questions)
Got questions? I’ve got (casual) answers!
- Can I make this ahead of time? Oh my gosh, yes! That’s the beauty of it. Make it a day or two in advance and keep it covered in the fridge. Perfect for dinner parties, BTW.
- How do I get it out of the ramekin? If you want to unmold it, briefly dip the bottom of the ramekin in hot water for about 10-15 seconds, then run a thin knife around the edge. Place a plate on top and invert. Sometimes it pops right out, sometimes it needs a little encouragement.
- My panna cotta didn’t set, what went wrong? Most likely, your gelatin wasn’t fully dissolved or wasn’t bloomed properly. Or, you didn’t let it chill long enough. Did you use light coconut milk? Rookie mistake!
- Can I use sugar substitutes? Technically yes, but taste and texture might vary. If you’re going for it, I’d recommend testing a small batch first.
- What if I don’t have ramekins? Any small, heat-proof glasses, mugs, or even silicone muffin molds will work! Presentation might be different, but it’ll taste just as good.
Final Thoughts
See? I told you it was easy! You just whipped up a dessert that looks like it took hours of painstaking effort but was actually a breeze. Now go on, bask in the glory. Share it with friends, impress a date, or honestly, just hoard it all for yourself (no judgment here, I totally would). You’ve earned it! Now go forth and conquer your dessert cravings. You’re basically a professional chef now, IMO.

