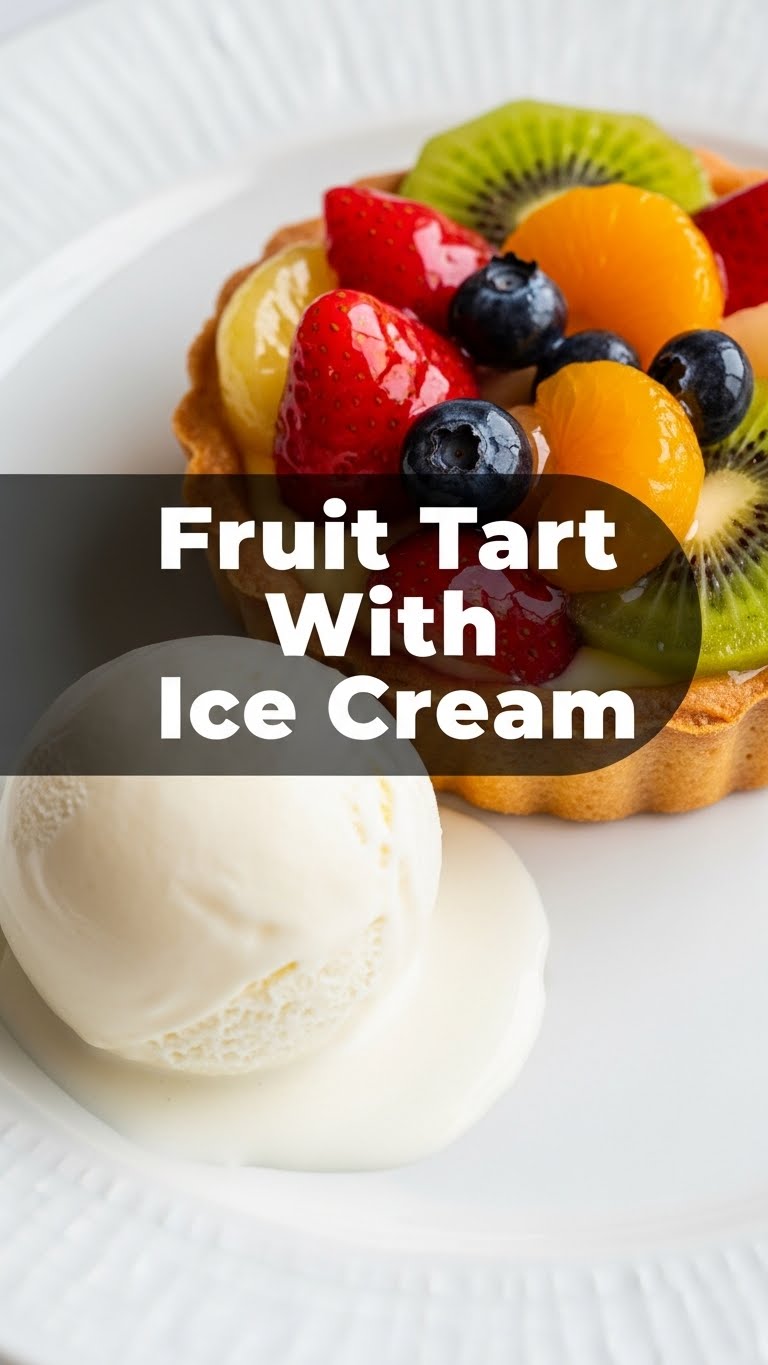
So you’re craving something fancy but also kinda just want to chill on the couch in your PJs? Been there, done that, bought the t-shirt. But what if I told you we could whip up a dessert that looks like it came from a fancy French patisserie but is actually… ridiculously easy? Enter: The Fruit Tart. With ice cream. Because why not go all out?
Why This Recipe is Awesome
Okay, first off, it’s gorgeous. Like, ‘insta-worthy’ gorgeous without you breaking a sweat. Secondly, it’s delicious. Seriously, the combo of crisp crust, fresh fruit, creamy custard, and melty ice cream? *Chef’s kiss*. Thirdly, and perhaps most importantly, it’s practically idiot-proof. No lie, if I, a person who once set off a smoke detector by making toast, can nail this, so can you. It’s fast, fresh, and makes you look like a culinary genius. Win-win-win.
Ingredients You’ll Need
- For the Crust (aka the “It’s Not Store-Bought, I Swear!” base):
- 1 pre-made pie crust (or shortbread tart shell): Yeah, we’re going for convenience. Don’t judge. Life’s too short for making pastry from scratch on a Tuesday.
- 2 tbsp melted butter: Because butter makes everything better. Fact.
- 1 tbsp granulated sugar: Just a touch of sweetness to make our lives complete.
- For the Custard (the “Oh-My-Gawd-Is-That-From-Scratch?!” filling):
- 1 cup whole milk: Or 2%, if you’re feeling rebellious.
- 1/4 cup granulated sugar: Sweet tooth, assemble!
- 2 large egg yolks: Give them yolks some purpose!
- 2 tbsp cornstarch: Our secret weapon for thick, creamy goodness.
- 1 tsp vanilla extract: The MVP of all sweet things.
- Pinch of salt: Balances everything out, trust me.
- For the Topping (the “Look How Fancy I Am” part):
- 1-2 cups mixed fresh fruit: Think berries (strawberries, blueberries, raspberries!), kiwi, peaches, mandarins. Whatever makes your heart sing (and looks pretty).
- 2 scoops vanilla ice cream (per serving): Or any flavor, really. Live your best life.
- Optional: 1 tbsp apricot jam (melted): For that shiny, professional glaze. Because we’re fancy like that.
Step-by-Step Instructions
- Prep the Crust: Unroll your pre-made pie crust (or unwrap your tart shell). Press it gently into a 9-inch tart pan (the one with the removable bottom, super handy!). Prick the bottom all over with a fork – this stops it from puffing up like a balloon. Mix the melted butter and sugar, then brush it all over the inside of the crust.
- Bake the Crust: Pop that bad boy into a preheated oven at 375°F (190°C) for about 10-12 minutes, or until it’s a beautiful golden brown. Let it cool completely on a wire rack. Patience, young grasshopper.
- Whip up the Custard: In a medium saucepan, whisk together the milk, sugar, egg yolks, cornstarch, vanilla, and salt. Whisk, whisk, whisk!
- Cook the Custard: Place the saucepan over medium heat. Keep whisking constantly (don’t you dare stop!) until the mixture thickens and starts to bubble. This takes about 5-7 minutes. It’ll go from watery to “ooh, that’s getting thick!” Remove it from the heat.
- Chill the Custard: Pour the custard into a bowl. Cover it directly with plastic wrap (this prevents a “skin” from forming – gross!). Stick it in the fridge for at least 1 hour, or until completely cool and firm. You can even do this a day ahead, FYI.
- Assemble the Tart: Once the crust is cool and the custard is chilled, spread the custard evenly into the baked tart shell. Now for the fun part: arrange your beautiful fresh fruit on top in whatever artistic pattern you desire.
- Glaze (Optional but Recommended): If you’re going for extra sparkle, melt a spoonful of apricot jam with a tiny splash of water in the microwave. Brush this over the fruit. Instant shine!
- Serve and Devour: Slice up your masterpiece. Serve each slice with a generous scoop (or two!) of ice cream. Seriously, don’t skip the ice cream. It’s the perfect creamy counterpoint.
Common Mistakes to Avoid
- Not Pricking the Crust: Rookie mistake! Your crust will puff up like a sad, deflated balloon if you don’t. Prick it. Seriously.
- Stopping Whisking the Custard: You’ll end up with scrambled eggs in milk, and nobody wants that. Whisk constantly! Your arm might ache, but it’s worth it.
- Not Chilling the Custard Enough: If it’s warm, it’ll be runny and mess up your beautiful tart. Give it time in the fridge. Good things come to those who wait (or chill).
- Overcrowding with Fruit: While we love fruit, don’t pile it so high it tumbles off. Artful arrangement is key, not fruit-pocalypse.
Alternatives & Substitutions
- Crust: Don’t have a pre-made one? Make a simple shortbread crust from scratch (flour, butter, sugar, pinch of salt). Or, if you’re really lazy (no judgment here!), crushed digestive biscuits mixed with melted butter works too for a no-bake crust.
- Custard: Feeling fancy? Infuse your milk with lemon zest or a vanilla bean pod while heating for an extra flavor kick. Can’t do eggs? Try a quick lemon curd or even just whipped cream cheese frosting for a different vibe.
- Fruit: Use whatever’s in season and looks good! Peaches and blueberries are amazing in summer, while pomegranate seeds and kiwi can brighten a winter tart. IMO, the more colorful, the better!
- Ice Cream: Vanilla is classic, but try strawberry, lemon sorbet, or even a fancy pistachio ice cream to really elevate it. Hot fudge, anyone? (Okay, maybe that’s too much, but you do you!)
FAQ
- Can I make this ahead of time? Absolutely! You can bake the crust and make the custard a day or two in advance. Store them separately in the fridge. Assemble just before serving for the freshest fruit.
- Do I have to use fresh fruit? For the best look and texture, yes, fresh is king. Frozen fruit tends to get watery when thawed and can make your tart soggy. Skip it for this one.
- What if my custard isn’t thickening? Are you whisking constantly? Is your heat high enough (medium, not low)? Sometimes it just needs a few more minutes. Don’t panic, just keep whisking!
- My tart crust broke when I took it out of the pan! Help! Deep breaths. It happens. You can try to “glue” it back together with a bit of extra melted butter, or just embrace its rustic charm. It’ll still taste amazing, trust me.
- Can I use margarine instead of butter for the crust? Well, technically yes, but why hurt your soul (and your taste buds) like that? Butter just tastes better. Period.
Final Thoughts
See? You totally crushed it! Who knew looking this impressive could be so darn easy? Now go impress someone—or yourself—with your new culinary skills. You’ve earned it! Seriously, pour yourself a glass of something delightful and enjoy the fruits (pun intended!) of your labor. Happy baking (or assembling, whatever!).


