Okay, let’s be real. You’ve got that chocolate craving hitting harder than a Monday morning alarm, but also, you’re not trying to spend your entire weekend playing master chef, right? Good, because I’ve got something for you that’s ridiculously decadent, surprisingly simple, and will make everyone think you secretly went to pastry school. Seriously, this isn’t just a cake; it’s a mood. And that mood is “I’m amazing and deserve chocolate *and* strawberries.”
Why This Recipe is Awesome
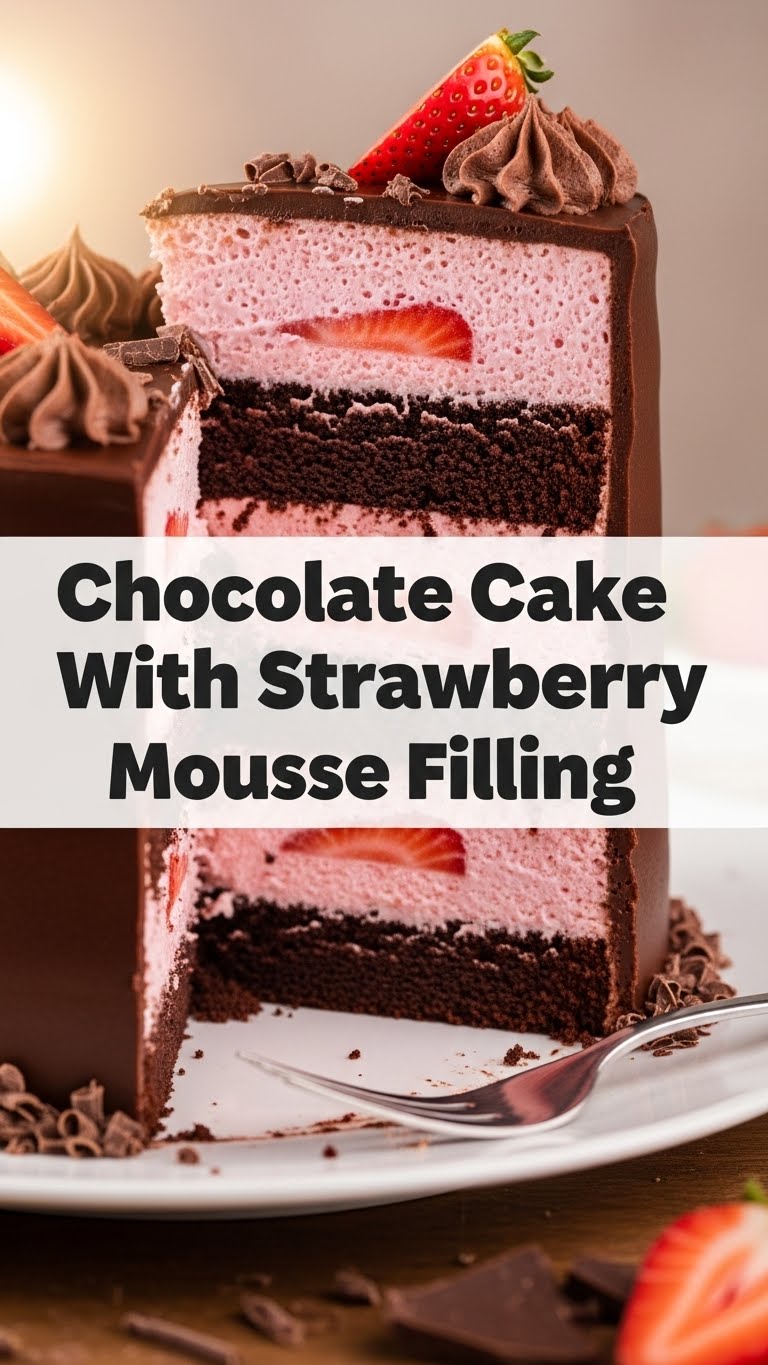
Because, my friend, this isn’t your grandma’s dry, boring chocolate cake. No offense to grandma, but we’re elevating things here. This bad boy brings together a super moist, dark chocolate cake and a ridiculously light, airy, and tangy strawberry mousse. It’s like a party in your mouth where chocolate and strawberries finally decided to get along and throw the best bash ever. Plus, it looks super fancy without requiring a degree in engineering. **It’s practically idiot-proof**, even if your usual baking specialty is burning toast. Trust me, I speak from experience.
Ingredients You’ll Need
Alright, gather your troops! No need for a treasure hunt, most of these are pantry staples. Just make sure they’re, you know, not expired. Nobody wants a science experiment.
For the Chocolate Cake:
- All-Purpose Flour: The backbone of any good cake. Don’t use self-rising unless you want a surprise party in your oven.
- Granulated Sugar: Sweetness! Duh.
- Unsweetened Cocoa Powder: Go for the good stuff, Dutch-processed if you can find it. It makes a difference, promise.
- Baking Soda & Baking Powder: Our dynamic duo for lift. Don’t confuse them; they’re not interchangeable besties.
- Salt: Just a pinch to make everything else taste better.
- Eggs: Room temp, please! They mix better.
- Milk: Any kind works, but whole milk makes it extra lush.
- Vegetable Oil: For moisture. Seriously, don’t skip this or your cake will be sad.
- Vanilla Extract: Pure vanilla, not imitation. Your taste buds will thank you.
- Hot Water or Coffee: This is the secret weapon for deep chocolate flavor. Coffee amplifies the chocolate without making it taste like coffee. Mind blown, right?
For the Strawberry Mousse Filling:
- Fresh Strawberries: The star of the show! Ripe and juicy, please. Frozen can work in a pinch, just thaw and drain well.
- Granulated Sugar: To sweeten up those berries.
- Lemon Juice: Brightens everything up. Don’t skip it!
- Heavy Cream (aka Whipping Cream): You need at least 35% fat for proper whipping.
- Powdered Sugar (Confectioners’ Sugar): For that smooth, melt-in-your-mouth sweetness in the mousse.
- Gelatin Powder (Unflavored): The secret to a stable mousse that doesn’t melt into a puddle. Don’t be scared of gelatin, it’s easier than it looks.
Step-by-Step Instructions
Okay, apron on, battle stations! We’re doing this. Read all the steps first, then dive in. Trust me, it saves headaches.
Part 1: The Chocolate Cake Magic
- Preheat & Prep: Get your oven screaming hot to 350°F (175°C). Grease and flour two 8-inch round cake pans. You can also line the bottoms with parchment paper if you’re feeling extra.
- Dry Mix: In a large bowl, whisk together the flour, sugar, cocoa powder, baking soda, baking powder, and salt. Make sure there are no lumpy bits.
- Wet Mix: In another bowl, whisk the eggs, milk, oil, and vanilla until well combined.
- Combine & Conquer: Pour the wet ingredients into the dry ingredients. Mix until just combined. Don’t overmix, or your cake will be tough – we’re aiming for tender, not a hockey puck.
- Add the Hot Stuff: Carefully pour in the hot water or coffee. The batter will be thin, and that’s okay! Stir until smooth. This liquid gold makes the cake super moist.
- Bake It Up: Divide the batter evenly between your prepared pans. Bake for **28-35 minutes**, or until a toothpick inserted into the center comes out clean.
- Cool Down: Let the cakes cool in the pans for about 10-15 minutes before inverting them onto a wire rack to cool completely. **Patience, grasshopper!** Don’t try to fill a warm cake, or things will get messy.
Part 2: Strawberry Mousse Dream
- Strawberry Puree: Wash and hull your strawberries. Blend them in a food processor or blender until smooth. Push the puree through a fine-mesh sieve to remove seeds, if you’re fancy.
- Sweeten the Berries: In a small saucepan, combine the strawberry puree, granulated sugar, and lemon juice. Heat over medium heat, stirring occasionally, until the sugar dissolves and it just starts to simmer. Remove from heat.
- Gelatin Time: In a tiny bowl, sprinkle the gelatin powder over 2 tablespoons of cold water. Let it sit for 5 minutes to “bloom” (it’ll get wrinkly). Then, microwave it for 10-15 seconds until it’s liquid and clear. Stir this dissolved gelatin into your warm strawberry mixture. Let it cool completely, or even chill slightly in the fridge until it’s just starting to thicken but still pourable.
- Whip It Good: In a separate, very cold bowl (metal bowls are great for this), whip the heavy cream and powdered sugar with an electric mixer until medium-stiff peaks form. Don’t go overboard, or you’ll have butter!
- Fold It In: Gently fold the cooled strawberry mixture into the whipped cream until no streaks remain. Try not to deflate all that lovely air you just whipped in.
- Chill Out: Cover the mousse and refrigerate for at least **1 hour** (or until firm enough to spread) while your cakes finish cooling.
Part 3: Assemble Your Masterpiece!
- Level Up: If your cake layers have domed tops, carefully slice them off with a serrated knife to create flat surfaces. This makes for a much neater cake.
- First Layer: Place one cake layer on your serving plate or cake stand.
- Fill ‘Er Up: Spread all of your glorious strawberry mousse evenly over the first cake layer. Leave a little space at the edge for when you place the top layer.
- Top It Off: Carefully place the second cake layer on top.
- Chill Again: Refrigerate the whole cake for at least **2-3 hours** to allow the mousse to fully set. Overnight is even better if you can resist!
- Decorate (Optional, but Fun): Dust with powdered sugar, top with fresh strawberries, or go wild with some chocolate shavings.
Common Mistakes to Avoid
Let’s save you some heartache and flour-covered tears, shall we? Avoid these rookie blunders:
- Not Preheating Your Oven: This isn’t a suggestion, it’s a command! Cold ovens mess up the rise and texture. **Always preheat fully.**
- Overmixing the Batter: You want just combined, not vigorously beaten into submission. Overmixing develops gluten, which makes cake tough. Nobody wants tough cake.
- Trying to Fill Warm Cakes: This is a recipe for a melted, sliding disaster. Seriously, **let those cakes cool completely.** Like, walk away, make coffee, watch an episode of your favorite show.
- Skipping the Gelatin (or Not Dissolving it Properly): Your mousse will be more like a runny soup than a dreamy cloud. Gelatin is your friend for stability. And make sure it’s fully dissolved, no lumps!
- Over-whipping the Cream: One minute it’s cream, the next it’s butter. Keep an eye on it when whipping; stop as soon as you hit medium-stiff peaks.
- Not Chilling Enough: This applies to both the mousse and the assembled cake. Patience is a virtue, especially when deliciousness is at stake.
Alternatives & Substitutions
Life happens, and sometimes you don’t have exactly what the recipe calls for. No stress, we can improvise!
- No Fresh Strawberries? You can definitely use frozen. Just thaw them completely and drain off any excess liquid before pureeing. The flavor might be slightly less vibrant, but still delicious.
- Different Berries for the Mousse? Absolutely! Raspberry, blueberry, or even mixed berries would be fantastic. Just adjust sugar to taste, as some berries are tarter.
- Gluten-Free Cake? Swap the all-purpose flour for a 1:1 gluten-free baking blend that contains xanthan gum. The texture might be slightly different, but still tasty.
- Dairy-Free? This one’s a bit trickier for the mousse. You could try a dairy-free whipping cream alternative (like coconut cream), but the stability with gelatin might vary. For the cake, use a plant-based milk and egg replacers if needed.
- No Coffee? Just use hot water instead. The coffee really just enhances the chocolate, it won’t taste like coffee.
- Want a different frosting? Feel free to frost the outside with your favorite chocolate ganache or buttercream once the mousse is set. I mean, why not? More is more!
FAQ (Frequently Asked Questions)
Got questions? I probably thought of them already. Let’s get these squared away so you can get baking!
- Can I make this cake ahead of time? Heck yes! This cake actually tastes even better the next day once the flavors have melded. You can keep it covered in the fridge for up to 3-4 days.
- What if my mousse is too thin? Oh no! Did you chill it enough? Or did you skip the gelatin? If it’s truly too thin even after chilling, you might need more gelatin (bloom and dissolve more, then gently fold into *some* of the mousse to boost its setting power, then fold that back into the rest). Or, if it’s not set at all, maybe you didn’t whip your cream enough. Live and learn!
- Do I really need hot coffee/water for the cake? Yes, you really do. The hot liquid helps bloom the cocoa powder, giving you a richer, darker chocolate flavor. Plus, it makes the cake incredibly moist. Trust the process.
- Can I use a different size cake pan? You can, but you’ll need to adjust baking times. If using smaller pans, you’ll get taller layers and they’ll take longer. Larger pans will mean thinner layers and less baking time. Keep an eye on it!
- My cakes stuck to the pan! What happened? Classic mistake! You probably didn’t grease and flour (or parchment line) well enough. Or you tried to remove them while they were still too hot. Next time, be generous with the non-stick prep!
- Is this cake kid-friendly? Absolutely! It’s chocolate and strawberries – a match made in kid heaven. Just maybe don’t tell them about the gelatin, it might sound weird.
Final Thoughts
So there you have it, my friend! A show-stopping, palate-pleasing chocolate cake with a dreamy strawberry mousse filling that’s going to make you feel like a culinary rockstar. It’s proof that you don’t need to be a Michelin-starred chef to whip up something truly spectacular. Now go impress someone – or, let’s be honest, just yourself – with your new culinary skills. You’ve earned those bragging rights (and that slice of cake!). Happy baking!


