So you’re staring into the fridge, wishing a fancy dessert would just *materialize*, but the thought of actual effort makes you want to curl up with a bag of chips instead? Been there, pal. But what if I told you there’s a dessert that tastes super fancy but is secretly so easy, you’ll wonder if you cheated? Enter the glorious, soul-satisfying, absolutely minimal-effort **Caramelized Pears with Ice Cream**. Get ready to impress yourself (and maybe someone else, if you’re feeling generous).
Why This Recipe is Awesome
Okay, let’s be real, you’re not trying to win MasterChef here, you’re trying to win the ‘fastest path to deliciousness’ award. And *ding ding ding*, we have a winner! This caramelized pears with ice cream situation is practically **idiot-proof**. Seriously, even my goldfish could probably follow these steps if he had opposable fins. It’s quick, it’s elegant (without the effort), and the warm-pears-cold-ice-cream combo is basically a hug for your taste buds. Plus, you get to feel like a culinary genius without, you know, actually being one. What’s not to love?
Ingredients You’ll Need
Gather your troops! This list is short, sweet, and to the point. No obscure ingredients you need to trek to a specialty store for, promise.
- **2-3 Ripe, but Firm Pears:** Think Bosc or Anjou. Not the rock-hard ones, but definitely not mushy either. We want them to hold their shape, folks!
- **2 Tablespoons Unsalted Butter:** The real stuff. Don’t go reaching for the margarine; your soul (and your taste buds) deserve better.
- **3 Tablespoons Brown Sugar:** This is where the magic happens. It gives us that deep, rich caramel flavor.
- **1 Teaspoon Vanilla Extract (optional, but highly recommended):** Just a little extra razzle-dazzle.
- **Vanilla Ice Cream:** The crown jewel! Or any flavor you fancy, but classic vanilla is *chef’s kiss*.
- **A Pinch of Salt (optional):** To balance the sweetness. Trust me on this one.
Step-by-Step Instructions
Ready? Set? Caramelize! Here’s how you turn those humble pears into a dessert hero:
- **Pear Prep Time:** First things first, wash those pears. Then, peel ’em, core ’em, and slice ’em into about 1/2-inch thick wedges. Don’t stress too much about perfection; rustic is charming, right?
- **Melt That Butter:** Grab a medium-sized skillet (non-stick is your best friend here) and place it over medium heat. Toss in the butter and let it melt until it’s nice and bubbly.
- **Sugar Rush:** Sprinkle the brown sugar evenly over the melted butter. Give it a quick stir until the sugar starts to dissolve and form a syrupy mixture. Keep an eye on it—we’re aiming for golden, not burnt!
- **Pear Party:** Add your pear slices to the skillet in a single layer if possible. Let them cook for about 3-5 minutes on one side, until they start to soften and turn a lovely golden-brown.
- **Flip & Finish:** Gently flip the pear slices over and cook for another 3-5 minutes on the other side. They should be tender, glossy, and beautifully caramelized. If you’re using vanilla extract, stir it in during the last minute of cooking. A tiny pinch of salt now will also elevate the flavor!
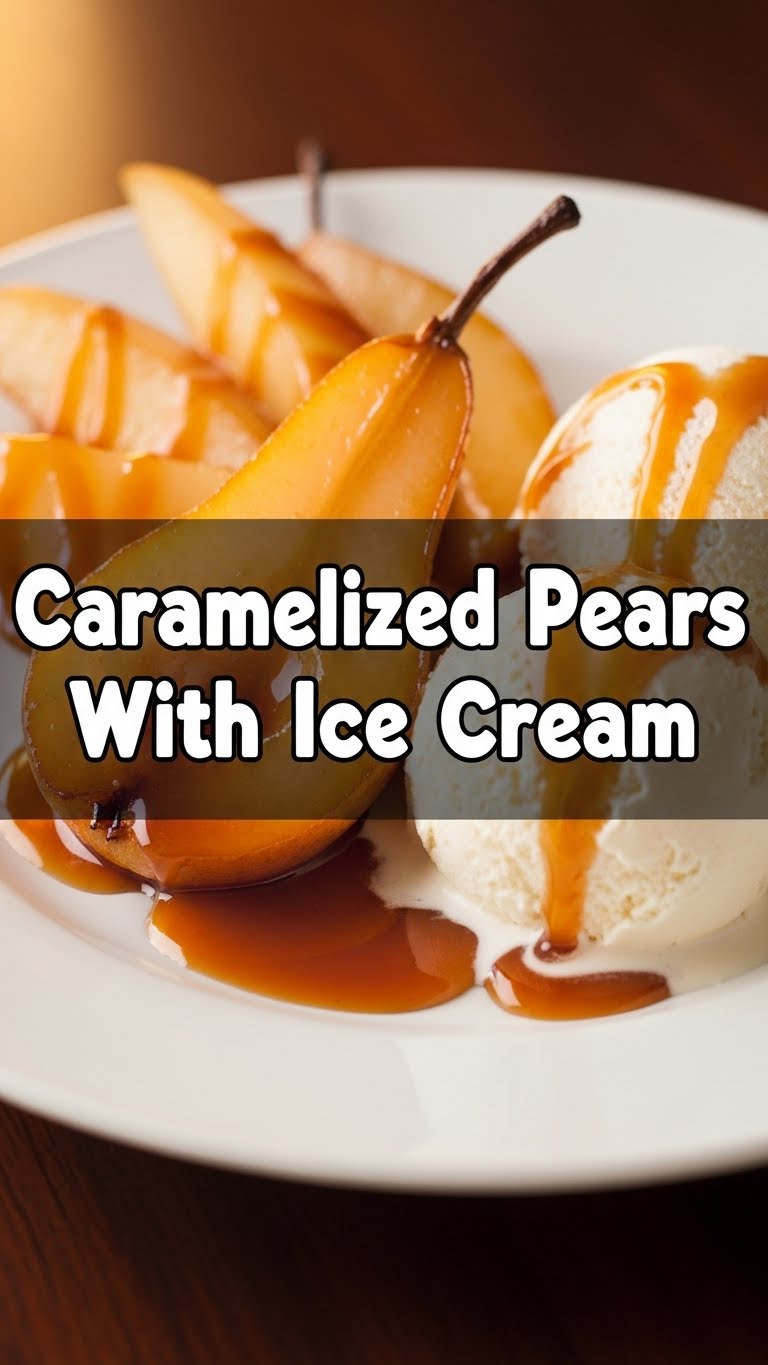
- **Serve It Up!** Immediately scoop those warm, caramelized pears into serving bowls. Plop a generous scoop (or two, no judgment here) of vanilla ice cream right alongside them. Drizzle any leftover caramel sauce from the pan over the top.
And voilà! Instant gratification. You’re welcome.
Common Mistakes to Avoid
Even though this recipe is practically fail-proof, there are a few rookie errors that can turn your pear-y dreams into a pear-y nightmare. Let’s not make them, okay?
- **Using Under-ripe Pears:** They’ll stay hard, refuse to caramelize properly, and just generally be quite rude. **Always use ripe, but firm pears.**
- **Overcrowding the Pan:** This is a biggie! If you jam too many pears in the pan, they’ll steam instead of caramelize. Cook in batches if your pan isn’t big enough.
- **Walking Away from the Caramel:** That sugar-butter mixture can go from perfectly golden to a burnt, bitter mess in mere seconds. **Stay vigilant and keep an eye on it!**
- **Not Having Ice Cream Ready:** Waiting for your ice cream to soften while your perfectly warm pears sit there getting cold is a tragedy. Have it scooped or ready to go.
Alternatives & Substitutions
Feeling adventurous? Or maybe you’re just out of an ingredient? No worries, we’ve got options!
- **Fruit Swaps:** No pears? No problem! Apples are a fantastic alternative (Honeycrisp or Fuji work great). Peaches in the summer? *Chef’s kiss* perfection. Just adjust cooking times as needed.
- **Spice It Up:** A pinch of cinnamon, nutmeg, or even a tiny dash of cardamom added with the brown sugar will make your kitchen smell like a cozy autumn wonderland.
- **Different Ice Cream Flavors:** While vanilla is a classic, salted caramel ice cream is next-level with these pears. Or go bold with pecan praline, cinnamon, or even a good quality plain yogurt for a “healthier” twist (we won’t tell!).
- **Boozy Boost:** Feeling a bit naughty? A tiny splash of rum, brandy, or even a fruit liqueur (like pear brandy, if you’re fancy) added to the pan during the last minute of cooking can add a sophisticated kick. Just cook it off for a minute or two to let the alcohol evaporate.
FAQ (Frequently Asked Questions)
Because you’ve got questions, and I’ve got (casual) answers!
- **Can I use white sugar instead of brown sugar?** You can, but brown sugar provides a richer, deeper caramel flavor. White sugar will still work, but it won’t be quite as complex.
- **What if my pears are too soft?** If they’re *too* soft, they might turn into mush when cooked. Try to find pears that are ripe but still hold their shape when gently squeezed.
- **Can I make the caramelized pears ahead of time?** While the pears are best served warm and fresh, you *could* caramelize them a bit ahead and gently reheat them. The caramel sauce itself can be made ahead and stored. But IMO, fresh is best here!
- **Is this dessert “healthy”?** Well, it has fruit! And, uh, dairy! So, “healthy-ish” if you squint and ignore the butter and sugar. It’s definitely “soul-healthy” though.
- **Can I add nuts?** Absolutely! A sprinkle of toasted pecans, walnuts, or even slivered almonds on top would add a lovely crunch and extra flavor.
- **My caramel hardened, what happened?** You likely overcooked it or didn’t have enough liquid. Don’t panic! You can sometimes gently reheat it with a tiny splash of water or butter to loosen it up.
Final Thoughts
See? That wasn’t scary at all! You just whipped up something amazing without breaking a sweat (or a dish, hopefully). This Caramelized Pears with Ice Cream is your new secret weapon for when you want maximum flavor with minimum fuss. Now go impress someone—or, let’s be real, just devour it all yourself—with your new culinary superpower. You’ve earned every single glorious bite!


