So you’re craving something tasty but too lazy to spend forever in the kitchen, huh? Same. What if I told you there’s a dessert that screams ‘I’m fancy!’ but whispers ‘I literally threw this together in my pajamas’? Yep, we’re talking about a Raspberry Tart with a side of *OMG-this-is-amazing* ice cream. Get ready to impress yourself (and maybe a few lucky guests) without breaking a sweat. Or at least, not *much* sweat.
Why This Recipe is Awesome
Okay, let’s be real. We all want to look like domestic goddesses/gods without, you know, actually being one all the time. This raspberry tart? It’s your secret weapon. It looks stunning, tastes like a dream, and honestly, it’s so forgiving, even I didn’t mess it up – and my kitchen has seen some things. Plus, you get to pair it with ice cream, which, let’s be honest, makes everything better. It’s the perfect balance of sweet, tangy, and ‘I totally made this from scratch and am therefore a genius.’
Ingredients You’ll Need
- For the Crust (the foundation of all greatness):
- 1 ½ cups all-purpose flour: The basic building block. Don’t overthink it.
- ½ cup unsalted butter, ice-cold and cubed: This is non-negotiable for flaky crusts. Seriously, embrace the cold.
- ¼ cup granulated sugar: Just enough sweetness for the crust to play nice.
- ¼ teaspoon salt: Balances everything out. Science, baby!
- 3-4 tablespoons ice water: Start with 3, add more if your dough is being a diva.
- For the Raspberry Filling (the star of the show):
- 2 cups fresh raspberries: The prettier, the better. No mushy ones allowed!
- ½ cup granulated sugar: Adjust to your berry’s sweetness, but this is a good starting point.
- 2 tablespoons cornstarch: Our secret agent for thickening. No runny mess here.
- 1 tablespoon lemon juice: Brightens everything up. Essential, IMO.
- Zest of half a lemon: More zing, because why not?
- For Serving (the grand finale):
- Vanilla bean ice cream: Or really, any ice cream you adore. French vanilla, raspberry ripple, chocolate… your call!
- Fresh mint leaves (optional, for looking fancy): Because a little green makes it look like you actually tried.
Step-by-Step Instructions
- Crust Time (Don’t Panic): In a large bowl, whisk together your flour, sugar, and salt. Add the ice-cold, cubed butter.
- Now, here’s the fun part: Use a pastry blender (or your very clean fingers!) to cut the butter into the flour mixture until it resembles coarse crumbs with some pea-sized pieces remaining.
- Gradually add the ice water, one tablespoon at a time, mixing until the dough just comes together. Don’t overmix! Form it into a disc, wrap it in plastic wrap, and chill in the fridge for at least 30 minutes. This is crucial for flakiness.
- Preheat & Prep: While your dough chills, preheat your oven to 375°F (190°C). Lightly grease a 9-inch tart pan with a removable bottom.
- Roll it Out: On a lightly floured surface, roll out your chilled dough into a 12-inch circle. Carefully transfer it to your prepared tart pan, pressing it gently into the bottom and up the sides. Trim any excess dough. Prick the bottom with a fork a few times.
- Blind Bake (Trust Me): Line the crust with parchment paper and fill with pie weights or dried beans. Bake for 15 minutes. Remove the weights and parchment, then bake for another 5-7 minutes until lightly golden. Take it out and let it cool slightly.
- Filling Frenzy: In a medium bowl, gently mix the fresh raspberries, sugar, cornstarch, lemon juice, and lemon zest. Be gentle; we want intact berries!
- Assemble & Bake: Pour the raspberry filling into your partially baked tart crust. Spread evenly.
- Bake for 25-30 minutes, or until the filling is bubbly and the crust is golden brown. If the crust edges start to get too dark, you can loosely tent them with foil.
- Cool Down: Let the tart cool completely on a wire rack before attempting to remove it from the pan. Patience is a virtue here, my friend. The filling needs to set!
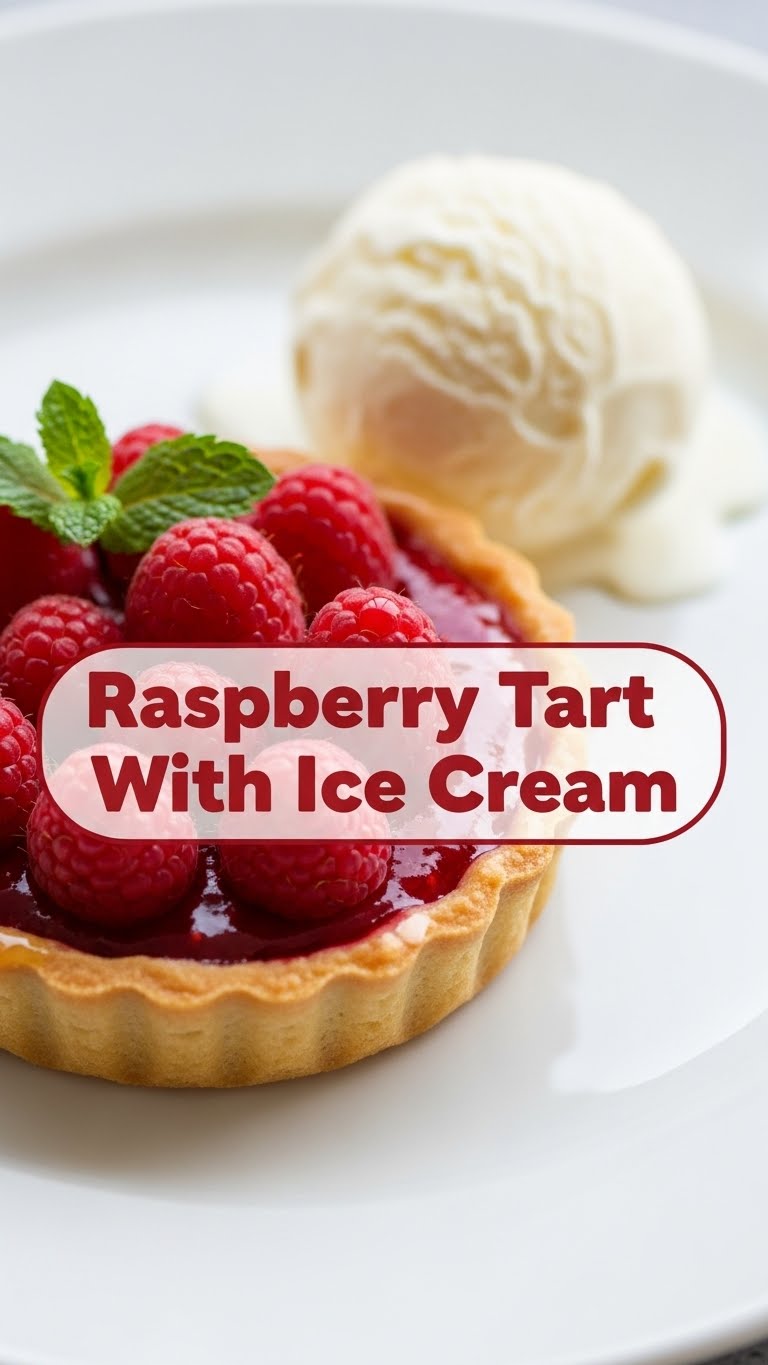
- Serve It Up! Slice your gorgeous tart and serve warm or at room temperature with a generous scoop (or two!) of vanilla bean ice cream. A tiny sprig of mint for *flair* if you’re feeling extra.
Common Mistakes to Avoid
- Warm butter: Seriously, don’t. Your crust will be sad and tough. Ice cold is the way to go.
- Overmixing the dough: You’ll develop the gluten too much, leading to a tough, bready crust instead of tender and flaky. Mix *just* until combined.
- Skipping the blind bake: This is how you avoid a soggy bottom. No one likes a soggy bottom.
- Not letting it cool: Resist the urge to cut into it immediately. The filling needs to set, otherwise, it’ll be a runny mess and you’ll cry.
- Thinking you don’t need to preheat the oven: Rookie mistake. Consistent heat is key for even baking.
Alternatives & Substitutions
- Berries: Not a raspberry fan? Or maybe they’re out of season? Feel free to swap them for blueberries, blackberries, or even a mix of your favorite berries. Strawberries might need a bit more cornstarch if they’re super juicy.
- Crust: If making a crust from scratch feels like too much adulting today, grab a store-bought pie crust. No judgment here, we all have those days! Just make sure it’s a good quality one.
- Sweetener: You can use brown sugar for a richer, more caramel-like flavor in the filling, though it will change the color slightly. Maple syrup or honey could work too, but might require slight adjustments to the cornstarch.
- Lemon: Out of fresh lemons? A splash of bottled lemon juice works, but honestly, the fresh zest adds so much zing, it’s worth getting one if you can.
- Ice Cream: Vanilla is classic, but chocolate, pistachio, or even a berry sorbet would be fantastic. Be adventurous!
FAQ (Frequently Asked Questions)
- “Can I use frozen raspberries?” Absolutely! No need to thaw them first. Just toss them in with the sugar and cornstarch as usual, but you might need to bake the tart for an extra 5-10 minutes. The filling might be a bit juicier, but still delicious!
- “My crust shrunk! What happened?” Aha! You probably didn’t chill it long enough, or you stretched it too much when placing it in the pan. Chilling helps butter solidify and relaxes the gluten, preventing shrinkage.
- “Can I make this tart ahead of time?” Yes, you can! The tart is actually great at room temperature for up to two days. Store it loosely covered. If you want to warm it slightly before serving with ice cream, go for it!
- “Is there a way to make it less sweet?” Totally. You can reduce the sugar in the filling by a tablespoon or two, especially if your raspberries are super ripe and sweet. Taste your berries first!
- “Do I *really* need a tart pan with a removable bottom?” It makes life *so much easier* for getting that beautiful presentation, FYI. If you don’t have one, a regular pie plate will work, but getting it out in one piece will be a fun little challenge.
Final Thoughts
See? You’re practically a pastry chef now! This Raspberry Tart isn’t just a dessert; it’s a declaration of your fabulousness. It’s proof that amazing food doesn’t have to be complicated, and that sometimes, the best things come from chilling (both the dough and yourself). Now go impress someone—or yourself—with your new culinary skills. You’ve earned it! Seriously, go make this. Your tastebuds will thank you.


