So you’re craving something tasty but too lazy to spend forever in the kitchen, huh? Same. We’ve all been there – staring into the fridge, wondering if a cheese string counts as dinner. But fear not, my culinary-curious pal, because today we’re whipping up something that tastes like a warm hug and takes less effort than deciding what to binge-watch next: homemade pie with a scoop (or three) of ice cream!
Why This Recipe is Awesome
Okay, let’s be real. “Homemade pie” usually sounds like an all-day affair involving flour explosions and existential crises over perfectly crimped edges. Not today, my friend. This recipe is awesome because it’s basically a cheat code for comfort food. We’re talking **maximum flavor, minimum fuss**. It’s idiot-proof, honestly – even *I* didn’t mess it up, and my kitchen adventures often end with the smoke alarm going off. You get that warm, gooey, sweet goodness without the stress, and the best part? It pairs with ice cream like Netflix pairs with a Friday night. It’s the ultimate ‘look what I made!’ dish that requires very little actual ‘making’.
Ingredients You’ll Need
Gather ’round, pantry explorers! Here’s your shopping list for edible happiness:
- 1 Box (2 count) Refrigerated Pie Crusts: Yes, store-bought. No shame here, friend, we’re going for *easy* and *delicious*, not “entered into a baking competition.”
- 1 large (21 oz or so) Can Fruit Pie Filling: Apple, cherry, peach, berry… pick your poison! This is your secret weapon for instant fruit deliciousness. Don’t judge, it’s a shortcut to happiness.
- 1 Large Egg: For that golden, glossy crust. Makes it look fancy-schmancy, like you actually tried.
- 1 tbsp Sugar (granulated): To sprinkle on top. Because sparkle makes everything better.
- 1/2 tsp Cinnamon (optional but highly recommended): For that extra cozy vibe.
- Vanilla Ice Cream: The classic, non-negotiable sidekick. Seriously, don’t skimp on this.
Step-by-Step Instructions
Alright, let’s get this party started! Follow these simple steps and prepare to amaze yourself.
- Preheat Power: First things first, get that oven screaming! Preheat it to **400°F (200°C)**. Seriously, don’t skip this. A cold oven is a sad oven.
- Crust Command: Unroll one pie crust and gently fit it into a standard 9-inch pie dish. Press it down so it snuggles into every curve. Don’t worry about perfection; rustic is in!
- Fill ‘er Up: Pour that glorious can of fruit pie filling into your crust. Spread it out evenly. Try not to eat it all with a spoon right now.
- Top Tier: Now, for the top crust! You can unroll the second crust and simply lay it over the filling, then cut a few slits in the top for steam to escape. Or, if you’re feeling a *tiny* bit fancy, cut it into strips and do a quick, messy lattice. It’s pie, not a museum exhibit!
- Seal and Glaze: Trim any excess crust around the edges and crimp them together with the bottom crust (using your fingers or a fork). In a small bowl, whisk the egg with a tablespoon of water to make an egg wash. Brush this over the entire top crust.
- Sweet Sprinkle: In another tiny bowl, mix your sugar and cinnamon (if using). Sprinkle this magical dust generously over the egg-washed crust.
- Bake It Up: Carefully place your pie on a baking sheet (to catch any potential overflow – better safe than sorry!) and pop it into your preheated oven. Bake for **35-45 minutes**, or until the crust is golden brown and the filling is bubbly. **Key tip: if the edges start to get too dark, cover them loosely with foil.**
- Patience, Grasshopper: Once golden and glorious, carefully remove the pie from the oven. Let it cool on a wire rack for at least 15-20 minutes before cutting. This allows the filling to set a bit, preventing a molten lava situation (which is still delicious, but harder to serve).
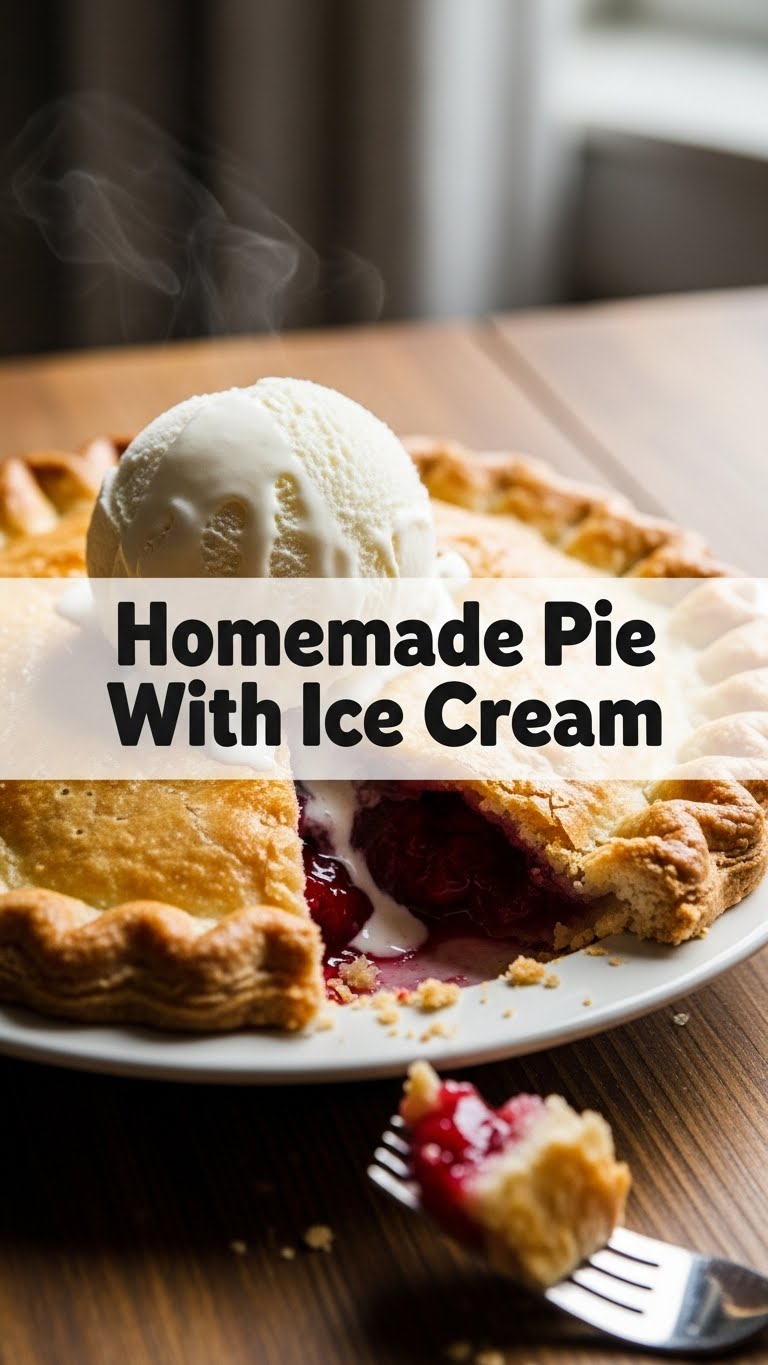
- The Grand Finale: Slice yourself a generous piece of pie. Plop a big ol’ scoop (or two!) of vanilla ice cream right on top. Watch it slowly melt into the warm fruit. Take a picture, then devour. You’ve earned this.
Common Mistakes to Avoid
Nobody’s perfect, but we can avoid some common pie pitfalls, can’t we?
- Not Preheating the Oven: Rookie mistake! A cold start means a soggy bottom. No one wants a soggy bottom.
- Overfilling Your Pie: Greed is not good here. If you overfill, it’ll bubble over, burn on your oven floor, and make you sad.
- Forgetting to Vent the Top Crust: Those little slits aren’t just for show! They let steam escape, preventing a pie explosion and ensuring a perfectly cooked filling.
- Cutting Into It Too Soon: I know, it’s tempting! But give it those 15-20 minutes to cool. It helps the filling set and prevents it from gushing everywhere like a broken dam of deliciousness.
- Forgetting the Ice Cream: This isn’t just a mistake, it’s a crime against humanity. The warm pie and cold ice cream combo is the entire point, FYI.
Alternatives & Substitutions
Feeling a bit adventurous, or just want to use what you’ve got? Here are some ideas:
- Crust Variations: If you’re feeling ambitious (and have more time), go ahead and make your own pie crust from scratch! But honestly, the store-bought stuff is a lifesaver. For gluten-free pals, most major brands now offer decent GF pie crusts.
- Filling Freedom: Don’t like canned filling? If you have fresh fruit, you can absolutely use it! You’ll just need to cook it down a bit with some sugar, cornstarch, and spices beforehand. But for a super quick win, stick with the can. Trust me, it’s a winner.
- Ice Cream Extravaganza: While vanilla is classic, feel free to experiment! Cinnamon, pecan, butterscotch, or even a good quality strawberry ice cream would be amazing. Or if you’re dairy-free, there are tons of fantastic plant-based ice creams out there these days.
- Extra Toppings: Drizzle with caramel sauce, a sprinkle of chopped nuts, or even a dollop of whipped cream if you’re feeling extra decadent.
FAQ (Frequently Asked Questions)
Got questions? I’ve got (casual, humorous) answers!
- Can I use margarine instead of butter for the egg wash? Well, you’re using an egg wash, so butter isn’t involved there. But if you’re asking about a homemade crust, technically yes, but why hurt your soul like that? Butter makes everything better.
- How do I know when the pie is truly done? Besides the golden-brown crust, look for the filling bubbling up nicely through those vents you cut. If it’s still just jiggling like Jell-O, give it a few more minutes.
- My pie crust edges are burning! What do I do? Rookie move. Don’t worry! Loosely tent the edges with aluminum foil. This shields them from direct heat while the rest of the pie catches up.
- Can I make this ahead of time? Absolutely! You can bake the pie a day in advance. Store it loosely covered at room temperature. Just warm it up slightly in the oven before serving for that “fresh out of the oven” experience.
- What if I don’t have an egg for the wash? You can skip it, but your crust won’t be as shiny or golden. A brush of milk or even water can help brown it slightly, but the egg gives it that professional glow.
- Can I use frozen fruit? Yes, but you’ll need to thaw it, drain any excess liquid, and probably mix it with some sugar and cornstarch to prevent it from getting too watery in the pie. IMO, canned filling is still the easiest for this particular recipe!
Final Thoughts
See? That wasn’t so bad, was it? You just whipped up a warm, comforting pie that looks (and tastes!) like you spent hours slaving away, all with minimal effort. Go on, pat yourself on the back. You’ve earned it. Now go impress someone—or just yourself, because let’s be honest, you’re probably going to eat most of it anyway—with your new culinary skills. Enjoy every last bite, and maybe save a sliver for breakfast. (Don’t tell anyone I said that.)


