So you’re staring into the abyss of your pantry, craving something warm, comforting, and ridiculously delicious, but the thought of spending hours in the kitchen makes you want to curl up and nap? Same, friend, same. Lucky for us, there’s a magical creation that delivers on all fronts: the Cinnamon Apple Crisp. And guess what? It’s practically foolproof. We’re talking minimal effort, maximum cozy vibes, and a house smelling like a bakery exploded in the best possible way. Prepare yourself for pure bliss.
Why This Recipe is Awesome
Let’s be real, life is complicated enough. Your dessert shouldn’t be. This apple crisp? It’s the culinary equivalent of a warm hug from your favorite person. It’s so easy, even I didn’t mess it up (and my track record with anything more complex than toast is… spotty). You get soft, spiced apples bubbling underneath a glorious, buttery, oat-y, crunchy topping that’s practically irresistible. And the best part? It practically screams for a generous scoop of vanilla ice cream. It’s an idiot-proof masterpiece that will make you feel like a gourmet chef without actually doing any gourmet chef things. Your kitchen will smell like autumn decided to move in, and that alone is worth the price of admission.
Ingredients You’ll Need
Gather ’round, my sweet-toothed companions! Here’s what you’ll need for this humble yet mighty dessert. Don’t worry, it’s nothing fancy, just good old-fashioned deliciousness.
- For the Apple Filling:
- 6-8 medium apples (Granny Smith, Honeycrisp, Fuji, or a mix are perfect – about 6 cups sliced. We want firm apples, not the ones that turn to mush just by looking at them!)
- 1/2 cup granulated sugar (Sweetness! Duh.)
- 1 tablespoon all-purpose flour (Helps thicken things up so it’s not a watery mess.)
- 1 teaspoon ground cinnamon (The star of the show!)
- 1/4 teaspoon ground nutmeg (Cinnamon’s best friend, adds depth.)
- 1 tablespoon lemon juice (Brightens the flavor and stops those apples from browning too fast. Science!)
- For the Crispy Topping:
- 1 cup all-purpose flour (The foundation of our crunchy heaven.)
- 1/2 cup packed light brown sugar (Adds a lovely caramel note and chewiness.)
- 1/2 cup granulated sugar (More sweetness, because why not?)
- 1 cup old-fashioned rolled oats (Important: not instant oats! We need that texture, folks.)
- 1 teaspoon ground cinnamon (Because more cinnamon is always the answer.)
- 1/2 teaspoon salt (Don’t skip this! It balances the sweetness like a pro.)
- 1/2 cup (1 stick) cold unsalted butter, cut into small cubes (Cold butter is KEY for crispiness! Embrace the fat, embrace the flavor.)
- To Serve:
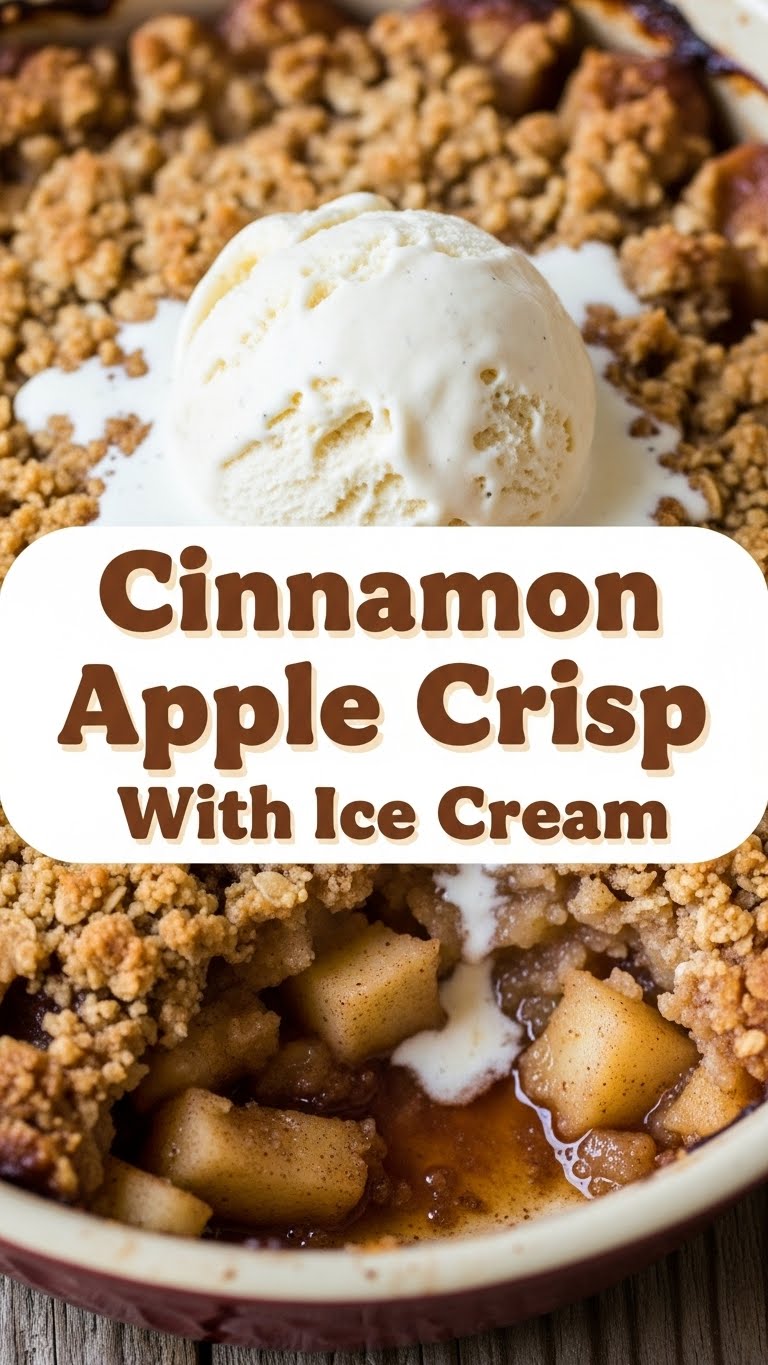
- Vanilla ice cream (Non-negotiable. Seriously. Don’t even try.)
Step-by-Step Instructions
Okay, let’s get this party started! These steps are so easy, you could probably do them blindfolded (though I don’t recommend it).
- Preheat & Prep: First things first, get that oven nice and toasty. Preheat it to 375°F (190°C). While it’s warming up, grab a 9×13 inch baking dish (or an 8×8 if you’re making a smaller batch). Give it a quick buttering if you’re feeling fancy, but it’s not strictly necessary.
- Apple Magic: Time for the apples! Peel ’em, core ’em, and slice ’em into roughly 1/2-inch thick pieces. Toss them into a large bowl with the 1/2 cup granulated sugar, 1 tablespoon flour, 1 teaspoon cinnamon, 1/4 teaspoon nutmeg, and the lemon juice. Mix it all up until the apples are nicely coated and looking delicious. Pour this glorious apple mixture into your prepared baking dish, spreading it out evenly.
- Crispy Topping Time: In another (clean!) large bowl, combine the 1 cup flour, brown sugar, granulated sugar, oats, 1 teaspoon cinnamon, and salt. Give it a good whisk to mix everything up.
- Butter Up: Now for the fun part! Add your cold, cubed butter to the dry topping ingredients. Using your fingertips, a pastry blender, or even two knives, work the butter into the mixture until it resembles coarse crumbs. You want pea-sized pieces of butter, not a smooth dough! This is what gives us that amazing crispy texture.
- Assemble & Bake: Evenly sprinkle that crumbly, buttery topping all over your apples in the baking dish. Don’t be shy! Pop the dish into your preheated oven and bake for 40-50 minutes. You’re looking for a golden brown, bubbly, fragrant masterpiece. The apples should be tender when poked with a fork.
- Serve & Devour: Let the crisp cool for about 10-15 minutes (if you can wait that long) before serving. This helps it set a bit. Then, scoop a generous portion into a bowl and crown it with a mountain of vanilla ice cream. Prepare for immediate happiness.
Common Mistakes to Avoid
We all make mistakes, but let’s try to avoid these common apple crisp faux pas to ensure your dessert is nothing short of legendary.
- Forgetting to Preheat the Oven: Rookie mistake! Your crisp will cook unevenly and take forever. Your oven needs a warm-up, just like you before a workout.
- Using Warm Butter for the Topping: This is a biggie! Warm butter melts too quickly and creates a greasy, sad topping instead of a wonderfully crumbly one. Cold butter is your best friend here.
- Over-mixing the Topping: Once those lovely coarse crumbs form, stop mixing! Over-mixing develops gluten, leading to a tough, less crisp topping.
- Using Instant Oats: Oh, honey, no. Instant oats turn to mush and ruin the texture. Stick to old-fashioned rolled oats for that perfect chew.
- Forgetting the Ice Cream: Is this even a mistake or just a tragic oversight? This crisp *demands* ice cream. End of discussion.
Alternatives & Substitutions
Feeling adventurous? Or just ran out of something? Here are a few ways to tweak this recipe without completely reinventing the wheel.
- Fruit Swap: Not an apple fan? Or just want variety? This recipe works beautifully with pears, peaches, mixed berries, or even rhubarb. Just adjust sugar content if your fruit is super sweet or tart.
- Oat-Free Topping: If oats aren’t your jam, you can omit them and use 1.5 cups of flour instead for a more cookie-like topping. Or, for extra crunch, add some chopped pecans or walnuts to the oat topping.
- Butter Alternatives: For a vegan version, you can try cold coconut oil or a good quality vegan butter. IMO, butter gives the best flavor, but gotta do what you gotta do!
- Spice It Up: Want to get wild with spices? Add a pinch of ground ginger, cardamom, or even a tiny bit of allspice to the apple filling for a different flavor profile.
- No Vanilla Ice Cream? (But why?!) Whipped cream, custard, or even a scoop of caramel ice cream would be acceptable. But vanilla is classic for a reason.
FAQ (Frequently Asked Questions)
Got questions? I’ve got answers! (Mostly.)
Q: Can I use different types of apples?
A: Absolutely! A mix of sweet and tart apples (like Honeycrisp and Granny Smith) creates the best flavor complexity. Just avoid super soft apples like Red Delicious, unless you want an apple sauce crisp!
Q: Can I make this ahead of time?
A: You bet! You can assemble the entire crisp (apples in the dish, topping on top), cover it tightly with plastic wrap, and refrigerate for up to 24 hours before baking. Just add about 5-10 minutes to the baking time if baking from cold. You can also bake it, let it cool completely, and then reheat portions later.
Q: My topping isn’t getting crispy, what gives?
A: A few culprits: too much butter, not enough baking time, or too shallow a baking dish (which can steam instead of crisp). Make sure your butter was cold, bake until golden, and maybe try raising your oven temperature by 25°F for the last 10 minutes if it’s still pale.
Q: Is this healthy?
A: Oh, sweet summer child. We’re talking butter, sugar, and ice cream here. It’s healthy for your soul, your mood, and your general well-being. And sometimes, that’s the most important kind of healthy, right?
Q: Do I really need to peel the apples?
A: Technically, no, you don’t *have* to. Apple skins add a bit of fiber and rustic charm. However, for that super tender, melt-in-your-mouth apple experience, I highly recommend peeling them. It’s worth the extra few minutes, trust me!
Q: How long does apple crisp last?
A: Covered and stored in the fridge, it’ll last about 3-4 days. But let’s be honest, good luck making it last that long!
Final Thoughts
See? I told you this was easy! You’ve just whipped up a dessert that smells incredible, tastes even better, and took hardly any effort at all. Your kitchen smells like a dream, your taste buds are doing a happy dance, and you’ve officially earned bragging rights. Now go forth and impress someone—or just yourself—with your new culinary skills. You’ve earned it!


