So you’re craving something tasty but too lazy to spend forever in the kitchen, huh? Same. And honestly, who isn’t these days? Well, buckle up, buttercup, because I’m about to drop a recipe so ridiculously easy and delicious, your grandma will wonder if you secretly went to culinary school. We’re talking about an Oreo Ice Cream Sandwich Cake with Cool Whip. It’s the kind of dessert that screams “I tried!” but actually whispers “I assembled this in like 15 minutes.”
Why This Recipe is Awesome
Listen up, this isn’t just a recipe; it’s a life hack. This glorious concoction is practically **idiot-proof**. And I say that with love, as someone who once burnt water (don’t ask). It requires zero baking, minimal ingredients, and maximum chill time (for the cake, mostly, but also for you, while it freezes). It’s perfect for summer BBQs, impromptu potlucks, or just a Tuesday night when your sweet tooth is staging a full-blown rebellion. Plus, it’s a total crowd-pleaser, meaning you’ll look like a dessert deity without breaking a sweat. Win-win-win!
Ingredients You’ll Need
Gather ’round, my fellow lazy gourmets. Here’s your shopping list. Keep it simple, keep it fun!
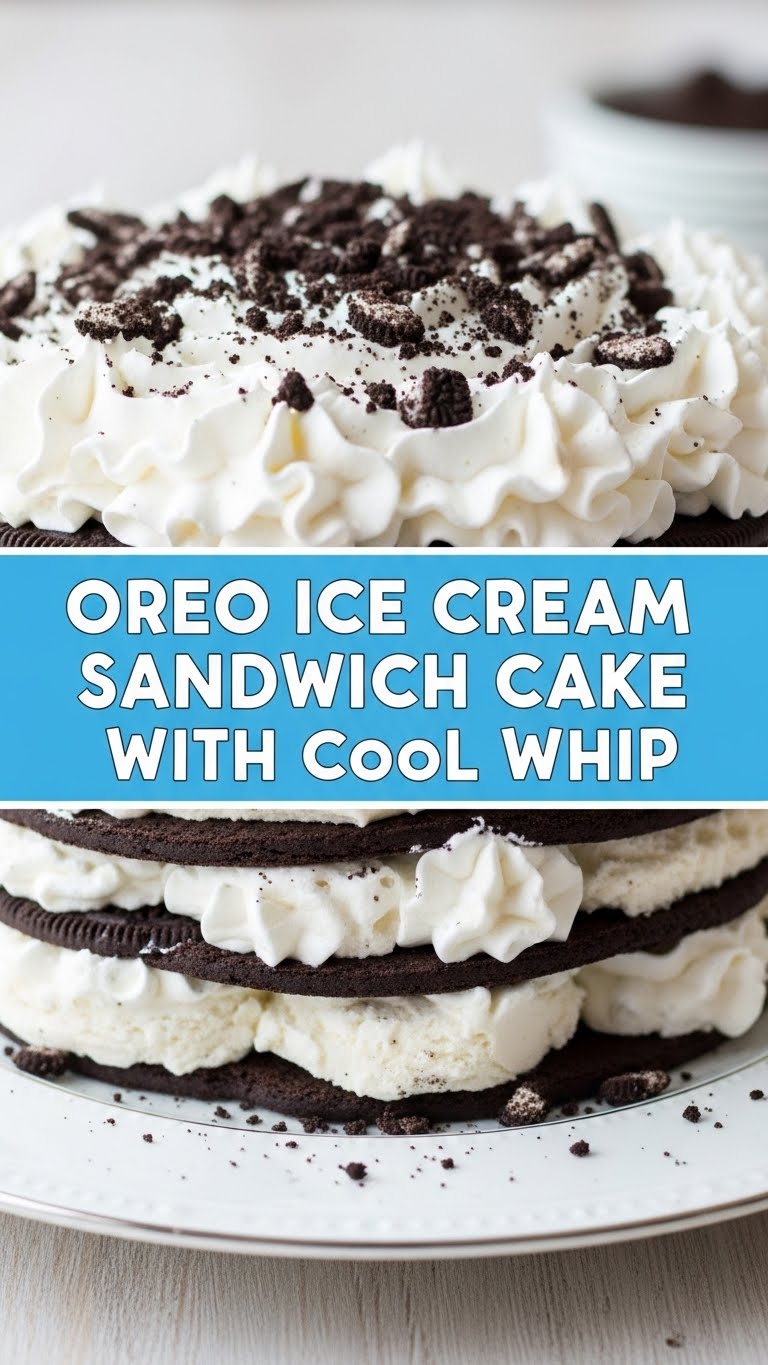
- 1-2 boxes of Oreo Ice Cream Sandwiches: These are the true MVPs of our show. The more you get, the bigger your cake. Don’t be shy; aim for at least 12-16 sandwiches for a decent size cake.
- 1 (8 oz) tub of Cool Whip: Because who has time to whip cream from scratch when there’s binge-watching to do? Plus, it’s light, fluffy, and holds up like a champ in the freezer. Make sure it’s thawed!
- 6-8 Oreo cookies (for topping): Crushed, obviously. For that extra crunch, visual appeal, and to make it look like you put in more effort than you did.
- Optional: Chocolate syrup or hot fudge: For drizzling. Because sometimes, you just gotta be extra.
Step-by-Step Instructions
Alright, let’s get this no-bake party started! These steps are so easy, you’ll wonder why you ever bothered with an oven.
- First things first, grab a 9×13 inch baking dish. If you’re using fewer sandwiches, a smaller square dish works too. Just make sure it can handle the cold!
- **Unwrap all your ice cream sandwiches.** This is probably the hardest part, FYI. Try not to eat them all before they make it into the dish. We need them for the cake!
- Arrange a single layer of ice cream sandwiches snugly in the bottom of your baking dish. Think of it like building a delicious, frosty brick wall. If there are small gaps, you can cut some sandwiches to fit.
- Now, carefully spread about half of your thawed Cool Whip over this first layer of ice cream sandwiches. Be gentle so you don’t squish them too much. We’re aiming for a smooth, cloud-like blanket.
- Repeat the layers! Add another layer of ice cream sandwiches on top of the Cool Whip. Then, spread the remaining Cool Whip over this second layer. You’re basically a dessert architect at this point.
- It’s topping time! Crush those extra Oreo cookies. You can put them in a Ziploc bag and bash them with a rolling pin (therapeutic, I swear) or use a food processor. Sprinkle the crushed Oreos evenly over the top layer of Cool Whip.
- If you’re feeling fancy, drizzle some chocolate syrup or hot fudge over the top. It’s purely for aesthetics and extra yummy points, so totally optional.
- Cover the dish with plastic wrap or foil and pop it into the freezer. **This is crucial.** You need to let it freeze for at least 4-6 hours, but ideally overnight, so it sets up nicely. Patience, young Jedi!
- Once it’s rock-hard (in the best way possible), take it out of the freezer, slice it up with a sharp knife (running it under warm water first helps with clean cuts!), and serve immediately. Prepare for applause!
Common Mistakes to Avoid
Even though this recipe is practically foolproof, there are a few rookie errors you might make. Don’t say I didn’t warn you!
- Not thawing the Cool Whip: Trying to spread frozen Cool Whip is like trying to spread concrete. Let it sit on the counter for 30-45 minutes before you start.
- Skimping on sandwiches: Thinking one small box will feed a party. Nope! You’ll end up with a sad, thin cake. **Go big or go home!**
- Not freezing it long enough: Pulling it out too soon will result in a soupy mess. You want solid, sliceable perfection. Trust the process.
- Over-squishing the layers: Don’t press down too hard when spreading the Cool Whip. The ice cream sandwiches are delicate, and we want distinct layers, not a mush.
- Eating all the ingredients before assembly: I mean, I get it, but try to exercise *some* self-control. Just for a little bit.
Alternatives & Substitutions
Feeling creative? Here are a few ways to mix it up, because who likes being basic all the time?
- Ice Cream Sandwich Swap: Not an Oreo fan? (Gasp!) Use chocolate chip cookie dough sandwiches, vanilla, or even Neapolitan ice cream sandwiches for a different flavor profile.
- Cool Whip Alternatives: You could use homemade whipped cream, but be warned, it tends to be less stable when frozen for long periods. A tub of store-bought frozen whipped topping is your best bet for convenience and stability.
- Topping Adventures: Instead of crushed Oreos, try crushed chocolate chip cookies, M&Ms, sprinkles, chopped nuts, or even a drizzle of caramel sauce. Get wild!
- Add-in Layers: Feeling extra? Add a thin layer of hot fudge (let it cool slightly first!) or a sprinkle of mini chocolate chips between your ice cream sandwich and Cool Whip layers.
FAQ (Frequently Asked Questions)
Got questions? I’ve got answers, delivered with a side of sass.
- Can I use regular whipped cream instead of Cool Whip?
Well, technically yes, but why hurt your soul like that? Cool Whip holds its structure much better in the freezer. Homemade whipped cream tends to get icy and lose its fluffiness. Stick with the cool stuff!
- How long does it really need to freeze?
Minimum 4 hours to be sliceable, but **overnight is truly best** for optimal firmness and easier slicing. Trust me on this one.
- What size pan should I use?
A 9×13 inch baking dish is pretty standard and works perfectly for about 12-16 sandwiches. If you want a thicker, smaller cake, go for an 8×8 or 9×9 inch pan and stack more layers.
- Can I make this ahead of time for a party?
Absolutely! This is practically *designed* for make-ahead convenience. Whip it up the day before, stash it in the freezer, and pull it out right before serving. You’ll be the hero of the party!
- My ice cream sandwiches are stuck together in the box! Help!
Don’t panic! Run a little warm water over the outside of the box or gently pry them apart with a butter knife. They’ll loosen up. Or, just eat the one that broke. Quality control, right?
- Can I add fresh fruit to this cake?
Honestly, not really recommended. Fruit tends to get super icy and lose its appeal when frozen for a long time within an ice cream cake. Save the fresh berries for a topping *just* before serving, if you must.
Final Thoughts
See? I told you it was easy peasy lemon squeezy. You’ve basically unlocked a cheat code for impressing guests (or just yourself, no judgment). This Oreo Ice Cream Sandwich Cake is a testament to the fact that you don’t need fancy skills or expensive gadgets to create something truly delicious. Now go forth and conquer your dessert cravings! You’ve earned it, you magnificent, no-bake culinary wizard!


