So, you’ve got that craving, huh? That deep, soul-stirring whisper for something warm, sweet, and utterly comforting, but also kinda fancy-looking? And let’s be real, you’re *not* about to spend your entire Saturday wrestling a rolling pin and muttering expletives. Good news, my friend. I’ve got your back. We’re making Apple Pie, but like, the *cool* apple pie. The one that makes people gasp, “Did *you* actually make that?” Yes, honey, you did. Get ready for an Apple Pie with a show-stopping spiral design that’s easier than parallel parking.
Why This Recipe is Awesome
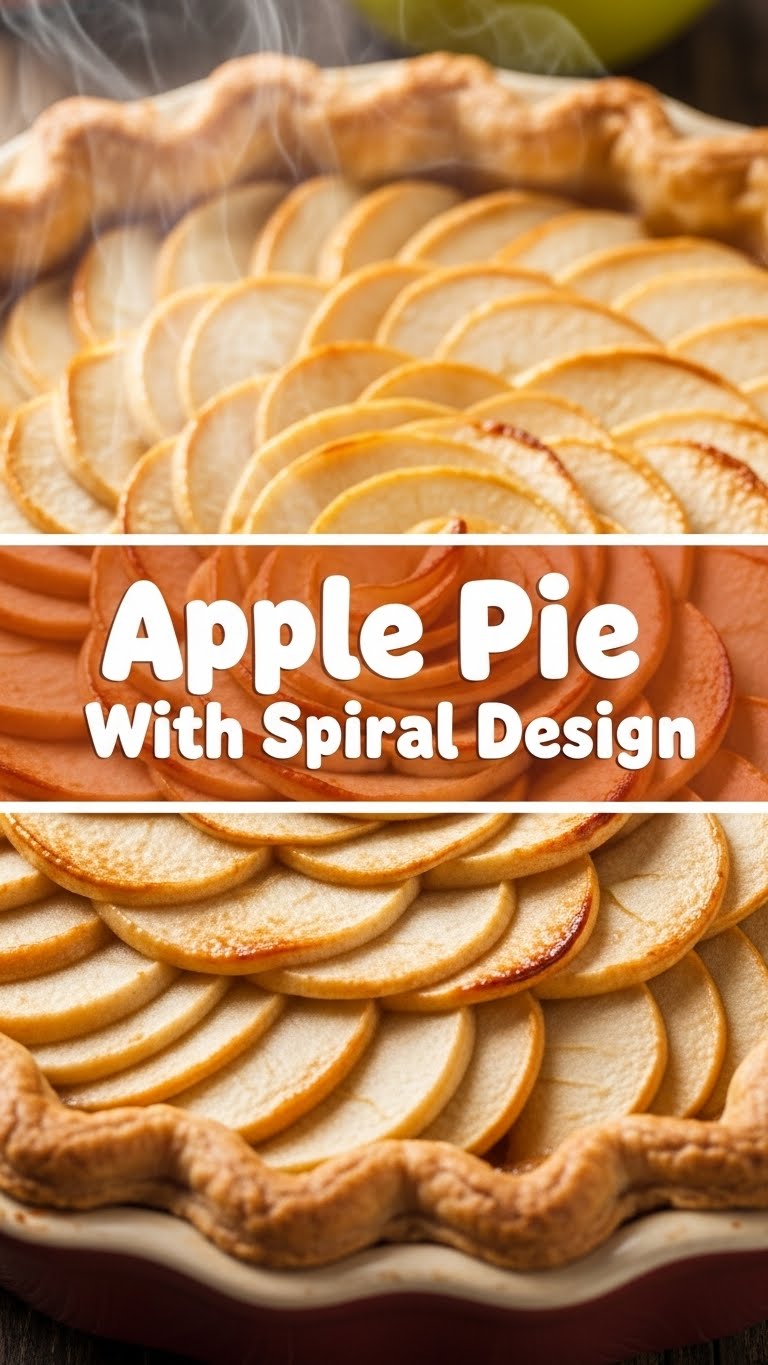
Why is this particular apple pie recipe going to be your new BFF? Well, for starters, it looks like you graduated from culinary school with honors, but in reality, it’s pretty much **idiot-proof**. Seriously. I tried it, and my kitchen usually looks like a crime scene after baking. Plus, that spiral design? It’s not just for show (though it *is* super showy). It ensures every bite gets that perfect fruit-to-crust ratio. No soggy bottoms here, friends. Just pure, unadulterated apple-y bliss. It’s awesome because it’s **easy, beautiful, and ridiculously delicious**. Boom.
Ingredients You’ll Need
- **For the Crust (or grab two!)**:
- **2 ½ cups all-purpose flour**: The foundation of your dreams.
- **1 teaspoon salt**: Don’t skip it; it brings out the flavor.
- **1 cup (2 sticks) unsalted butter**, very cold and cubed: Seriously, don’t skimp here. Your pie crust deserves the best. Unless you *want* a sad, flavorless crust. Your call, I guess.
- **½ cup ice water (or a little more)**: The colder, the flakier. Trust me on this one.
- *OR* **1 box (2 count) refrigerated pie crusts**: No shame in the convenience game!
- **For the Filling**:
- **6-8 medium Granny Smith apples (or a mix!)**: About 2-2.5 lbs. These are the OG pie apples – tart, firm, and hold their shape. Don’t be using those mushy Red Delicious types, unless you enjoy apple sauce in a crust. No judgment, just… don’t.
- **½ cup granulated sugar**: Sweetness without overpowering the apples.
- **¼ cup packed light brown sugar**: Adds a lovely caramel note.
- **2 tablespoons all-purpose flour (or cornstarch)**: Our secret weapon against a watery pie. Thickens things up nicely.
- **1 teaspoon ground cinnamon**: Because what’s apple pie without cinnamon? A tragedy, that’s what.
- **¼ teaspoon ground nutmeg**: A little warmth, a little spice.
- **Pinch of salt**: Balances all those sweet flavors.
- **2 tablespoons unsalted butter**, cut into small pieces: Adds richness and makes the filling extra luscious.
- **1 egg**, whisked with 1 tablespoon water (for egg wash): For that beautiful, golden shine.
- **Coarse sugar (optional)**: For a sparkly, crunchy topping. Because why not?
Step-by-Step Instructions
- **Get Cracking on the Crust:** If you’re using store-bought (no shame!), grab two discs and let them sit out for 10-15 minutes to soften slightly. If you’re a purist, make your favorite double-crust recipe (remember, **cold butter is key!**) and chill it like a boss for at least 30 minutes.
- **Prep Your Apples:** Peel, core, and slice those beauties into thin, even pieces. We’re talking about 1/8 to 1/4 inch thick. Think about how they’ll spiral. **Consistency is important here, folks!**
- **Mix the Filling:** In a large bowl, gently toss your sliced apples with granulated sugar, brown sugar, flour (or cornstarch), cinnamon, nutmeg, and a pinch of salt. Make sure every slice gets some love.
- **Roll Out the Dough:** On a lightly floured surface, roll out one pie crust disc into a 12-inch circle. Carefully transfer it to a 9-inch pie plate. Trim the edges, leaving about an inch of overhang. Pop it in the fridge while you do the next step.
- **The Spiral Magic:** Now for the fun part! Retrieve your pie plate. Start arranging your apple slices, overlapping them slightly, in concentric circles from the outer edge of the pie plate inwards. Stand them up a bit, creating a beautiful spiral. Once you’ve got your first layer, scatter about half of the small butter pieces over it. Then, continue building your spiral with the remaining apples and butter, working towards the center, piling them up slightly. You want it to look full and gorgeous!
- **Top It Off:** Roll out your second pie crust disc into a 12-inch circle. Carefully place it over the apple spiral. Trim the top crust to match the bottom overhang. Now, crimp the edges together—you can use your fingers, a fork, or get fancy with a fluted edge.
- **Vent and Glaze:** Cut a few slits in the top crust (or get artistic with a leaf or apple cutout!) to allow steam to escape. Brush the entire top crust with your egg wash and sprinkle with coarse sugar, if using.
- **Bake It Up:** Place your pie on a baking sheet (to catch any potential drips – better safe than sorry!). Bake in a preheated oven at **425°F (220°C)** for 15 minutes. Then, reduce the temperature to **375°F (190°C)** and continue baking for another 45-60 minutes, or until the crust is golden brown and the filling is bubbly. If the crust starts to get too dark, loosely tent it with foil.
- **Cool Down:** This is the hardest part, IMO. Let the pie cool on a wire rack for at least 2-3 hours before slicing and serving. This allows the filling to set properly. Impatience leads to runny pie, and nobody wants that.
Common Mistakes to Avoid
- **Not chilling your dough**: Warm dough = tough, sad crust. Embrace the chill!
- **Thinking you don’t need to preheat the oven**: Rookie mistake! A cold oven won’t give you that initial puff and set for the crust.
- **Using the wrong apples**: Seriously, those mealy apples will turn into a watery, flavorless mess. Stick to firm, tart varieties.
- **Underfilling or overfilling**: Too little and it’s a sad, empty pie. Too much and it overflows everywhere. Find that sweet spot.
- **Not letting it cool**: I know, I know, it smells heavenly. But cutting into a hot pie before it’s set will give you a messy, runny slice. **Patience, grasshopper.**
Alternatives & Substitutions
- **Fruit Swap**: Not an apple fan (gasp!) or just want to mix it up? Try pears, peaches, or even mixed berries! Adjust sugar levels based on the fruit’s sweetness.
- **Sugar Switch**: Want less refined sugar? You can totally use maple syrup or honey for part of the brown sugar, but know it might change the texture slightly.
- **Gluten-Free Crust**: There are some fantastic gluten-free pie crust recipes and store-bought options out there. Go for it!
- **Spice It Up**: Feel free to add a pinch of allspice, cardamom, or even a tiny bit of ginger for an extra kick in your filling.
- **No Egg Wash?**: You can brush the crust with milk or cream for a softer shine, or just skip it. It won’t be quite as golden, but still tasty!
FAQ (Frequently Asked Questions)
- **Can I use margarine instead of butter for the crust?** Well, technically yes, but why hurt your soul like that? Butter provides superior flavor and flakiness. Margarine just… exists. For pie perfection, stick with butter.
- **My apples aren’t getting tender! What did I do wrong?** You probably sliced them too thick, or your oven temperature was off. Thinner slices and proper baking time are your friends.
- **How do I prevent a soggy bottom crust?** A few tricks! Make sure your apples are tossed well with flour to absorb juices, don’t over-moisten your bottom crust when assembling, and pre-baking (blind baking) your bottom crust slightly before adding the filling can help a ton.
- **Can I make this pie ahead of time?** Absolutely! You can assemble the whole pie, wrap it well, and refrigerate it for up to 24 hours before baking. You can even freeze it unbaked for a few months! Just add an extra 15-20 minutes to the baking time if baking from frozen.
- **How do I store leftover pie?** Cover it loosely and keep it at room temperature for up to two days, or pop it in the fridge for up to 4-5 days. Reheat a slice slightly for that fresh-baked feel!
Final Thoughts
So there you have it, your new go-to recipe for an Apple Pie that looks like it came straight out of a fancy bakery, but tastes like pure homemade love. You’ve got the skills, you’ve got the recipe, and now you’re about to have the most impressive pie on the block. Now go impress someone—or yourself—with your new culinary skills. You’ve earned it! And if you eat half of it straight from the oven, I won’t tell. Pinky promise. Happy baking, superstar!


