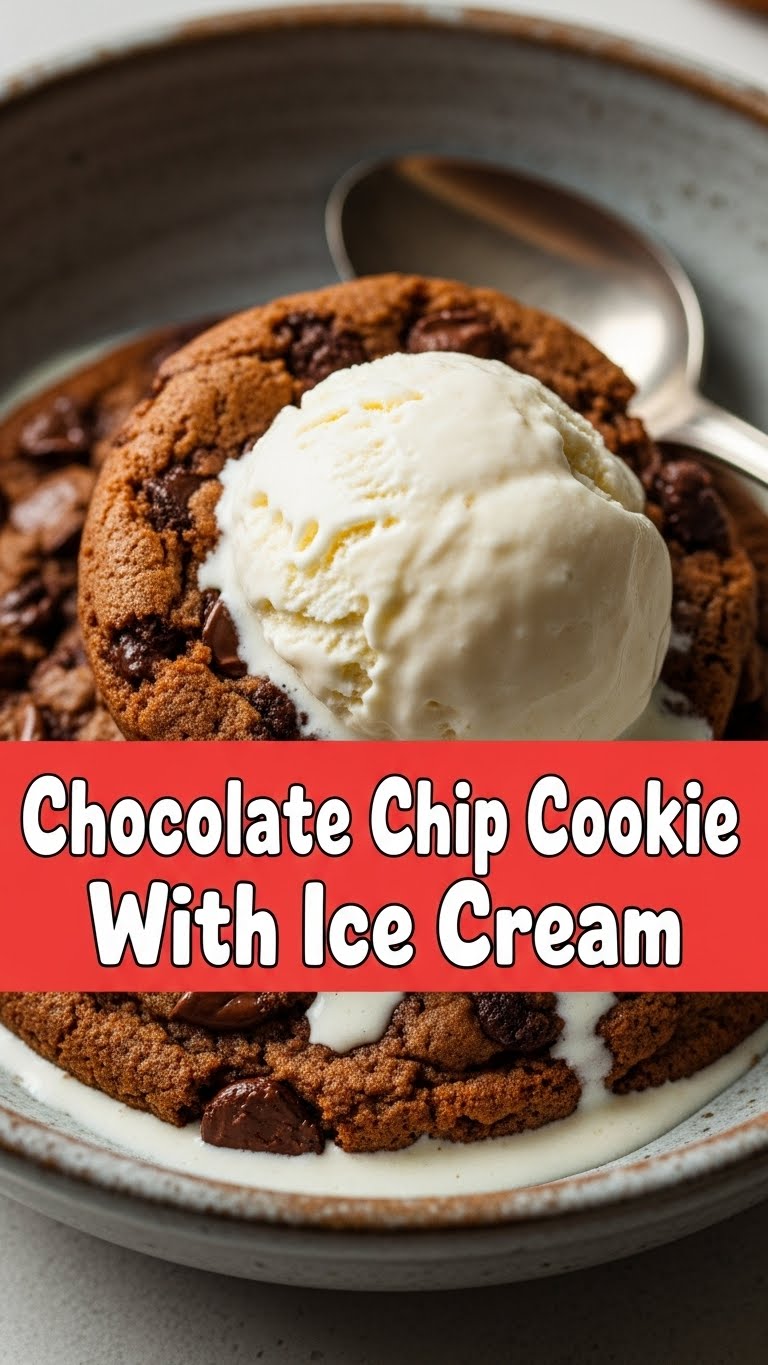
So you’re craving something tasty but too lazy to spend forever in the kitchen, huh? Same. We’ve all been there – staring into the abyss of an empty fridge, dreaming of something warm, gooey, and absolutely smothered in something cold and creamy. Well, today, my friend, your dreams are coming true. We’re talking about the ultimate comfort combo: **Chocolate Chip Cookies with Ice Cream**. But not just any cookies; we’re making the kind that’ll make you feel like a culinary genius, even if your usual go-to is instant ramen.
Why This Recipe is Awesome
Okay, let’s be real. This isn’t just a recipe; it’s a life hack disguised as dessert. First off, it’s pretty much **idiot-proof**. I’ve personally tested this theory, and if I didn’t mess it up, you’re golden. Secondly, it’s fast. Like, “I need chocolate now” fast. You’ll be sinking your teeth into warm, melty goodness before your existential crisis even has a chance to fully develop. And finally, it’s versatile. Got weird cravings? No problem. This recipe is your canvas for deliciousness. Plus, who doesn’t love the look of pure joy on someone’s face (even if that someone is just you in a mirror) when they bite into a warm cookie topped with a melting scoop of their favorite ice cream? No one, that’s who.
Ingredients You’ll Need
Gather ’round, my fellow lazy gourmands! Here’s your simple shopping list. Don’t worry, nothing too fancy, unless your definition of fancy is “butter.”
- 1/2 cup (1 stick) Unsalted Butter: The golden stuff that makes everything better (and probably clogs your arteries, but who cares today?). Make sure it’s softened, not melted.
- 1/4 cup Granulated Sugar: For that classic sweet crunch.
- 1/2 cup Packed Light Brown Sugar: This is where the chewiness comes from. Don’t skimp on the packing!
- 1 large Egg: The binder. Don’t forget it, unless you want crumbly sad cookies.
- 1 teaspoon Vanilla Extract: Because everything is better with a splash of vanilla. IMO, it’s non-negotiable.
- 1 1/4 cups All-Purpose Flour: The foundation of our cookie dreams.
- 1/2 teaspoon Baking Soda: Helps them get puffy and soft. Science!
- 1/4 teaspoon Salt: Balances out all that sweetness. Trust me, it makes a difference.
- 1 cup Chocolate Chips: The reason we’re all here. Semi-sweet is classic, but hey, you do you.
- Your Favorite Ice Cream: Seriously, ANY flavor. Vanilla, chocolate, mint chip, salted caramel… it’s your party.
Step-by-Step Instructions
Alright, apron on (or don’t, I won’t tell), let’s get baking! These steps are so easy, you can probably do them with one eye closed.
- **Preheat Your Oven & Prep Your Pan:** First things first, get that oven nice and toasty to **375°F (190°C)**. Line a baking sheet with parchment paper. This isn’t just for easy cleanup (though it is!), it also helps prevent sticking.
- **Cream the Butter & Sugars:** In a large bowl, using an electric mixer (or just some good old elbow grease), beat together the softened butter, granulated sugar, and brown sugar until it’s light and fluffy. This usually takes about 2-3 minutes. Don’t rush perfection!
- **Add Egg & Vanilla:** Crack that egg in there, then pour in the vanilla extract. Mix until just combined. Don’t go crazy here; we’re not making scrambled eggs.
- **Whisk Dry Ingredients:** In a separate, smaller bowl, whisk together the flour, baking soda, and salt. Give it a good swirl so everything is evenly distributed.
- **Combine Wet & Dry:** Gradually add the dry ingredients to the wet ingredients, mixing on low speed until *just* combined. And I mean **just combined**. Overmixing is the enemy of tender cookies!
- **Fold in Chocolate Chips:** Now for the good stuff! Gently fold in your chocolate chips. Use a spatula for this so you don’t overmix the dough.
- **Scoop & Bake:** Drop rounded tablespoons of dough onto your prepared baking sheet, leaving a couple of inches between each cookie. These babies need room to spread their wings.
- **Bake ‘Em Up:** Pop ’em in the oven for **9-11 minutes**, or until the edges are golden brown and the centers are still slightly soft. That’s the secret to gooey perfection!
- **Cool (A Little) & Serve:** Let the cookies cool on the baking sheet for about 5 minutes. They’ll continue to set up. Then, transfer them to a wire rack. But honestly, who has time for that? Grab a warm cookie, plop a generous scoop of your favorite ice cream on top, and get ready for pure bliss.
Common Mistakes to Avoid
Because nobody wants a sad, flat, or burnt cookie. Learn from my past errors, young padawan!
- **Overmixing the Dough:** I cannot stress this enough. Once you add the flour, mix *just* until everything comes together. Overmixing develops the gluten too much, leading to tough, chewy, cardboard-like cookies. **Stop when you see no more streaks of flour!**
- **Using Cold Butter:** Softened butter is key for proper creaming with the sugars, which creates air pockets for a light, tender cookie. Cold butter won’t incorporate properly.
- **Not Preheating the Oven:** Rookie mistake! Your oven needs to be at the correct temperature from the get-go. If it’s too cool, your cookies will spread too much before they set, resulting in thin, crispy wafers instead of soft, chewy ones.
- **Baking for Too Long:** Unless you like hockey pucks, don’t overbake! The cookies might look slightly underdone in the middle when you pull them out, but they’ll continue to cook on the hot baking sheet. This is the secret to soft centers.
- **Eating All the Dough Before Baking:** Okay, maybe not a “mistake” per se, but then you won’t have any cookies, will you? Self-control, my friend. (Though a little taste test never hurt anyone… *ahem*).
Alternatives & Substitutions
Feeling adventurous or just missing an ingredient? No worries, we can totally hack this!
- **Butter Alternatives:** Can you use margarine? Well, technically yes, but why hurt your soul like that? If you absolutely *must*, use a good quality stick margarine. For a dairy-free option, use a plant-based butter alternative that’s designed for baking.
- **Chocolate Chips:** The world is your oyster! Swap semi-sweet for milk chocolate, dark chocolate, white chocolate, peanut butter chips, or a mix. Throw in some chopped nuts (pecans or walnuts are great!), M&Ms, or even some shredded coconut. Go wild!
- **Flour Power:** You can try substituting a small portion of the all-purpose flour with whole wheat flour for a nuttier flavor, but stick mainly to AP flour for the best texture. Gluten-free 1:1 baking flour can also work, but results may vary slightly.
- **Ice Cream Flavors:** This is where the real fun begins! Vanilla is classic, but imagine a warm cookie with salted caramel ice cream, or mint chip, or strawberry! Get creative and match your cookie’s personality with its icy partner.
- **Make it a Skillet Cookie:** Instead of individual cookies, press all the dough into a small cast-iron skillet (greased, of course!) and bake until the edges are set and the center is gooey. Serve it hot out of the skillet with scoops of ice cream directly on top!
FAQ (Frequently Asked Questions)
Got questions? I’ve got answers, probably with a side of sarcasm.
- Can I use cold butter?
No, my friend, please don’t. Cold butter is like a grumpy cat; it just won’t cooperate. Make sure it’s softened to room temp so it creams properly with the sugars. You want light, fluffy butter, not chunky cold butter.
- My cookies are flat! What went wrong?
Ah, the dreaded flat cookie syndrome. Usually, this means your butter was too soft (partially melted), your oven wasn’t preheated, or you didn’t chill your dough. A quick fix for overly soft dough is popping it in the fridge for 15-30 minutes before baking.
- Can I make the dough ahead of time?
Yes, you responsible human, you! You can absolutely make the dough and chill it in the fridge for up to 3 days. Just bring it closer to room temp before scooping, or if it’s too stiff, let it sit out for 10-15 minutes.
- How long do these cookies last?
Hah! As if they’ll last past five minutes. But seriously, stored in an airtight container at room temperature, they’ll stay fresh for 3-5 days. If they last that long, you have more willpower than me.
- Can I freeze the cookie dough?
Absolutely! Scoop the dough balls onto a baking sheet, freeze until solid, then transfer to a freezer-safe bag. They’ll keep for up to 3 months. When you’re ready to bake, just place them on a baking sheet and add a couple of extra minutes to the baking time. Fresh cookies on demand? Yes, please!
Final Thoughts
And there you have it, folks! Your new favorite dessert, courtesy of your (humble) friend who just wants you to be happy and full of cookies. Seriously, this recipe is a game-changer for those moments when you need a hug in dessert form. It’s simple, it’s quick, and it’s ridiculously delicious. So go forth, wield your spatula with confidence, and create some magic. Now go impress someone—or yourself—with your new culinary skills. You’ve earned it!


