So, you’re scrolling, you’re hungry, and you’re thinking, “What’s a dessert that screams ‘I’m a fancy grown-up’ but also whispers ‘I just want to eat something delicious and easy’?” Well, my friend, you’ve hit the jackpot. Forget those complicated recipes that require a culinary degree. We’re about to dive into the world of **Creme Brulee with Ice Cream**, and trust me, it’s easier than trying to get a cat into a bath. (Unless you have a very chill cat, then maybe it’s equally easy).
Why This Recipe is Awesome
Let’s be real, Creme Brulee sounds intimidating, right? Like it belongs in a Michelin-star restaurant, not your kitchen. But here’s the secret: it’s surprisingly simple. Seriously, it’s almost foolproof. Even I, who once mistook baking powder for baking soda (it was a dark day for those cookies), can nail this one. Plus, we’re adding ice cream. Why? Because everything is better with ice cream, **duh**. It’s the perfect cool, creamy counterpoint to that warm, crunchy sugar crust. It’s rich, it’s impressive, and it makes people think you’ve got some kind of dessert superpowers. (Don’t worry, your secret’s safe with me.)
Ingredients You’ll Need
Gather ’round, my sweet-toothed conspirators! Here’s what you’ll need for your culinary adventure. Keep it simple, keep it classy:
- 2 cups Heavy Cream: This is where the magic happens. Don’t skimp. We’re going for rich, not sad-and-watery.
- 5 large Egg Yolks: The heart and soul of your custard. Separate them carefully; we don’t want any whitey-brown bits.
- 1/2 cup Granulated Sugar (plus more for topping): Sweetness for the custard, and that glorious, crunchy top layer.
- 1 teaspoon Vanilla Extract: Go for the good stuff. It makes a difference. No imitation vanilla, unless you want your brulee to taste like a candle.
- Pinch of Salt: Just a tiny bit to balance out all that sweetness. Think of it as the bassline in a great song.
- Your Favorite Ice Cream: This is where you do you. Vanilla, salted caramel, chocolate, pistachio… the world is your oyster!
Step-by-Step Instructions
Alright, apron on (or not, I don’t judge), let’s get cooking!
- **Preheat Your Oven & Prep:** Get that oven up to 300°F (150°C). Grab four 4-6 ounce ramekins. Find a baking dish large enough to hold them all, because we’re doing a water bath (fancy, right?). Boil some water for said water bath.
- **Warm the Cream:** Pour your heavy cream into a saucepan. Heat it over medium heat until it’s hot and steamy, but **don’t let it boil**. You just want to see tiny bubbles around the edges. Remove it from the heat.
- **Whisk the Goodness:** In a separate bowl, whisk together the egg yolks, 1/2 cup granulated sugar, vanilla extract, and that tiny pinch of salt until the mixture is light yellow and slightly thickened.
- **Temper, Temper!:** This is crucial. Slowly, *very slowly*, pour about half of the hot cream into the egg yolk mixture while continuously whisking. This is called “tempering” and it prevents your eggs from scrambling. Nobody wants scrambled egg dessert. Then, pour the tempered egg mixture back into the saucepan with the remaining hot cream. Whisk until fully combined.
- **Strain (Optional but Recommended):** For the smoothest custard ever, pour the mixture through a fine-mesh sieve into a clean bowl or a large measuring cup with a spout. This catches any little bits of cooked egg or impurities.
- **Fill ‘Em Up:** Divide the custard mixture evenly among your ramekins. Place the ramekins in your large baking dish.
- **Water Bath Time:** Carefully pour the hot water you boiled earlier into the baking dish, around the ramekins, until it comes about halfway up their sides.
- **Bake It Up:** Carefully transfer the baking dish to your preheated oven. Bake for 30-35 minutes, or until the edges are set but the centers still jiggle slightly when you gently shake a ramekin. **Don’t overbake!**
- **Chill Out:** Carefully remove the ramekins from the water bath and let them cool on a wire rack. Once they’re cool enough, cover them with plastic wrap and chill them in the fridge for at least 4 hours, or even better, overnight. **This is not optional.**
- **Brulee Time!:** When you’re ready to serve, pat the tops of the chilled custards dry with a paper towel. Sprinkle a thin, even layer of granulated sugar (about 1-2 teaspoons per ramekin) over the top. Now, grab your kitchen torch (or fire up your broiler, see FAQ!). Torch the sugar until it melts, caramelizes, and turns a beautiful golden brown crust.
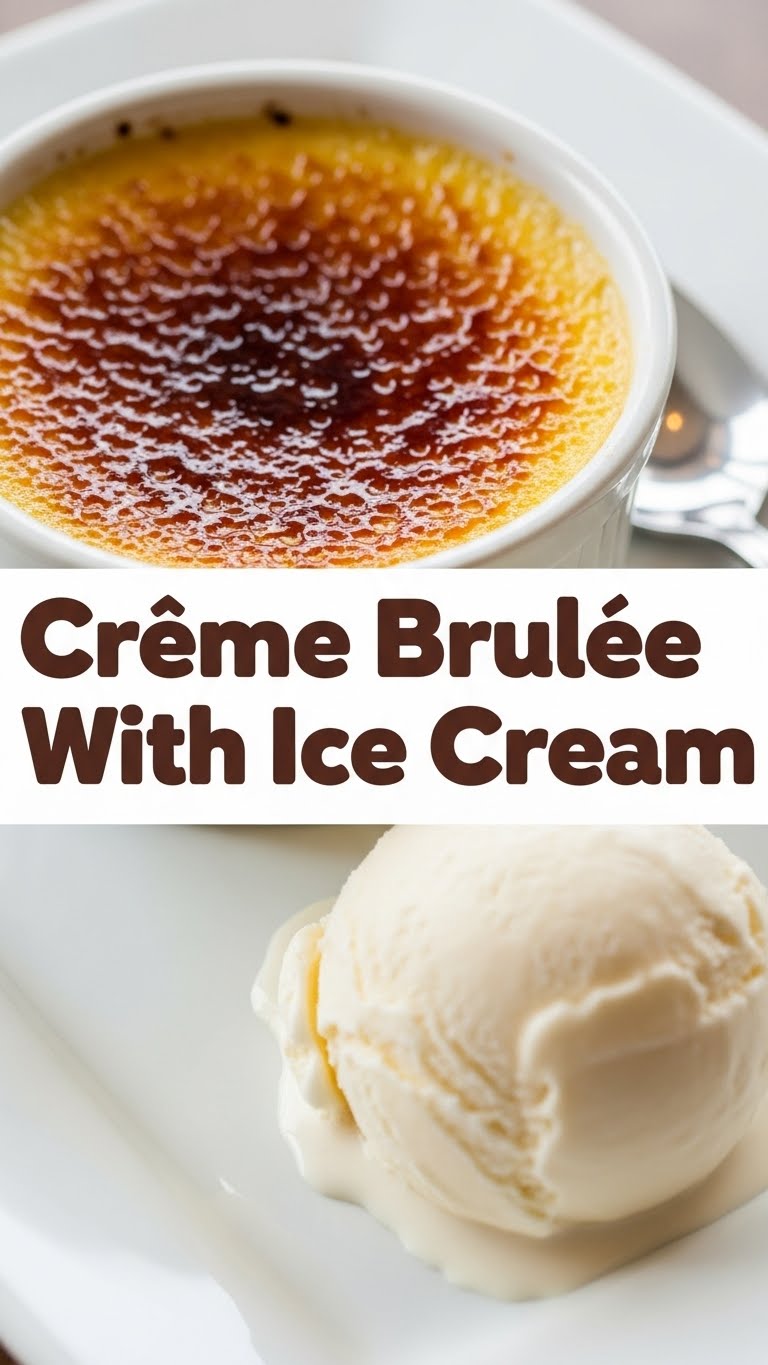
- **Serve with a Scoop (or two)!:** Immediately after torching (that crust is best when warm and fresh!), grab a scoop of your favorite ice cream and place it right on top or beside your freshly torched creme brulee. Enjoy your masterpiece!
Common Mistakes to Avoid
Even though this recipe is super chill, there are a few potholes you can swerve around:
- **Scrambled Eggs (The Horror!):** If you add hot cream to the eggs too fast, you’ll end up with a sweet omelet. Remember: **slow and steady wins the tempering race.**
- **Overbaking is a Brulee Blunder:** Baking for too long will give you a dense, rubbery custard instead of that silky smooth texture. Watch for the jiggle!
- **Skipping the Chill:** Impatience is a virtue, but not here. If you try to torch warm brulee, the sugar will melt into the custard instead of forming a crisp crust. **Chill out, literally.**
- **Burning the Sugar (A Tragic End):** Keep that torch moving! If you hold it in one spot too long, you’ll get a bitter, burnt sugar taste. Nobody wants that.
Alternatives & Substitutions
Feeling adventurous? Here are some ways to shake things up:
- Flavor Boosters: Instead of vanilla, try adding a tablespoon of orange zest, a dash of almond extract, a shot of espresso (for coffee brulee!), or a splash of rum or Grand Marnier to the cream as it heats.
- Cream Swap: For a slightly lighter version, you can use half-and-half instead of heavy cream, but honestly, **why would you?** The richness is key here, IMO.
- Sugar on Top: While granulated sugar is standard, you can also use turbinado sugar for a slightly coarser, crunchier crust. It’s all about personal preference!
- Ice Cream Extravaganza: Don’t limit yourself to vanilla! Salted caramel, chocolate, strawberry, pistachio, coffee… any flavor that tickles your fancy will pair beautifully. Get creative!
FAQ (Frequently Asked Questions)
Got questions? I’ve got answers (and a little sass)!
Can I make Creme Brulee ahead of time?
Oh, absolutely! In fact, it’s encouraged. You can make the custards, chill them (un-torched!) for up to 3 days in the fridge. Torch right before serving for the best crust. Genius, right?
What if I don’t have a kitchen torch?
No torch? No problem! Your oven broiler is your trusty sidekick here. Place your sugar-topped ramekins on a baking sheet and pop them under a preheated broiler (rack about 4-6 inches from the heat). Keep the oven door slightly ajar and **watch them like a hawk!** It takes mere seconds to go from perfect to charcoal. Remove once golden and bubbly.
Why only egg yolks? Can I use whole eggs?
Well, technically you *could* use whole eggs, but why hurt your brulee like that? Yolks are what give creme brulee its incredible richness, silky texture, and beautiful pale yellow color. Whole eggs would make it more like a baked custard, which is fine, but it’s not the same creamy dream.
My sugar burned! What happened?
Too much heat, too fast, or not moving your torch enough! Scrape off the burnt bits (gently!), re-sprinkle with fresh sugar, and try again, keeping the torch moving constantly and not too close. Practice makes perfect, and also means more brulee.
What’s the best ice cream flavor to pair with it?
Honestly? Whatever makes your heart sing! Vanilla is classic for a reason, but a rich chocolate, a tangy raspberry sorbet, or even a nutty pistachio ice cream can be phenomenal. Don’t let anyone tell you what to scoop!
My custard is too thin/too thick. Help!
Too thin usually means underbaked. Next time, give it a few more minutes in the oven until the edges are set with a slight jiggle in the center. Too thick often means overbaked, or perhaps your yolks were extra large. Remember, a little jiggle is your friend!
Final Thoughts
There you have it, my friend! You’re now equipped to create a dessert that’s both elegant and utterly delicious. It’s a showstopper, a crowd-pleaser, and frankly, a pretty awesome way to treat yourself after a long day of, well, existing. Go forth, embrace the torch (or broiler!), and revel in the glory of your homemade Creme Brulee with Ice Cream. You’ve earned it!


