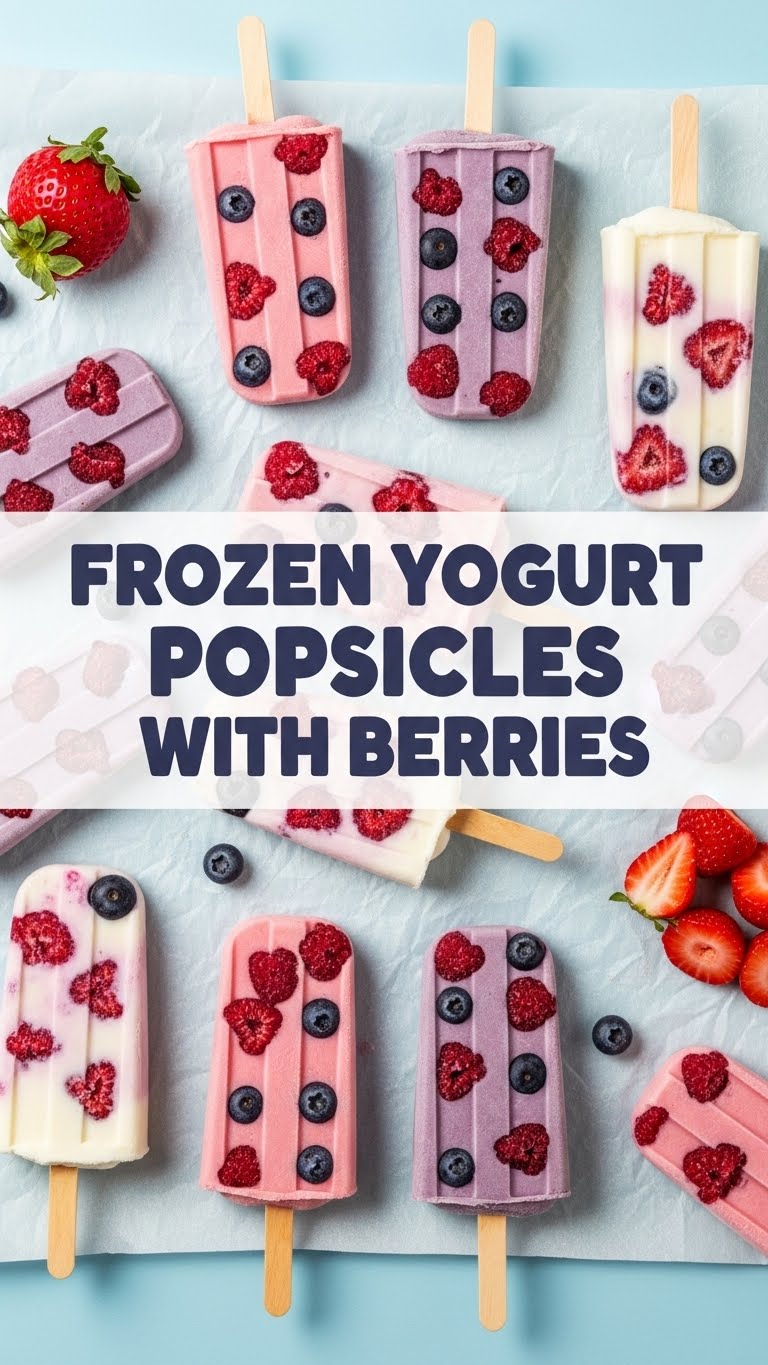
So, the sun’s doing its best to melt your face off, and your brain is screaming for something cold, sweet, and maybe, just maybe, not entirely terrible for you? You’re in luck, my friend. We’re diving into the ridiculously easy world of Frozen Yogurt Popsicles with Berries!
Why This Recipe is Awesome
Why bother with this, you ask? Because it’s basically the culinary equivalent of a warm hug for your tastebuds that won’t make you regret your life choices five minutes later. Seriously, it’s so simple, an actual sloth could probably make it – provided it had opposable thumbs and a blender.
It’s **idiot-proof**, packed with good stuff (hello, antioxidants!), and tastes like a tiny, frozen party in your mouth. Plus, you get to pretend you’re being super healthy while still enjoying a treat. Winning!
Ingredients You’ll Need
- Plain Greek Yogurt: The OG base. Go for full-fat if you’re feeling fancy, or fat-free if you’re pretending to be virtuous. Whatever floats your boat, as long as it’s not flavored with ‘mystery fruit’ – trust me.
- Mixed Berries: Fresh or frozen, your choice! Strawberries, blueberries, raspberries, blackberries – get the whole gang together. They’re the stars of the show, after all.
- Honey or Maple Syrup: For that touch of natural sweetness. Adjust to your liking, because some of us have a sweeter tooth than others (me, it’s me).
- Vanilla Extract (optional, but highly recommended): Just a dash to elevate things. It’s like the secret weapon of deliciousness.
- Popsicle Molds & Sticks: Obvious, but worth mentioning. Unless you’re planning to eat it with a spoon directly from the blender, which, no judgment, but it won’t be a ‘popsicle’ then, will it?
Step-by-Step Instructions
- Gather Your Goodies: Alright, clear that counter space. You’ll need all your ingredients within arm’s reach. This isn’t rocket science, but organization helps.
- Berry Blast: Grab about 1 cup of your mixed berries. If they’re frozen, give them a quick thaw, or just let your blender work a bit harder. Pop them into your blender.
- Sweet Swirl: Add your plain Greek yogurt (about 2 cups), honey/maple syrup (start with 2-3 tablespoons and add more later if you’re a sweet fiend), and that optional vanilla extract. If you’re using fresh berries, maybe a splash of milk or water to help it blend.
- Blend It Up: Pulse and blend until it’s smooth and creamy. You want it well combined, but a few small berry chunks are totally cool – adds character, right?
- Taste Test & Adjust: This is the best part! Grab a spoon, take a tiny taste. Does it need more sweetness? More vanilla? Adjust until it’s exactly how you like it. **Don’t skip this step!**
- Mold Magic: Carefully pour your glorious mixture into your popsicle molds. Don’t overfill them, unless you want an icy mess later. Leave a little room for expansion.
- Stick ‘Em Up: Insert your popsicle sticks into the molds. Make sure they’re straight so your future self doesn’t have a wobbly pop.
- Freeze Fest: Now for the hard part: waiting. Pop them into the freezer for at least 4-6 hours, or until they’re solid enough to survive a wrestling match with a toddler. Overnight is usually best, FYI.
- Enjoy Your Victory: Once they’re solid, run the molds under warm water for a few seconds to help them release. Then, peel ’em out and enjoy your homemade masterpiece!
Common Mistakes to Avoid
- Impatience, Thy Name Is You: Trying to unmold them after only an hour. Seriously? These aren’t speed pops. Give them time. You wouldn’t pull a cake out of the oven halfway through, would you? (Okay, maybe you would, but don’t do it here).
- Under-Sweetening: Forgetting to taste test and ending up with a popsicle that tastes like sour health. Nobody wants that. **Always taste test before freezing!**
- Overfilling Molds: Your freezer will thank you for not turning into an archaeological dig site of frozen yogurt overflow. Leave a little space at the top.
- Ignoring the Release Trick: Prying them out with brute force. You’ll just break the stick or the pop. A quick warm water bath is your friend, not your enemy.
Alternatives & Substitutions
- Different Fruits: Not a berry person? What?! Just kidding (mostly). Try sliced peaches, mango chunks, kiwi, or even a banana for a creamier texture. Go wild!
- Greek Yogurt Swap: You can totally use regular yogurt, but Greek gives you that awesome, creamy texture and more protein. If you do use regular, it might be a bit icier. You could also try dairy-free yogurt for a vegan version!
- Sweetener Switch: Agave nectar, stevia, or even a ripe mashed banana can stand in for honey or maple syrup. Just remember to adjust for sweetness.
- Add-ins for Extra Oomph: Feel free to stir in some chia seeds for fiber, a spoonful of nut butter for extra richness (and protein!), or even a tiny sprinkle of chocolate chips (because chocolate).
FAQ (Frequently Asked Questions)
Can I use flavored yogurt? You *can*, but why would you want to? Plain lets the berries shine and gives you control over the sweetness. Flavored yogurt might make it too sweet or give it an artificial taste that battles with your beautiful berries. Stick to plain, IMO.
My popsicles are too icy, what did I do wrong? Probably not enough fat or sugar. Full-fat yogurt helps with creaminess, and a bit more sweetener (honey, maple syrup) helps keep them less rock-solid. A mashed banana or a spoonful of nut butter can also work wonders for texture.
How long do these last in the freezer? Oh, weeks! If they even make it that long. Realistically, up to 2-3 weeks in an airtight container. But honestly, they’ll probably be gone by tomorrow.
Do I really need popsicle molds? Technically no. You can use small paper cups and wooden sticks, or even ice cube trays for mini pops. But molds are definitely easier and give you that classic shape. Don’t make life harder for yourself!
Can I make these ahead for a party? Absolutely! They’re the perfect make-ahead treat. Just keep them well-wrapped or in an airtight container until go-time. You’ll be the hero of the party, trust me.
What if I don’t have a blender? Okay, that’s a tough one for smooth pops. You could try mashing the berries *really* well and then stirring everything vigorously, but it won’t be as smooth. Maybe borrow a friend’s blender? Or just embrace the chunky life!
Final Thoughts
And there you have it, folks! Your very own, super easy, super delicious, and surprisingly healthy Frozen Yogurt Popsicles with Berries. You just whipped up a treat that’s perfect for scorching days, Netflix binges, or just because you deserve something yummy.
Now go impress someone—or yourself, because let’s be real, you’ve earned it! Enjoy your frosty masterpiece, and don’t forget to share (or don’t, I won’t tell).


