So, you’re craving something frosty, creamy, and ridiculously delicious, but the thought of battling grocery store crowds for a pint of the good stuff just isn’t cutting it, huh? Or maybe you just watched a dessert show and now you *need* something decadent, like, yesterday? Same. Total same. Let’s make some magic without the madness.
Why This Recipe is Awesome
Okay, buckle up, because this isn’t just *any* ice cream recipe. This is the “I-swear-I’m-a-gourmet-chef-but-really-I-just-followed-three-steps” kind of awesome. Seriously, it’s so easy, your cat could probably supervise (and maybe even “help” if you’re not careful with the cream). We’re talking **no ice cream maker required**, minimal ingredients, and maximum “OMG, I made this?!” factor. It’s basically adulting on easy mode. Plus, we’re topping it with homemade whipped cream because if you’re going to treat yourself, do it right. No sad, deflated, can-sprayed stuff here. We deserve better!
Ingredients You’ll Need
Get ready for a shockingly short list. You probably have half of these already, which makes you a domestic god/goddess in my book.
- 2 cups (480ml) Heavy Whipping Cream, super cold: This is our star. Don’t skimp, don’t substitute with anything “light.” We’re going full-fat fabulous today.
- 1 (14-ounce/397g) can Sweetened Condensed Milk: The magical sweetener and texture-giver. Just make sure it’s *sweetened* condensed milk, not evaporated milk. Big difference, trust me!
- 1 teaspoon Vanilla Extract: The classic. Adds that warm, comforting “ice cream” flavor. Feel free to go fancy with vanilla bean paste if you’re feeling extra boujee.
- For the Whipped Cream:
- 1 cup (240ml) Heavy Whipping Cream, also super cold: A separate batch, just for our fluffy cloud topping.
- 1-2 tablespoons Powdered Sugar (optional): For a touch of sweetness. Adjust to your liking.
- ½ teaspoon Vanilla Extract (optional): Again, for that lovely vanilla aroma.
Step-by-Step Instructions
Alright, friend, time to channel your inner kitchen wizard. You got this!
- Chill Out (Your Bowl, That Is): Grab a large mixing bowl and your whisk attachment (if using an electric mixer) and pop them in the freezer for about 10-15 minutes. This step is a **game-changer** for whipping cream effectively. Trust me, it makes all the difference.
- Whip It Good (For Ice Cream): Pour your 2 cups of *super cold* heavy whipping cream into your chilled bowl. Using an electric mixer (or serious arm muscles and a hand whisk), beat the cream on medium-high speed until it forms stiff peaks. What are stiff peaks? When you lift the whisk, the cream should stand up firmly and hold its shape. Don’t overmix, or you’ll end up with butter (which isn’t bad, just not what we’re going for).
- Fold in the Sweetness: Gently pour in the entire can of sweetened condensed milk and the 1 teaspoon of vanilla extract. Now, using a spatula, **gently fold** everything together until just combined. You want to keep all that beautiful air you just whipped into the cream. Don’t vigorously stir it; be a gentle giant.
- Freeze Your Future Happiness: Pour your lovely mixture into a freezer-safe container. An old loaf pan works great, or any other airtight container. Cover it tightly with a lid or plastic wrap. Pop it in the freezer for at least 6 hours, or ideally, overnight. Patience, young Padawan!
- Whip Up Your Cloud (Whipped Cream Time!): Once your ice cream is almost ready (or whenever you’re about to serve), grab your separate 1 cup of *super cold* heavy whipping cream. You can use the same chilled bowl if you quickly rinsed it. Beat it on medium-high speed until it starts to thicken. Add the powdered sugar and vanilla extract (if using) and continue beating until soft to medium peaks form. You want it fluffy and dreamy, not super stiff.
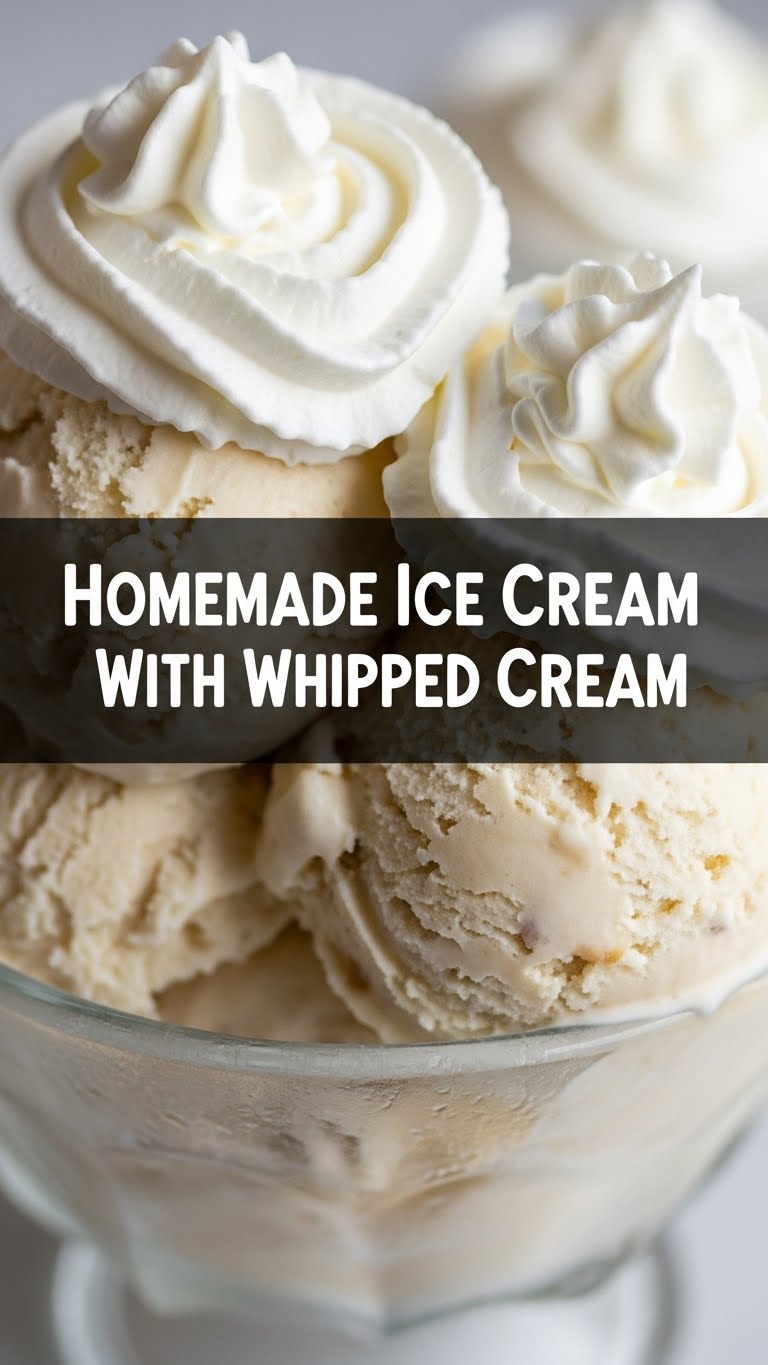
- Scoop, Top, Devour: Once your ice cream is nicely firm, scoop out generous portions. Top with your freshly made, pillowy whipped cream. Maybe a sprinkle of sprinkles, a drizzle of chocolate, or some fresh fruit if you’re feeling fancy. Then, well, enjoy the fruits (or creams) of your labor!
Common Mistakes to Avoid
We’ve all been there, hovering over a recipe, thinking “I got this!” only to find ourselves in a minor kitchen catastrophe. Here are some pitfalls to dodge:
- Using Warm Cream: This is probably the biggest rookie error. **Cold cream is essential** for whipping properly. If it’s not cold, it won’t whip, and you’ll just have sad, sloshing liquid.
- Overmixing the Whipped Cream: Go too far, and you’ll separate the fat, ending up with grainy cream or, eventually, butter. Stop when it holds soft-medium peaks. Better a little soft than completely overdone.
- Not Folding Gently: After you whip the cream, you want to maintain that airy volume. If you stir vigorously when adding the condensed milk, you’ll deflate all that precious air, and your ice cream will be dense instead of light and creamy.
- Substituting Heavy Cream: Seriously, don’t. Half-and-half, milk, or “light” whipping cream won’t give you the same rich, creamy texture or proper whipping ability. This is one ingredient where quality and fat content matter.
Alternatives & Substitutions
Feeling adventurous? This recipe is a fantastic base for all your wildest ice cream dreams!
- Flavor Town: Instead of just vanilla, try adding:
- Cocoa Powder: For chocolate ice cream. Add 1/4 to 1/2 cup sifted cocoa powder with the condensed milk.
- Coffee Extract or Espresso Powder: For a mocha kick.
- Peanut Butter: Swirl in a few spoonfuls of melted peanut butter. OMG, yes.
- Mint Extract: With a few drops of green food coloring (if you’re into that festive look) for mint chip.
- Mix-Ins & Swirls: The world is your oyster! After folding in the condensed milk, gently fold in:
- Chocolate chips, chopped cookies (Oreos, Biscoff, etc.), chopped candy bars, fruit purees, caramel swirls, nuts, sprinkles. Basically, anything you’d want in store-bought ice cream, you can put in yours!
- Whipped Cream Variations:
- Maple Whipped Cream: Swap powdered sugar for a tiny drizzle of maple syrup.
- Chocolate Whipped Cream: Sift in a tablespoon of cocoa powder with the powdered sugar.
- Boozy Whipped Cream: A tiny splash (like, ½ teaspoon) of Kahlúa or Grand Marnier works wonders if it’s an adults-only dessert.
FAQ (Frequently Asked Questions)
Got questions? I probably do too. Here are some common ones that pop up:
Do I really need to chill the bowl and whisk?
Oh, honey, yes. It helps the cream whip up faster and hold its peaks better, especially if your kitchen is a bit warm. Think of it as giving your cream a spa day before its big performance.
My ice cream is hard as a rock! What went wrong?
It happens! Usually, it’s just *too* cold. Let it sit on the counter for 5-10 minutes before scooping. Also, some freezers run colder than others. If it’s consistently too hard, try adding another tablespoon of sweetened condensed milk next time; the extra sugar can help keep it softer.
Can I use an immersion blender or food processor to whip the cream?
You *can*, but it’s a bit risky! They tend to overmix very quickly, turning your cream into butter before you can say “dessert.” An electric hand mixer or stand mixer is your safest bet. If you only have an immersion blender, be super vigilant!
How long does homemade ice cream last in the freezer?
Ideally, you’ll devour it within a week or two for the best texture and flavor. After that, it might start to get a bit icy. But let’s be real, it usually doesn’t last that long, does it?
Can I make this dairy-free?
Good question! Yes, you can. You’d need to use full-fat coconut cream (chilled, scoop out the thick cream only, leave the liquid) and a dairy-free sweetened condensed coconut milk. The texture might be slightly different and have a subtle coconut flavor, but it’s totally doable!
Final Thoughts
There you have it, folks! Your very own, incredibly easy, ridiculously delicious homemade ice cream with a crown of fluffy whipped cream. You just went from zero to hero in the kitchen with minimal effort, and your taste buds (and anyone you share this with, if you’re feeling generous) will thank you. Now go impress someone—or yourself—with your new culinary skills. You’ve earned it!


