So you’re craving something tasty but too lazy to spend forever in the kitchen, huh? Same. Guess what? I’ve got a recipe so ridiculously simple, so unbelievably good, it feels like cheating. And the best part? You only need THREE ingredients. Yes, you read that right. Three. Prepare to become an ice cream wizard without breaking a sweat (or the bank!).
Why This Recipe is Awesome
Okay, let’s spill the tea on why this no-churn ice cream is about to become your new best friend. First off, no ice cream machine. Seriously. You just need a bowl and a mixer (or strong arms, if you’re feeling ambitious). Secondly, it’s faster than most of my online shopping deliveries, and way more satisfying. Third, it’s practically idiot-proof. I didn’t mess it up, and my kitchen skills sometimes peak at toasting bread. It’s rich, creamy, and tastes like something you spent hours on, not minutes. Plus, the compliments you’re about to get? Totally worth it.
Ingredients You’ll Need
Gather ’round, my aspiring dessert overlords. Here’s your super-short shopping list:
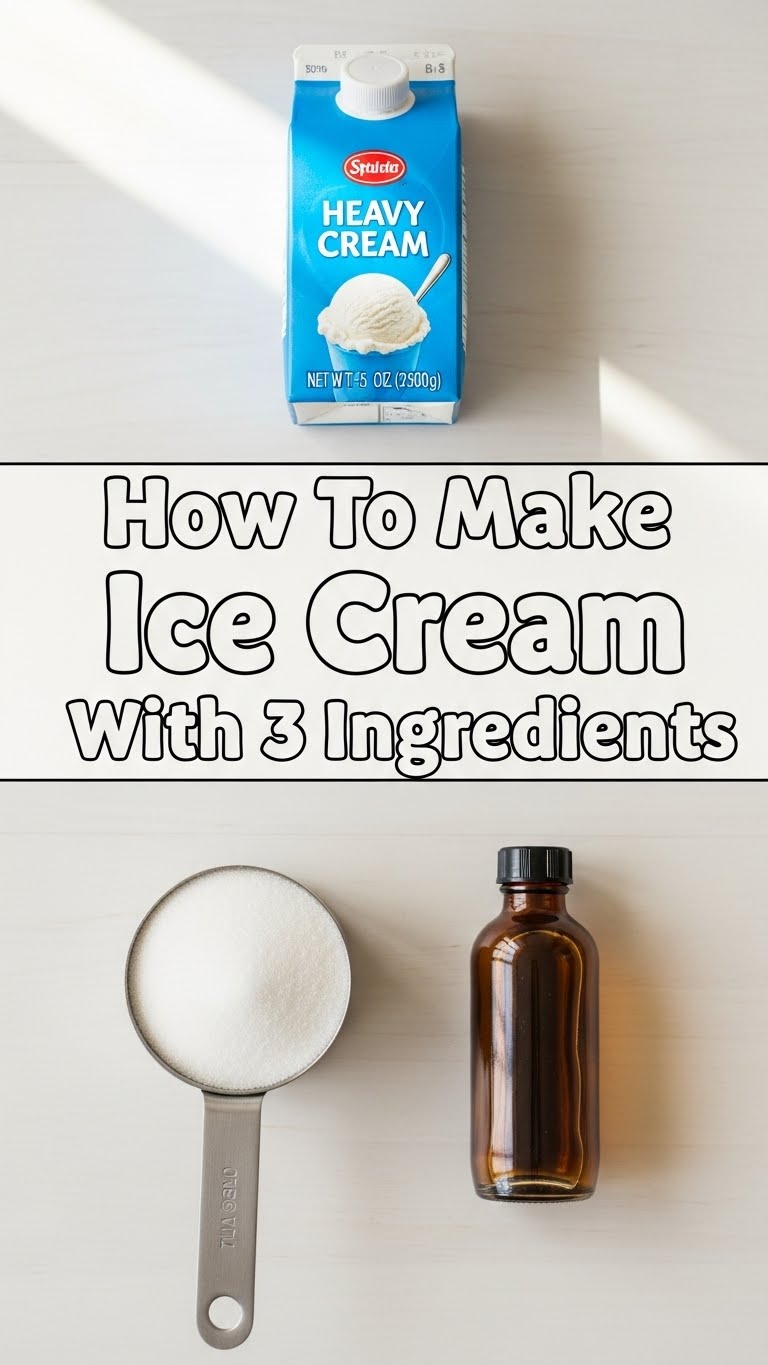
- 2 cups (475ml) Cold Heavy Cream: This is where the magic happens. Don’t skimp, don’t substitute with anything less than heavy cream. We need that high-fat goodness for ultimate creaminess.
- 1 can (14oz / 397g) Sweetened Condensed Milk: Your secret weapon. This gives us both sweetness and that luscious, silky texture without any added sugar or fancy syrups. Make sure it’s sweetened condensed milk, not evaporated milk! Big difference, trust me.
- 1-2 teaspoons Vanilla Extract: The soul of the operation. Pure vanilla extract is best, but whatever you have will work. It just adds that classic, irresistible ice cream flavor. Don’t skip it!
Step-by-Step Instructions
- Chill Out (Literally): Before you start, make sure your heavy cream is super cold. Pop your mixing bowl and whisk attachment (if using an electric mixer) in the freezer for 10-15 minutes. This helps the cream whip up faster and fluffier.
- Whip It Good: Pour your super cold heavy cream into the chilled bowl. Using an electric mixer (or by hand, if you’re a warrior), beat the cream on medium-high speed until it forms stiff peaks. This means when you lift the whisk, the peaks stand up straight and don’t flop over. Don’t overmix, or you’ll end up with butter (unless you’re aiming for that, then congrats!).
- Fold in the Sweetness: Gently pour the entire can of sweetened condensed milk into the whipped cream. Add your vanilla extract now too.
- Be Gentle: Using a spatula, gently fold the condensed milk and vanilla into the whipped cream. Be careful not to deflate all that lovely air you just whipped in! Mix just until combined and no streaks of condensed milk remain. We’re aiming for a light, airy mixture.
- Into the Freezer We Go: Scrape the mixture into a freezer-safe container. An airtight container works best to prevent ice crystals. Smooth out the top.
- Patience, Padawan: Cover your container and freeze for at least 6 hours, but preferably overnight. The longer it freezes, the firmer and more scoopable it will be.
Common Mistakes to Avoid
- Using the Wrong Milk: Remember that “sweetened condensed milk” part? Using evaporated milk will give you a sad, unsweetened, weirdly textured mess. Don’t do it!
- Over-Whisking the Cream: Whipped cream can turn into butter if you beat it for too long. Keep an eye on it – as soon as those stiff peaks appear, stop!
- Not Freezing Long Enough: I know, the temptation is real. But pulling it out too early will result in a soft-serve texture (which isn’t bad, but not proper ice cream). For solid scoops, give it time.
- Being Impatient with Folding: Once the condensed milk is in, treat that whipped cream like a delicate cloud. Too vigorous mixing will knock the air out, making your ice cream dense instead of airy.
Alternatives & Substitutions
This recipe is a blank canvas for your ice cream dreams! Here are a few ideas:
- Chocolate Lover’s Dream: Fold in ½ cup of cocoa powder along with the condensed milk for a chocolate base. Or, simply stir in chocolate chips, chopped candy bars, or swirls of chocolate fudge at the end. IMO, more chocolate is always a good idea.
- Fruity Fun: Swirl in pureed berries (strawberries, raspberries) or chopped fruit like mango or peaches. Just make sure the fruit isn’t too watery, or it might get icy.
- Cookie Monster Style: Crush up your favorite cookies (Oreos, Biscoff, chocolate chip) and fold them in before freezing.
- Nutty Professor: Add a swirl of peanut butter, almond butter, or chopped nuts.
- Coffee Kick: Dissolve 1-2 tablespoons of instant coffee or espresso powder in a tiny bit of hot water, then cool it and add it with the vanilla for a coffee-flavored treat.
FAQ (Frequently Asked Questions)
- Can I use low-fat cream or milk? Nope! Please don’t. The high fat content in heavy cream is what makes this ice cream so incredibly creamy without churning. Anything less will give you an icy, sad result.
- Do I need an ice cream maker for this? Absolutely not! That’s the beauty of this recipe. It’s “no-churn” for a reason.
- How long does it last in the freezer? Stored in an airtight container, it’ll stay good for about 2 weeks. After that, it might start to develop ice crystals, but it’ll still be edible.
- Can I add alcohol to it? A tiny splash (1-2 tablespoons) of liqueur can add flavor without affecting the texture too much. Too much alcohol will prevent it from freezing solid, FYI.
- Why isn’t my ice cream firm? It likely needed more time in the freezer, or your heavy cream wasn’t whipped to stiff enough peaks. Patience is key!
- Can I use homemade condensed milk? If you’re feeling extra ambitious, sure! Just make sure it’s thick and sweet, similar in consistency to store-bought.
Final Thoughts
See? I told you it was easy! You’ve just whipped up (pun intended) some seriously delicious, creamy ice cream with minimal effort. Now go impress someone—or yourself—with your new culinary skills. You’ve earned it! Grab a spoon, kick back, and enjoy your sweet, sweet victory. You’re basically a chef now. Go forth and make more flavors!


