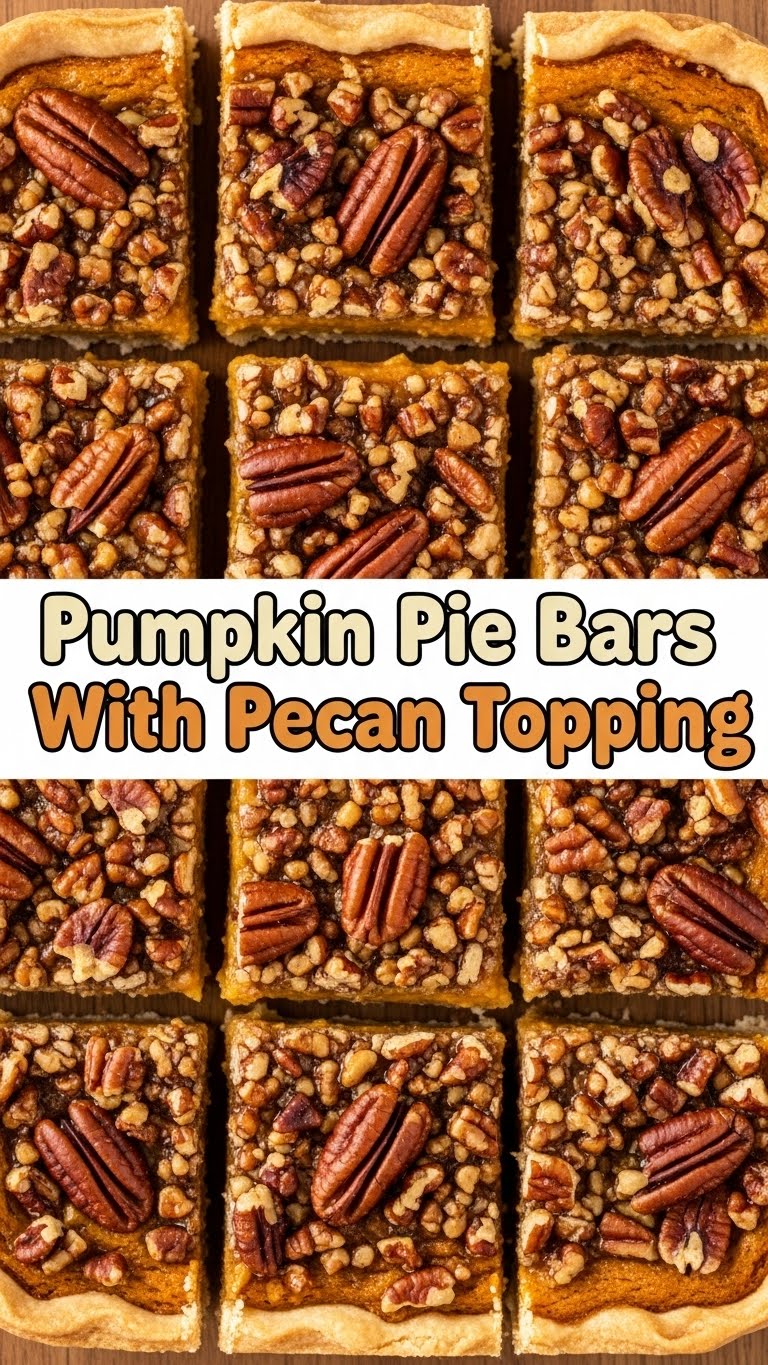
Ever woken up with a sudden, overwhelming urge for something pumpkin-y, but the thought of a whole pie just feels… extra? My friend, I’ve been there. And that’s exactly why we’re diving into these **Pumpkin Pie Bars with Pecan Topping**. No fuss, maximum deliciousness, and honestly, way more chill than wrestling with a full pie crust. Let’s get baking without taking life too seriously, shall we?
Why This Recipe is Awesome
Why are these bars basically your new kitchen MVP? First, they’re **way less intimidating than a full pie**. Seriously. No fancy crimping, no pie plate existential crisis. Just press, pour, and bake. It’s practically idiot-proof, even I didn’t mess it up! Second, they’re perfectly portioned and portable! Bring ’em to a party and be the hero, sneak one for breakfast (shhh, I won’t tell), or just hoard them all for yourself. IMO, that’s a win-win-win. Plus, that pecan topping? It’s like a crunchy, buttery crown on your pumpkin-y royalty. *Chef’s kiss*.
Ingredients You’ll Need
Gather your troops, er, ingredients! Here’s what you’ll need to whip up some magic:
- For the Shortbread Crust:
- 1 cup (2 sticks) unsalted butter, softened. The good stuff. Don’t skimp, your taste buds will thank you.
- ½ cup granulated sugar. Just enough sweetness to start the party.
- 2 cups all-purpose flour. The foundational magic that holds everything together.
- ¼ teaspoon salt. To balance things out. It’s like the unsung hero of baking.
- For the Pumpkin Filling:
- 1 (15-ounce) can pumpkin puree. Important: Make sure it’s puree, not pumpkin pie filling. Big difference, trust me.
- ¾ cup packed light brown sugar. For that deep, molasses-y sweetness.
- 2 large eggs. Room temp if you’re feeling fancy, but straight from the fridge works too.
- ½ cup heavy cream. Makes it extra silky and rich.
- 1 teaspoon ground cinnamon. Because, pumpkin.
- ½ teaspoon ground ginger. A little kick!
- ¼ teaspoon ground nutmeg. Warm and cozy vibes.
- ⅛ teaspoon ground cloves (optional, but highly recommended). Just a pinch for that extra something-something.
- ¼ teaspoon salt. Again, for balance.
- For the Pecan Topping:
- ½ cup (1 stick) unsalted butter, melted.
- ½ cup packed light brown sugar.
- 1 cup chopped pecans. For that glorious crunchy crown!
- 1 teaspoon vanilla extract. A flavor enhancer extraordinaire.
Step-by-Step Instructions
Alright, let’s get this show on the road! Don’t worry, it’s easier than assembling IKEA furniture.
- **Preheat & Prep:** First things first, get that oven screaming hot to 350°F (175°C). While it’s warming up, lightly grease a 9×13 inch baking pan. You can also line it with parchment paper with a little overhang, which makes lifting the bars out super easy later.
- **Crust Time!** In a large bowl, beat the softened butter and granulated sugar together until light and fluffy. Now, gradually add the flour and salt, mixing until just combined. Don’t overmix, or you’ll end up with a tough crust, and nobody wants that.
- **Press It In:** Press this glorious dough evenly into the bottom of your prepared pan. Use the back of a spoon or your clean hands to get it nice and flat. Bake this crust for **15-20 minutes**, or until it’s lightly golden. Pull it out and let it cool slightly while you make the filling.
- **Whip Up the Filling:** In another bowl, whisk together the pumpkin puree, brown sugar, eggs, heavy cream, cinnamon, ginger, nutmeg, cloves, and salt. Make sure everything is well combined and smooth.
- **Pour & Bake:** Pour the pumpkin filling over your partially baked crust. Pop it back into the oven and bake for **25-30 minutes**. The edges should be set, but the center might still be a little jiggly. That’s okay, we’re not done yet!
- **Topping Transformation:** While the pumpkin layer is doing its thing, melt the butter for the pecan topping. Stir in the brown sugar, chopped pecans, and vanilla extract. Oh, the aromas!
- **The Grand Finale:** Carefully remove the pan from the oven. Evenly sprinkle the pecan topping mixture over the pumpkin layer. Return the pan to the oven and bake for another **20-25 minutes**, or until the topping is golden brown and the pumpkin filling is fully set (no more jiggle!).
- **Cool Down, Buttercup:** Once baked, let these beauties cool completely on a wire rack. **This is crucial!** Cooling allows the bars to set up properly. Seriously, resist the urge to cut into them right away. Patience is a virtue, especially when it comes to deliciousness. Once cool, slice into bars and enjoy your hard work!
Common Mistakes to Avoid
Hey, we all make mistakes! But here are a few rookie errors you can totally dodge:
- **Using Pumpkin Pie Filling Instead of Puree:** This is like bringing a spoon to a knife fight. Pumpkin pie filling has added sugar and spices, which will totally mess with the balance of this recipe. **Always double-check your can!**
- **Overmixing the Crust:** Remember what I said about tough crust? Overworking the dough develops gluten, leading to a less tender, more biscuity texture. Mix until *just* combined, then stop!
- **Not Cooling Completely:** I know, the smell is intoxicating! But cutting into warm pumpkin bars is a recipe for a gooey, messy disaster. **Let them chill out**, literally, to firm up. Overnight in the fridge is even better.
- **Undercooking the Filling:** If your bars are still super wobbly in the center after baking, they probably need a few more minutes. A slight jiggle is okay, but it shouldn’t look like liquid. Trust your oven, but keep an eye on it!
Alternatives & Substitutions
Life’s too short for rigid recipes, right? Here are some ways to shake things up:
- **Gluten-Free Gang:** Want to make these GF? No problem! Simply swap out the all-purpose flour for a 1:1 gluten-free baking blend. FYI, I’ve had great success with Bob’s Red Mill 1:1.
- **Nut-Free Zone:** If pecans aren’t your jam (or someone has an allergy), you can totally skip the pecan topping. Or, for a similar crunch, try a mixture of oats, brown sugar, and melted butter as a crumble topping.
- **Dairy-Free Delights:** For a dairy-free version, use vegan butter sticks for the crust and topping, and substitute the heavy cream with full-fat canned coconut milk (the thick cream on top, not the watery stuff!).
- **Spice It Up (or Down):** Not a fan of cloves? Leave ’em out! Want more ginger? Go for it! This is your kitchen, your rules.
FAQ (Frequently Asked Questions)
Got questions? I’ve got answers, mostly delivered with a side of sass.
- **Can I use pumpkin pie spice instead of individual spices?** Absolutely! Use about 2-2.5 teaspoons of pumpkin pie spice blend in place of the individual cinnamon, ginger, nutmeg, and cloves. Easy peasy, pumpkin squeezy.
- **How do I store these amazing bars?** Keep ’em covered in an airtight container in the fridge for up to 4-5 days. If they last that long, you’re a stronger person than me.
- **Can I freeze these bars?** You bet! Once fully cooled, wrap individual bars tightly in plastic wrap, then store in an airtight container or freezer bag for up to 2-3 months. Thaw in the fridge before serving.
- **Why are my bars runny? What went wrong?** Chances are they weren’t fully baked or weren’t cooled completely. Pumpkin filling needs time to set up properly. Give them more time in the oven or more time to chill in the fridge!
- **Do I really need to pre-bake the crust?** Yes, my friend, **yes!** Pre-baking prevents a soggy bottom (the horror!) and gives you that perfect, crisp shortbread foundation. Don’t skip this step.
- **Can I make a bigger batch?** If you have a larger pan (like a 10×15 jelly roll pan), you can easily double the recipe. Just be mindful of baking times, they might need a little longer.
Final Thoughts
So there you have it, folks! Your new go-to for all things pumpkin and delicious. These Pumpkin Pie Bars with Pecan Topping are a hug in edible form, a little slice of autumn comfort, and frankly, just darn delicious. They’re perfect for sharing (if you’re feeling generous) or hoarding (which I fully support). Now go forth and bake, my friend! You’ve officially leveled up your dessert game. Don’t forget to tell me how amazing they were!

