So you’re craving something warm, gooey, chocolatey, and topped with something cold and utterly decadent, but you’re also rocking those ‘too lazy to bake a whole cake’ vibes? My friend, you’ve come to the right place. Because today, we’re whipping up Brownie Cups with Ice Cream, and trust me, it’s going to be your new go-to dessert for when you want to feel fancy without, you know, actually *being* fancy. You game?
Why This Recipe is Awesome
Okay, let’s be real. Why bother with this recipe? First, it’s ridiculously easy. Seriously, if you can melt chocolate and stir, you’re practically a pastry chef in the making. Second, it’s individual portions! No messy slicing of a big brownie pan, just perfectly formed cups of joy ready for a scoop of ice cream. It’s like a warm hug for your taste buds, topped with a cool kiss. Plus, it looks super impressive with minimal effort. Your guests (or just your hungry self) will think you slaved away for hours. Spoiler alert: You didn’t. It’s also incredibly versatile – you can pimp these up with whatever you have lying around. What’s not to love?
Ingredients You’ll Need
- A good old box of brownie mix (yep, we’re not reinventing the wheel here, folks! Go for your favorite fudgy kind, okay?)
- Ingredients listed on your brownie mix box (usually eggs, oil, water – follow those instructions like gospel).
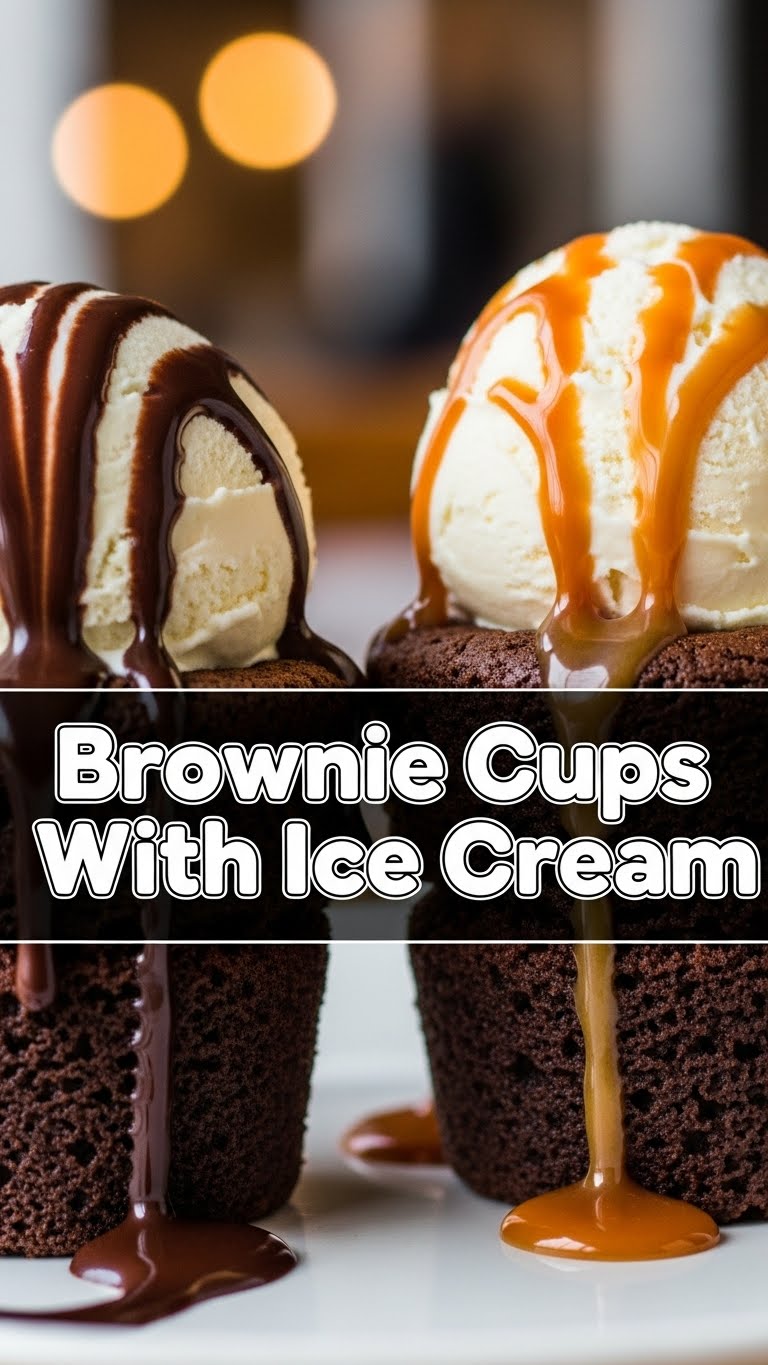
- A tub of your favorite ice cream (vanilla is classic, but hey, live a little! Cookie dough? Mint chip? Your call!).
- Optional: Chocolate chips, sprinkles, caramel sauce, whipped cream, or whatever toppings make your heart sing. (Because why be basic when you can be extra?)
- Muffin tin (because we’re making cups, not a slab).
- Muffin liners (unless you enjoy chiseling brownies out of metal, which, no judgment, but also… why?).
Step-by-Step Instructions
- First things first: Preheat your oven to whatever temperature your brownie mix box demands. Seriously, don’t skip this. While it’s getting toasty, pop those muffin liners into your muffin tin.
- In a mixing bowl, combine your brownie mix with the eggs, oil, and water as per the box instructions. Stir until just combined. Don’t overmix, unless you like tough brownies (you don’t, trust me).
- Carefully spoon the brownie batter into your prepared muffin liners. You want them about two-thirds full. Resist the urge to fill them to the brim – they need room to rise a little and still leave space for ice cream!
- Bake for the time suggested on your brownie mix box for cupcakes or muffins. Usually, it’s around 18-22 minutes. A good way to check if they’re done is when a toothpick inserted comes out with moist crumbs, not wet batter. We want fudgy, not raw, folks!
- Once baked, let them cool in the muffin tin for about 5 minutes before transferring them to a wire rack to cool completely. Patience, young grasshopper! They’ll firm up as they cool.
- Now for the fun part! Once your brownie cups are cool enough to handle (or if you’re like me, still slightly warm because who can wait?), grab a spoon and gently press down in the center of each brownie to create a little ‘cup’ or well. This is where the magic happens!
- Scoop a generous dollop of your chosen ice cream into each brownie cup. Drizzle with caramel, sprinkle with chocolate chips, or just admire its pure, unadulterated glory. Serve immediately and watch them disappear faster than your motivation on a Monday morning.
Common Mistakes to Avoid
- Overmixing the batter: This is a surefire way to get dense, cake-like brownies instead of the fudgy perfection we’re aiming for. Mix until just combined, a few lumps are totally fine. Embrace the lumps!
- Overfilling the muffin cups: Remember, two-thirds full! Otherwise, you’ll have giant brownie tops spilling over, leaving less room for your precious ice cream. And that’s just sad.
- Not letting them cool (at least a little): Trying to scoop hot ice cream onto a piping hot brownie cup? You’ll end up with a melted puddle of sadness. Let them cool enough to hold their shape, IMO, it’s worth the wait.
- Forgetting to make the ‘cup’ indentation: This is crucial! Without it, your ice cream will just slide off the top. We’re creating a cozy little nest for that scoop, people!
Alternatives & Substitutions
- Brownie Mix: Feel like being a total kitchen wizard? Go for a homemade brownie recipe! Just make sure it’s one that bakes up fudgy and not too cakey. Box mix is my go-to for speed, but you do you!
- Ice Cream Flavors: Vanilla is classic, but any flavor works! Coffee ice cream for a mocha vibe? Strawberry for a summer twist? Salted caramel? Oh, the possibilities! Don’t be shy, experiment!
- Toppings Galore: Instead of just chocolate chips, try chopped nuts, shredded coconut, mini marshmallows, or even a dollop of peanut butter on top of the warm brownie before the ice cream. A drizzle of hot fudge or a sprinkle of sea salt always elevates things.
- Gluten-Free/Dairy-Free: Many gluten-free brownie mixes are fantastic these days! And for dairy-free, there are some seriously good plant-based ice creams out there now. No one has to miss out on this deliciousness!
FAQ (Frequently Asked Questions)
- Can I make these ahead of time? Absolutely! Bake the brownie cups, let them cool completely, and store them in an airtight container for up to 3 days at room temp. When you’re ready to serve, just warm them up slightly (or not!), make your indentation, and add the ice cream. Easy peasy!
- What if I don’t have a muffin tin? Uh oh! While it’s ideal for the cup shape, you could bake the brownies in a square pan and then use a round cookie cutter (or even a glass rim) to cut out circles. It won’t have the same ‘cup’ indentation, but it’ll still be delicious! Or, make a brownie skillet sundae, which is basically the same idea, just messier.
- Can I use any kind of brownie mix? Yep, mostly! Just aim for a fudgy brownie mix rather than a cakey one if you want that classic gooey brownie experience. But honestly, even a cakey one would be good with ice cream. It’s hard to mess up chocolate and ice cream, right?
- My brownie cups stuck to the liners! What did I do wrong? Rookie mistake! Make sure your liners are good quality, or give them a light spray with non-stick cooking spray before adding batter. Or, you know, just embrace the rustic look and serve them with a spoon. No judgment here!
- What’s the best way to store leftovers? Leftovers? What are those? Just kidding (mostly). If you have any brownie cups left *before* adding ice cream, store them airtight. Once ice cream is added, it’s a devour-immediately situation, my friend. Otherwise, you’ll have a sad, soggy mess.
- Can I add chocolate chips to the batter? OMG, YES! A half cup of chocolate chips or even chopped nuts mixed into the batter will take these from ‘yum’ to ‘holy moly!’
Final Thoughts
So there you have it, folks! Your new secret weapon for instant dessert gratification. These Brownie Cups with Ice Cream are the perfect blend of cozy, impressive, and downright delicious. They’re proof that you don’t need to be a Michelin-star chef to create something truly special. Now go forth, bake, scoop, and devour! You’ve earned this moment of pure, unadulterated joy. And hey, if you end up eating three, I won’t tell. We’re friends, after all. 😉


