So you’re craving something warm, comforting, and absolutely legendary, but also kinda want to avoid a kitchen disaster? You’re in the right place, my friend. We’re diving headfirst into the glorious world of apple pie, but with a secret weapon that’ll make your taste buds do a happy dance: heavy cream. Yes, you heard me. It’s like giving your grandma’s classic recipe a luxurious spa day. Get ready to bake something so good, you’ll wonder why you ever bothered with lesser pies.
Why This Recipe is Awesome
Okay, let’s be real. There are a million apple pie recipes out there. So why this one? Because it’s not just “another” apple pie. This is *the* apple pie. It’s got that classic comforting vibe, but the heavy cream transforms the filling into something unbelievably rich, tender, and oh-so-creamy without being gloopy. It’s like the pie had a glow-up. Plus, it’s pretty darn **idiot-proof**. Seriously, if I can make it without setting off the smoke alarm, you totally can too.
No soggy bottom blues, no dry, flavorless apples, just pure, unadulterated apple pie perfection. And let’s not forget the smell that will fill your home—it’s basically a hug in aroma form. You’re welcome.
Ingredients You’ll Need
Time to gather your edible treasures! Here’s what we’re wrangling:
- For the Crust (or grab store-bought, no judgment here):
- 2 ½ cups all-purpose flour (the basic kind, don’t overthink it)
- 1 teaspoon salt (because flavor)
- 1 cup (2 sticks) **cold, unsalted butter**, cubed (the colder, the flakier, trust me)
- ½ cup ice water (gotta keep things frosty for that perfect texture)
- For the Filling:
- 6-8 medium baking apples, peeled, cored, and sliced (Granny Smith, Honeycrisp, or Braeburn are your pals here – they hold their shape like a boss)
- ¾ cup granulated sugar (or a bit less if your apples are super sweet, you’re the boss of sweetness)
- 2 tablespoons all-purpose flour (to thicken things up a bit)
- 1 teaspoon ground cinnamon (the undisputed king of pie spices)
- ¼ teaspoon ground nutmeg (cinnamon’s loyal sidekick)
- Pinch of ground cloves or allspice (optional, but adds a little something extra)
- ¼ cup **heavy cream** (the secret ingredient, don’t skimp!)
- 1 tablespoon lemon juice (brightens everything up, trust the process)
- 2 tablespoons unsalted butter, cut into small pieces (because butter makes everything better)
- For the Egg Wash (optional, but makes it pretty):
- 1 egg, lightly beaten
- 1 tablespoon milk or water
Step-by-Step Instructions
- Make the Dough (or unroll the store-bought magic): In a large bowl, whisk together the flour and salt. Cut in the cold butter using a pastry blender or your fingertips until the mixture resembles coarse crumbs with some pea-sized butter bits. Gradually add the ice water, 1 tablespoon at a time, mixing until the dough just comes together. Don’t overmix! Divide the dough in half, flatten into discs, wrap in plastic, and chill in the fridge for at least 30 minutes (or up to 2 days). **This chill time is non-negotiable for a flaky crust!**
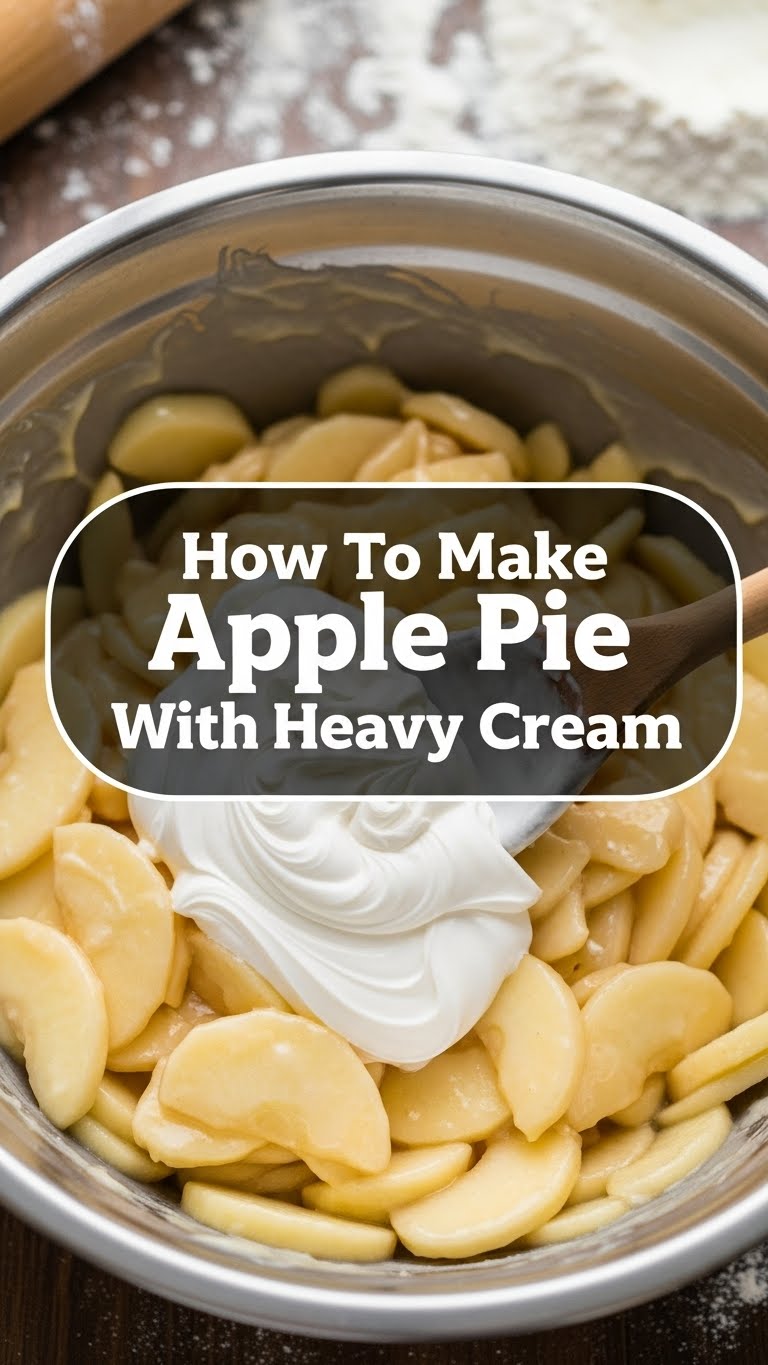
- Prep the Apples: In a big bowl, combine your sliced apples, sugar, 2 tablespoons flour, cinnamon, nutmeg, cloves (if using), and lemon juice. Toss gently until the apples are evenly coated. Now for the star: pour in the heavy cream and give it another gentle toss. Let it sit for about 15 minutes while you roll out your crust – this helps the flavors meld.
- Assemble the Pie: Preheat your oven to 425°F (220°C). On a lightly floured surface, roll out one disc of chilled dough into a 12-inch circle. Carefully transfer it to a 9-inch pie plate. Trim the edges, leaving about a ½ inch overhang.
- Fill ‘er Up: Pour the apple mixture into the pie crust, mounding it slightly in the center. Dot the top with those small pieces of butter.
- Top It Off: Roll out the second disc of dough. You can lay it over the filling, crimp the edges, and cut a few slits for steam to escape. Or, get fancy and do a lattice top – totally up to you and your artistic ambitions (or lack thereof). Trim and crimp the edges of both crusts together.
- Egg Wash & Bake: If you’re using an egg wash, brush it lightly over the top crust. This gives it that beautiful golden shine. Place the pie on a baking sheet (to catch any drips, FYI) and bake for 15 minutes at 425°F (220°C).
- Lower & Slow: Reduce the oven temperature to 375°F (190°C) and continue baking for another 35-45 minutes, or until the crust is deeply golden brown and the filling is bubbly. If the crust starts browning too quickly, loosely cover the edges with aluminum foil.
- Cool Down (the hardest part!): Let the pie cool completely on a wire rack for at least 2-3 hours before slicing. Yes, it’s torture, but it allows the filling to set properly. Nobody wants a runny pie, right?
Common Mistakes to Avoid
- Warm Butter in the Crust: This is a biggie. **Warm butter equals tough, sad crust.** Keep everything—butter, water, even your hands if you’re feeling feisty—as cold as possible.
- Overworking the Dough: The more you knead or handle pie dough, the more gluten develops, and the tougher your crust will be. We’re going for flaky, not chewy, IMO. Handle it like it’s a delicate newborn kitten.
- Not Chilling the Dough: Skipping this step means your butter will melt too fast in the oven, and you’ll miss out on that beautiful flakiness. Patience, young padawan!
- Undercooked Apples: There’s nothing worse than biting into a pie with crunchy apples that refuse to be pie-like. Make sure they’re tender before you pull that pie out. Bubbly filling is your cue!
- Slicing Too Early: Resist the urge! Seriously, that filling needs time to set. If you slice it hot, you’ll have a delicious, albeit messy, pile of apple goo.
Alternatives & Substitutions
Feeling adventurous? Or just out of something crucial? Here are some tweaks:
- Crust: Store-bought pie crusts are totally fine! No shame in saving time. If you’re making your own, you can substitute half the butter with shortening for an even flakier (but slightly less buttery) crust.
- Apples: Not a fan of Granny Smiths? Mix it up! Try Cortland, Gala, or a mix of whatever looks good at the market. Just ensure they’re baking apples that hold their shape.
- Spices: Out of cinnamon? Allspice or apple pie spice blend will work wonders. Want more zing? A little fresh ginger, grated, in the filling is divine.
- Sweetener: Brown sugar can replace some or all of the granulated sugar for a deeper, more molasses-like flavor.
- Heavy Cream: Can you use half-and-half? Yes, but it won’t be as rich. Whole milk? Even less rich. **Heavy cream is king here** for a reason, but in a pinch, you can adjust.
FAQ (Frequently Asked Questions)
Got questions? I probably have snarky answers!
- Can I use pre-made pie filling?
- Well, technically yes, but why miss out on all that fresh apple goodness and the magic of heavy cream? You’re making a pie, not a compromise!
- My crust always shrinks! What gives?
- Did you chill your dough enough? Or overwork it? These are the usual culprits. Also, make sure you don’t stretch the dough when you put it in the pie plate; gently ease it in to avoid shrinkage.
- Do I *really* need heavy cream? Can’t I just skip it?
- You *could*… but then it wouldn’t be *this* recipe, would it? The heavy cream is what elevates this pie from “good” to “oh my goodness.” It makes the filling incredibly tender and coats the apples beautifully. It’s the secret sauce, remember?
- How do I store leftover apple pie?
- Cover it loosely with plastic wrap or foil and keep it at room temperature for up to 2 days, or in the fridge for up to 5 days. Though, honestly, “leftover apple pie” is a mythical creature in my house.
- My pie crust is browning too fast! Help!
- Fear not! Grab some aluminum foil and gently tent it over the pie, or make a foil ring to cover just the edges. This acts as a little sunblock for your crust.
Final Thoughts
And there you have it, folks! Your very own, utterly delicious, heavy cream-infused apple pie. You’ve conquered the crust (or at least befriended a store-bought one), wrangled the apples, and embraced the power of cream. This isn’t just a pie; it’s a statement. A statement that says, “Yes, I can bake, and yes, it’s ridiculously good.” Now go impress someone—or yourself—with your new culinary skills. You’ve earned it!
Happy baking, you magnificent human!


