So, your sweet tooth is doing a little happy dance, but your motivation to actually *bake* something from scratch is still in bed, hitting snooze? Been there, my friend, countless times. But guess what? We’re about to make an apple pie with crumb topping so ridiculously easy and delicious, you’ll feel like a kitchen wizard without actually having to pull out your wand. (Unless your wand is a spatula, then by all means!)
Why This Recipe is Awesome
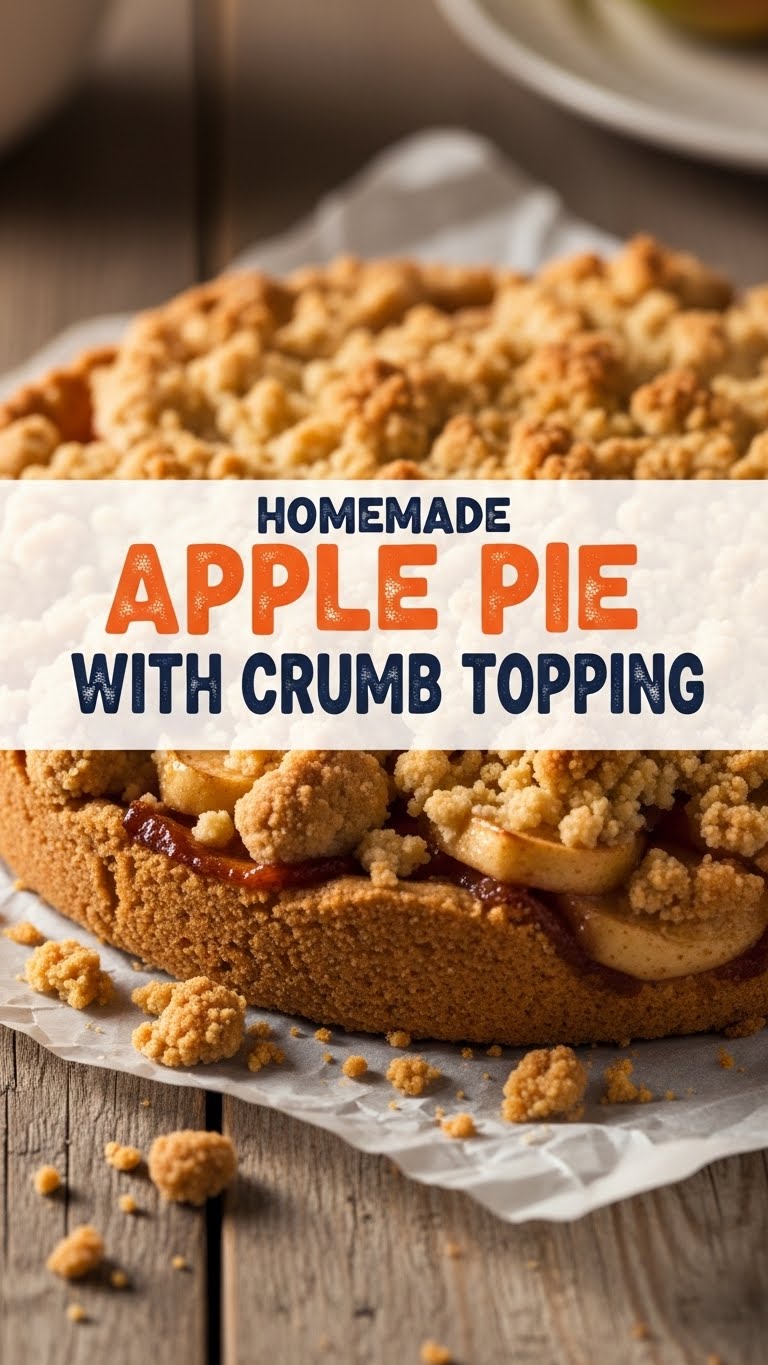
Okay, listen up. This isn’t just *any* apple pie. This is the “I baked this in my pajamas and still felt like a culinary genius” apple pie. It’s shockingly simple, tastes like a warm hug from your grandma (the cool one who lets you eat dessert first), and honestly, it’s **idiot-proof**. If *I* can make it without setting off the smoke detector, you totally got this. Plus, that crumb topping? It’s basically a crunchy, buttery crown of glory on an already perfect pie. You’re welcome.
Ingredients You’ll Need
Gather your troops! Here’s what we’re wrangling for this culinary adventure:
- For the Crust (aka, your base to glory):
- 1 pre-made pie crust (because who has time for scratch? We’re friends, I won’t judge. But if you’re a baking purist, go for it!)
- For the Filling (the juicy, spiced heart of it all):
- 6-8 medium apples (Granny Smith, Honeycrisp, or a mix – don’t be shy, mix it up!). Peeled, cored, and sliced. (Yeah, that’s probably the “hardest” part. Deep breaths.)
- 1/2 cup granulated sugar (or a bit more if your apples are super tart and you like things extra sweet, you rebel.)
- 1/4 cup packed light brown sugar
- 2 tablespoons all-purpose flour (thickens things up, no soggy bottoms here!)
- 1 teaspoon ground cinnamon (the smell alone is worth it)
- 1/4 teaspoon ground nutmeg (cinnamon’s best buddy)
- Pinch of salt (seriously, don’t skip this, it makes everything pop!)
- 2 tablespoons unsalted butter, cut into small pieces (because butter makes everything better, duh.)
- For the Crumb Topping (the crunchy crown!):
- 1/2 cup all-purpose flour
- 1/4 cup granulated sugar
- 1/4 cup packed light brown sugar
- 1/2 teaspoon ground cinnamon
- Pinch of salt
- 1/4 cup cold unsalted butter, cut into small cubes (cold butter is key for crumbles!)
Step-by-Step Instructions
Alright, let’s do this! Follow these simple steps and prepare for compliments.
- Preheat & Prep: Get that oven fired up to 400°F (200°C). Grab your pre-made pie crust and gently unroll it into a 9-inch pie plate. Trim the edges, make it look pretty – or don’t, it’s going to be covered anyway, LOL.
- Apple Adventure: In a giant bowl, toss those sliced apples with both sugars, flour, cinnamon, nutmeg, and salt. Make sure every apple slice gets a nice coating. This is where the magic starts!
- Into the Crust: Pour the glorious apple mixture into your prepared pie crust. Dot the top with those small pieces of butter. Don’t be shy; spread the love (and the butter).
- Crumb Time! In a separate bowl, whisk together the flour, both sugars, cinnamon, and salt for your crumb topping. Now, cut in the cold butter using a pastry blender, your fingers, or two knives until it looks like coarse crumbs. **Don’t overmix!** You want distinct crumbs, not a paste.
- Top It Off: Sprinkle that dreamy crumb topping evenly over the apples in your pie crust. Try to get good coverage; every bite deserves some crumble!
- Bake Away: Place the pie on a baking sheet (to catch any enthusiastic bubbly overflows – trust me on this one, it saves your oven from a sticky mess). Bake for 15 minutes at 400°F (200°C), then **reduce the oven temperature to 375°F (190°C)** and bake for another 35-45 minutes. The topping should be golden brown, and the filling should be bubbling like a happy volcano.
- Cool Down (the hardest part): Let your masterpiece cool for at least 2-3 hours before slicing. Yes, I know, it’s torture, but it allows the filling to set. **Patience, young grasshopper!** Otherwise, you’ll have delicious apple soup, not pie slices.
Common Mistakes to Avoid
We all make mistakes, but let’s try to avoid these rookie errors, shall we?
- Skipping the preheat: You wouldn’t jump into a cold shower, would you? Your pie feels the same way about a cold oven. **Always preheat!**
- Not chilling your butter for the crumb topping: Warm butter = sad, greasy crumbs. Cold butter = flaky, glorious crumbs. It’s science, or something.
- Cutting into it too soon: I know the smell is intoxicating, but seriously, give it time to set. Otherwise, you’ll have delicious apple soup, not pie slices. Learned that the hard way, so you don’t have to.
- Overmixing the crumb topping: We’re going for crumbles, not play-doh. Mix just until combined and crumbly. Texture is key!
Alternatives & Substitutions
Feel free to get creative or work with what you’ve got! This recipe is chill like that.
- Crust: If you’re feeling extra fancy (or have too much time on your hands), make your own pie crust. But honestly, **store-bought is perfectly fine**. No judgment here, ever. It’s about the destination (delicious pie), not just the journey!
- Apples: Not a fan of Granny Smiths? Use all Honeycrisp, Braeburn, or Fuji. Or a mix! Just aim for apples that hold their shape when baked. Super mushy apples might turn your pie into applesauce (which is fine, but not what we’re going for here).
- Spices: Feel free to add a pinch of allspice or cardamom if you’re feeling adventurous. Or ditch the nutmeg if you’re not a fan. Your pie, your rules!
- Butter: Can you use margarine instead of butter? Well, technically yes, but why hurt your soul like that? Butter just tastes better, IMO, especially in baked goods.
FAQ (Frequently Asked Questions)
Got questions? I’ve got answers (and probably some cheeky comments).
- My pie crust is looking a little pale. What gives? Did you forget to preheat? Or maybe your oven runs a bit cool. You can always tent the top with foil if it’s browning too fast, but usually, a good preheat helps even things out.
- Can I use frozen apples? You *can*, but they tend to release a lot more water, making your pie a bit watery. If you must, **thaw them first and drain really well!** Pat them dry even. Trust me, it makes a difference.
- How do I know when it’s done? The filling will be bubbly (you might even see it through the crumb topping if you’re lucky!), and a knife inserted into the center of the apples (through the crumb) should go in with little resistance. The topping should also be beautifully golden.
- Can I make this ahead? Absolutely! You can assemble the pie (minus baking) and refrigerate it for a day. Or, bake it, let it cool completely, and store it at room temp for up to 2 days, or in the fridge for 3-4 days. It’s also freezer-friendly, FYI!
- What if my crumb topping burns before the apples are cooked? Uh oh! Don’t panic. Just loosely cover the top of the pie with aluminum foil for the rest of the baking time. Crisis averted!
- Is it *really* okay to use a store-bought crust? Let’s be real, you’re making homemade apple pie! That’s impressive enough. Using a store-bought crust simply means you’re smart, efficient, and know how to pick your battles. **Embrace the shortcut!**
Final Thoughts
And there you have it! Your very own, ridiculously delicious, crumb-topped apple pie. Get ready for your kitchen to smell like pure autumn heaven and for everyone to suddenly become your best friend. Now go impress someone—or yourself—with your new culinary skills. You’ve totally earned it. Maybe even treat yourself to a slice *with* ice cream. You know, for quality control. You’re basically a pastry chef now, so own it!


