So you’re craving something ridiculously tasty but also *maybe* feeling a little too lazy to spend an entire afternoon in the kitchen? Same. Total same. Sometimes, you just want that warm, cozy hug of apple pie but without the drama of making a perfect crust. And sometimes, you just want cake because… well, cake.
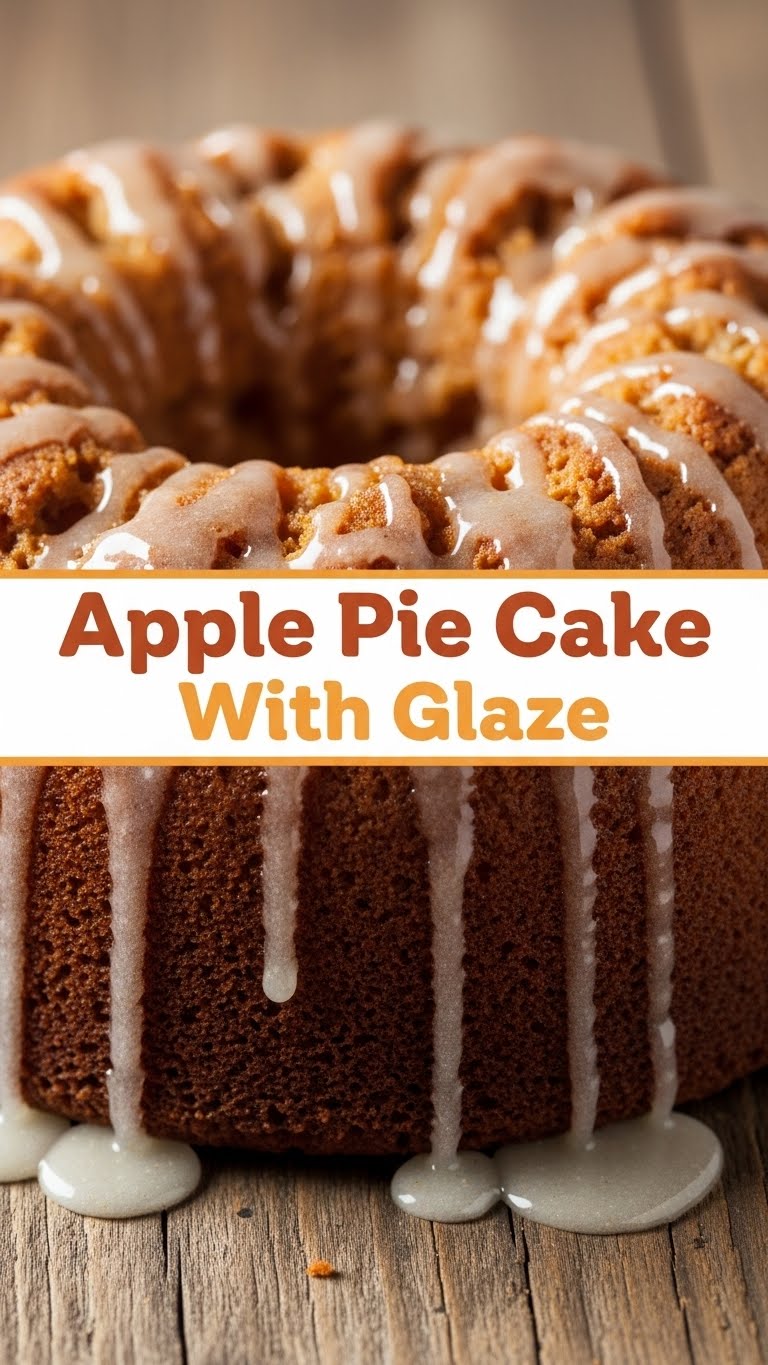
Good news, buttercup! What if I told you there’s a magical creation that combines the best of both worlds? Enter the Apple Pie Cake with Glaze – your new best friend for dessert emergencies, casual Sunday baking, or just because Tuesday exists. Let’s get baking, shall we?
Why This Recipe is Awesome
Okay, real talk. This isn’t just *another* cake recipe. This is THE cake recipe for when you want to feel like a baking superstar without actually breaking a sweat (or a temper). Why is it awesome? Let me count the ways:
- It’s like apple pie and cake had a super delicious, less-fussy baby. All the comforting, spiced apple goodness wrapped in a soft, tender cake.
- **It’s pretty much idiot-proof.** Seriously, if I can bake this without setting off the smoke alarm, you’re golden.
- **One pan wonder!** We’re talking less cleanup, which means more time for… well, eating the cake. Hallelujah!
- The glaze is optional but highly, *highly* recommended. It adds that little extra sparkle and sweetness that just screams, “I made this myself, aren’t I fabulous?”
Ingredients You’ll Need
Gather your troops! Most of these are probably already chilling in your pantry.
- For the Cake:
- 1 ½ cups (190g) All-Purpose Flour – The foundational stuff. Don’t skimp on measuring!
- 1 tsp Baking Soda – For that lovely lift, because flat cakes are sad cakes.
- ½ tsp Salt – The unsung hero; balances all that sweetness.
- 1 tsp Ground Cinnamon – Essential for that apple pie vibe.
- ½ tsp Ground Nutmeg – Cinnamon’s spicy sidekick.
- ¾ cup (170g) Unsalted Butter, softened – The good stuff. Unsalted so you control the saltiness, you culinary wizard.
- 1 cup (200g) Granulated Sugar – Sweetness, duh.
- 2 Large Eggs – Our little glue guys, binding it all together.
- 1 tsp Vanilla Extract – Adds that ‘oomph.’ Don’t skip!
- ½ cup (120ml) Milk – Any kind works! Brings moisture to the party.
- 2 medium Apples, peeled, cored, and diced (about 2 cups) – The stars of the show! Firm, tart ones like Granny Smith or Honeycrisp work best.
- For the Glaze (optional but really, really not):
- 1 cup (120g) Powdered Sugar – For that dreamy drizzle.
- 2-3 tbsp Milk or Cream – Just enough to make it pourable.
- ½ tsp Vanilla Extract – Because vanilla makes everything better.
Step-by-Step Instructions
Ready to make some magic? Let’s do this!
- Get Prepped: Preheat your oven to 350°F (175°C). Grab an 8×8 or 9×9 inch baking pan. Grease it well and flour it, or line it with parchment paper for easy removal. You’ll thank me later.
- Dry Mix Fun: In a medium bowl, whisk together the flour, baking soda, salt, cinnamon, and nutmeg. Give it a good whisk until everything is friendly.
- Wet Mix Wonder: In a larger bowl, using an electric mixer, cream together the softened butter and granulated sugar until light and fluffy. Beat in the eggs one at a time, then stir in the vanilla extract until just combined.
- Combine & Conquer: Now for the alternating act! Add about one-third of the dry ingredients to the wet ingredients, mixing on low speed until just combined. Follow with half of the milk, mix. Repeat with another third of the dry, the remaining milk, and finally the last of the dry ingredients. **Mix until just combined; don’t overmix!** Lumps are totally okay here.
- Apple Time! Gently fold in your diced apples. You want them distributed nicely, so every slice gets a bit of apple-y goodness.
- Bake It Up: Pour the batter evenly into your prepared pan. Pop it into the preheated oven and bake for 35-45 minutes, or until a toothpick inserted into the center comes out clean.
- Chill Out: Let the cake cool in the pan on a wire rack for at least 15-20 minutes before attempting to flip it out. Patience, my friend. It’s worth it. Once out, let it cool completely on the rack. This is crucial for the glaze!
- Glaze Craze (if you dare to be delicious): While the cake cools, whisk together the powdered sugar, milk/cream, and vanilla extract in a small bowl until smooth. If it’s too thick, add more liquid a tiny bit at a time. If it’s too thin, add more powdered sugar. Drizzle this glorious glaze over the *completely cooled* cake. Slice and serve!
Common Mistakes to Avoid
Nobody’s perfect, but we can try to avoid these rookie blunders, right?
- Overmixing the Batter: Seriously, chill out with the mixer. Mixing too much develops the gluten, leading to a tough, dense cake. We want fluffy! Mix until just combined, even if there are a few small lumps.
- Not Greasing Your Pan Properly: Unless you want to chisel your beautiful creation out with a butter knife, **grease and flour or line your pan well.** It’s a non-negotiable.
- Ignoring the Cooling Step: “Hot glaze on hot cake equals a sad, melted, transparent mess.” **Let that cake cool completely** before glazing, or you’ll lose all that pretty drizzle.
- Using the Wrong Apples: Mushy apples make mushy cake. Stick to firm, crisp, and slightly tart varieties like Granny Smith, Honeycrisp, or Fuji for the best texture and flavor.
- Eyeballing Ingredients (Especially for Baking Newbies): Baking is a science, not a guessing game. At least initially! Use proper measuring cups and spoons.
Alternatives & Substitutions
Feeling adventurous? Or just missing an ingredient? No worries, we’ve got options!
- Different Fruits: Swap apples for pears, peaches (fresh or well-drained canned), or even some cranberries for a festive twist. Just make sure to dice them similarly.
- Spice It Up: Don’t have nutmeg? Add a pinch of allspice or ground ginger. Or just stick to cinnamon – it’s a classic for a reason.
- Butter Swap: While butter really does give the best flavor and texture, you *can* use an equal amount of vegetable oil for a slightly different crumb. But honestly, **IMO, butter is king here.**
- Glaze Alternatives: Not a glaze person? Dust the cooled cake with powdered sugar, drizzle with some warm caramel sauce, or even make a simple cream cheese frosting. Or just eat it plain, it’s still amazing!
- Gluten-Free: You can typically substitute all-purpose flour with a 1:1 gluten-free baking blend that includes xanthan gum. The texture might be slightly different, but still delicious!
FAQ (Frequently Asked Questions)
Got questions? I’ve got (casual) answers!
- Can I use margarine instead of butter? Well, technically yes, you *can*. But why hurt your soul (and your cake’s flavor) like that? Butter just tastes better and gives a superior texture. For the best results, stick with butter.
- Do I have to peel the apples? Nah, if you’re feeling extra lazy, leave ’em on! The peel adds a bit of rustic charm, extra fiber, and a slight chew. Just make sure to wash them well.
- Can I add nuts to the cake? Absolutely! Walnuts or pecans would be *chef’s kiss* in this cake. Fold in about ½ cup with the apples.
- How long does this Apple Pie Cake keep? It’s best within 2-3 days at room temperature (covered tightly), or up to 5 days in the fridge. But let’s be real, it probably won’t last that long!
- Can I make this ahead of time for a party? Yes, please do! This cake actually tastes fantastic the next day as the flavors have more time to meld. Just glaze it before serving.
- Is this really easier than making an actual apple pie? Oh, sweet summer child, **YES!** No finicky crusts to roll or crimp here. Just mix, pour, and bake. You’re welcome.
Final Thoughts
So there you have it, folks! Your new favorite dessert that’s a total crowd-pleaser and deceptively easy to make. This Apple Pie Cake with Glaze is proof that you don’t need to be a Michelin-star chef to create something utterly delicious and comforting.
Now go impress someone – or, more importantly, yourself – with your new culinary skills. You’ve earned it! Seriously, pat yourself on the back, you just made magic. Happy baking (and eating)!

