So you’re craving something tasty, juicy, and with those gorgeous char marks, but the thought of firing up the outdoor grill feels like too much adulting right now, huh? Same, friend, *same*. Don’t even get me started on the fickle weather or the constant fear of setting off the smoke detector. Well, buckle up, buttercup, because we’re about to hack our way to “grilled” chicken right in your oven. Yep, that magical box that usually just holds your forgotten takeout containers is about to become your new best friend for effortlessly delicious chicken.
Why This Recipe is Awesome
Okay, let’s be real. This isn’t just a recipe; it’s a life hack disguised as dinner. First off, it’s virtually **idiot-proof**. Seriously, if I can do it without calling the fire department, you’re golden. You get that lovely, slightly charred exterior and a super tender, juicy interior, all without the outdoor elements or the need for a propane tank. Plus, cleanup is a breeze if you use parchment paper or foil (pro tip!). It’s also incredibly versatile – a blank canvas for whatever flavor profile your heart desires. Weeknight dinner savior? Check. Meal prep hero? Double check. Impressing your date without breaking a sweat? You betcha!
Ingredients You’ll Need
Get ready for a shocker: you probably have most of this stuff already. No fancy-schmancy ingredients here, just good old basics.
- Boneless, Skinless Chicken Breasts (2-4): Or thighs, if you’re feeling rebellious. Pat them dry like you’re drying off a baby after a bath. It’s crucial for that crispy “grilled” texture!
- Olive Oil (2-3 tbsp): Your chicken’s best friend. Helps with browning and keeps things from sticking.
- Salt & Black Pepper (to taste): The OG flavor enhancers. Don’t be shy!
- Smoked Paprika (1 tsp): This is where the magic happens for that “grilled” flavor without the actual grill.
- Garlic Powder (1 tsp): Because everything is better with garlic. End of discussion.
- Onion Powder (1/2 tsp): Adds another layer of savory goodness.
- Optional additions for extra pizzazz: A pinch of cayenne for a kick, dried herbs like oregano or thyme, or a squeeze of lemon juice at the end.
Step-by-Step Instructions
Alright, let’s get down to business. Don’t blink, these steps are ridiculously easy.
- Prep the Chickens (and the Oven): First things first, pat those chicken breasts *super* dry with paper towels. Seriously, this step is important for getting that beautiful sear. While you’re doing that, go ahead and preheat your oven to a scorching 425°F (220°C). If your oven has a “broil” setting, make sure that’s ready to go for later.
- Season Like a Pro: In a medium bowl, drizzle your chicken with olive oil, then sprinkle generously with salt, pepper, smoked paprika, garlic powder, and onion powder. Get in there with your hands and rub it all over, making sure every inch is coated. Think of it as giving your chicken a spa treatment.
- Pan It Up: Grab a baking sheet and line it with parchment paper or foil for easy cleanup (you’ll thank me later). Place your seasoned chicken breasts on the sheet, making sure they’re not touching. Give them some personal space; they’re introverts.
- Bake ‘Em Good: Pop that baking sheet into your preheated oven. Bake for about 15-20 minutes, depending on the thickness of your chicken. You’re looking for an internal temperature of 165°F (74°C). If you don’t have a meat thermometer, get one! It’s a game-changer.
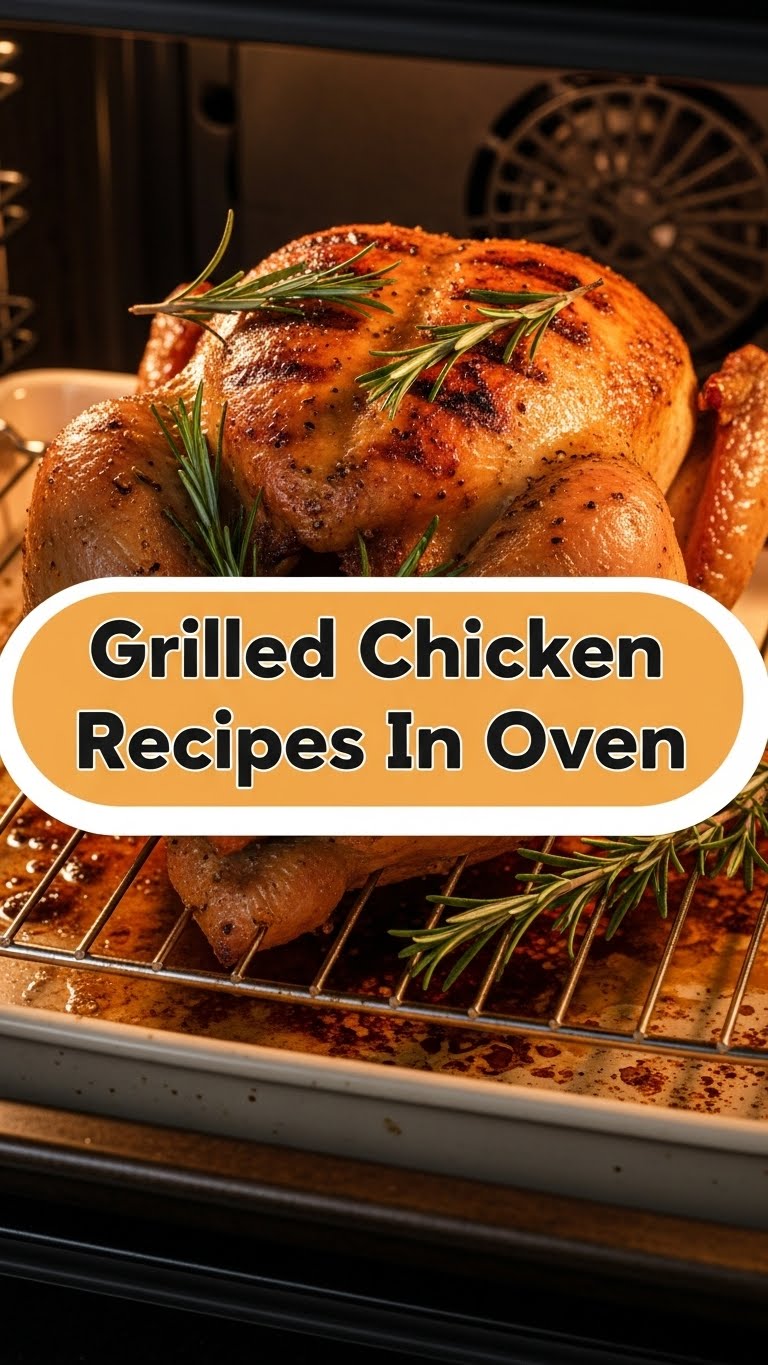
- Broil for That “Grilled” Finish: Once your chicken hits 165°F, it’s time for the grand finale. Move the oven rack closer to the broiler element (usually the top rack). Switch your oven to the “broil” setting. Broil for 2-4 minutes per side, watching *very* closely! We’re aiming for beautiful char marks, not charcoal briquettes.
- Rest, Then Devour: Once those beautiful grill marks appear, pull the chicken out and let it rest for 5-10 minutes. This is crucial for keeping the chicken juicy. Slice it, dice it, serve it whole – do whatever your heart desires.
Common Mistakes to Avoid
Because nobody’s perfect, here are a few facepalm moments you can totally sidestep:
- Not Patting Dry: This is probably the biggest offender. Wet chicken steams; dry chicken sears. You want sear!
- Forgetting to Preheat the Oven: Rookie mistake! Your chicken needs that initial blast of heat to get a good crust. Don’t be impatient.
- Overcrowding the Pan: We talked about personal space, right? If your chicken breasts are jammed together, they’ll steam instead of roast, and you’ll miss out on those delicious crispy bits.
- Skipping the Broil (or walking away from it): The broil is what gives you those coveted “grill marks.” But seriously, **do not walk away**. Broilers are notoriously fast and can turn perfect chicken into a smoky mess in seconds.
- Not Letting it Rest: Cutting into your chicken immediately after cooking is like making it run a marathon and then not letting it cool down. All those delicious juices will run out, leaving you with dry chicken. Let it chill!
Alternatives & Substitutions
Feeling adventurous? Or just out of a specific ingredient? No worries, I got you!
- Chicken Thighs instead of Breasts: Oh, absolutely! Thighs are more forgiving, stay juicier, and are generally harder to mess up. Cook them for a bit longer, maybe 20-25 minutes, until they reach 175°F (80°C) for optimal texture.
- Spice Blends: Out of smoked paprika? Try a store-bought BBQ rub, Italian seasoning, or even just salt, pepper, and a touch of chili powder. The world is your spice cabinet!
- Oil Alternatives: Avocado oil or grapeseed oil work just as well as olive oil for high-heat cooking. Just avoid butter for the initial cooking as it can burn too quickly under high heat.
- Marination Station: If you have extra time (say, 30 minutes to a few hours), marinating your chicken in a simple mix of olive oil, lemon juice, garlic, and your favorite herbs will take it to the next level. **FYI, longer isn’t always better**; too much lemon or acid can “cook” the chicken.
FAQ (Frequently Asked Questions)
Got questions? I’ve got (casual) answers!
- “Can I use frozen chicken breasts?” Well, technically you *can* cook from frozen, but it’s not ideal for this recipe’s quick cook time and even browning. It’s much better to thaw them completely first. IMO, life’s too short for sub-par chicken.
- “How do I know my chicken is cooked through?” The only truly reliable way is with a meat thermometer. Stick it into the thickest part of the chicken; it should read 165°F (74°C). Don’t cut into it to check, you’ll lose all the juices!
- “My oven doesn’t have a broiler. What now?” No worries! You can still get a nice sear by preheating your baking sheet in the oven before adding the chicken, or by finishing the chicken in a hot cast-iron skillet on the stovetop after baking.
- “Can I add veggies to the same pan?” You bet! Just make sure they’re cut into similar-sized pieces (think bell peppers, onions, zucchini) and tossed with a little oil and seasoning. Root veggies might need a head start, as they cook slower than chicken.
- “How long can I store leftovers?” Cooked chicken is good in an airtight container in the fridge for 3-4 days. It’s fantastic for salads, sandwiches, or quick weeknight stir-fries!
- “Is this really ‘grilled’ chicken if it’s from the oven?” Okay, okay, technically no. But it gives you that *vibe* and flavor profile without the actual grill. We’re going for delicious, not pedantic perfection, right?
Final Thoughts
See? I told you it was easy! Now you’ve got a killer, no-fuss recipe for “grilled” chicken that’ll make your taste buds sing and your belly happy. This is your secret weapon for those nights when you want something satisfying without the drama. So go on, whip up some of this magic, pat yourself on the back, and enjoy the deliciousness. Now go impress someone – or just yourself – with your new culinary skills. You’ve earned it!


