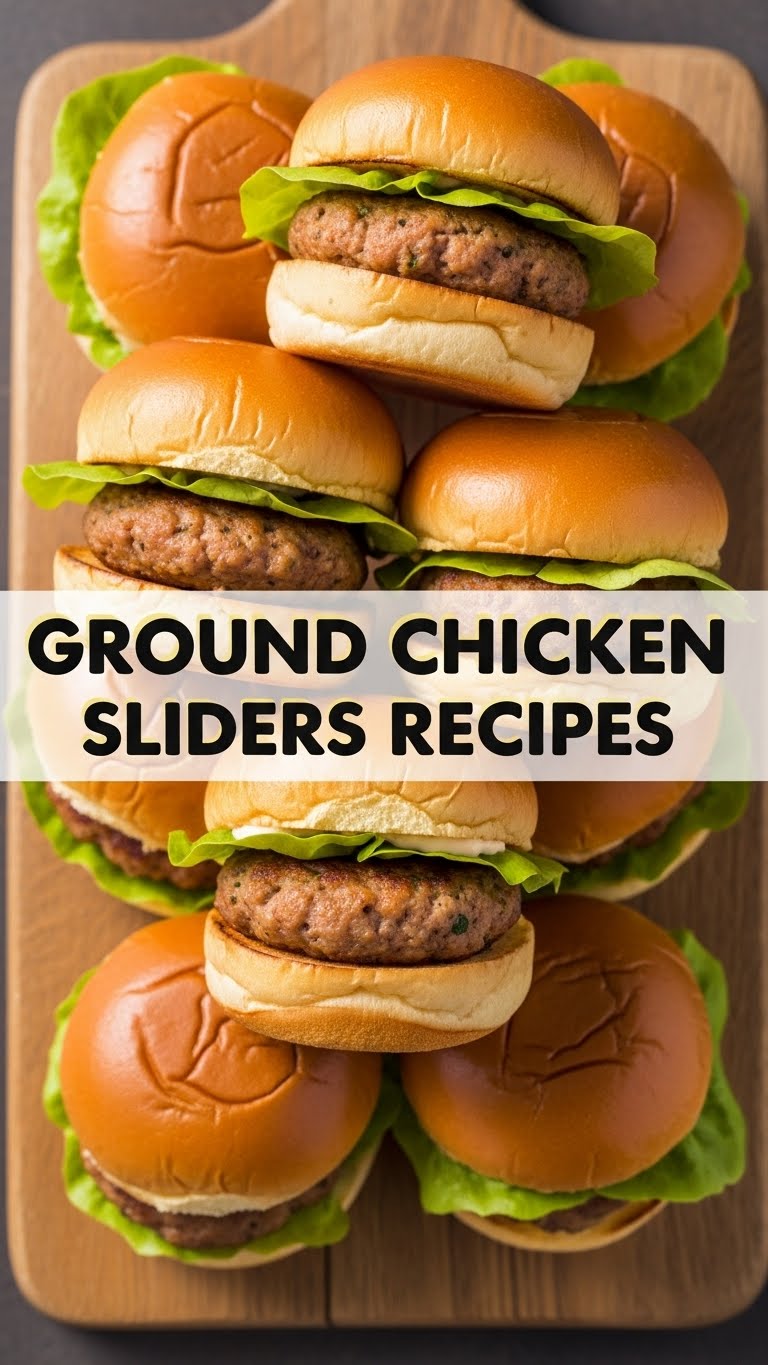
So you’re craving something tasty but too lazy to spend forever in the kitchen, huh? Same. We’re talking maximum flavor, minimum fuss. And guess what? Ground chicken sliders are here to save your weeknight (or weekend, no judgment). Get ready for some tiny burgers that pack a huge punch!
Why This Recipe is Awesome
Okay, so why are we even talking about ground chicken sliders? Because they’re seriously the unsung heroes of easy entertaining (or just feeding your hangry self). They’re lighter than beef, super versatile, and honestly, they cook up so fast you’ll wonder if you missed a step. Plus, they’re basically bite-sized hugs in bun form. And let’s be real, who doesn’t love something miniature and adorable that you can devour in two bites?
It’s practically idiot-proof, even I didn’t mess it up. Seriously, if you can form a patty, you can make these. Prepare to feel like a culinary genius with minimal effort. You’re welcome.
Ingredients You’ll Need
- Ground Chicken (1 lb): The star of our show! Get the good stuff, or just whatever’s on sale. Your call.
- Panko Breadcrumbs (1/4 cup): For that perfect texture. No soggy sliders allowed!
- Egg (1 large): Our binder, our glue, our patty whisperer.
- Garlic Powder (1 tsp): Because everything is better with garlic. Duh.
- Onion Powder (1 tsp): Garlic’s best friend. They’re a package deal.
- Salt & Black Pepper (to taste): Don’t be shy, season like you mean it. Bland food is a crime.
- Your Favorite Slider Buns (12-pack): Brioche, Hawaiian, whole wheat – pick your fighter!
- Toppings Galore: Lettuce, tomato, pickles, cheese, a fancy sauce… go wild! Think of it as a choose-your-own-adventure meal.
- A little oil (for cooking): Just enough to prevent sticking. We’re making sliders, not hockey pucks.
Step-by-Step Instructions
- Prep Time! Grab a big bowl. Toss in your ground chicken, panko, egg, garlic powder, onion powder, salt, and pepper.
- Get Your Hands Dirty. Seriously, dig in! Mix everything together until it’s just combined. Don’t overmix, or your sliders will be tough. Nobody wants a tough slider.
- Form the Patties. Divide the mixture into about 12 equal portions. Gently form each portion into small, flat patties. Remember, they shrink a bit when cooked, so make them slightly wider than your buns.
- Heat Things Up. Drizzle a little oil into a large non-stick skillet or cast-iron pan over medium heat. Get it nice and warm.
- Sizzle Time! Carefully place the patties into the hot pan. Cook for about 3-4 minutes per side, or until they’re golden brown and cooked all the way through. Make sure there’s no pink left!
- Cheese Please (Optional). If you’re a cheese fan (who isn’t?), put a slice on each patty during the last minute of cooking. Cover the pan briefly to help it melt perfectly.
- Assemble and Devour. Toast your slider buns if you like (highly recommended!). Pop a patty on each bun, add your favorite toppings, and boom! You’ve just made magic.
Common Mistakes to Avoid
- Overmixing the chicken: You’ll end up with rubbery patties. Treat that ground chicken gently, like it’s a fluffy cloud.
- Making patties too thick: They won’t cook evenly, and you’ll have raw centers or burnt outsides. Aim for about 1/2 inch thick.
- Not seasoning enough: We covered this. Bland food is a crime. Salt and pepper are your friends. Don’t be shy!
- Overcrowding the pan: This lowers the pan temperature, and your sliders will steam instead of sear. Cook in batches if you need to.
- Skipping the bun toasting: Seriously, toasted buns elevate the whole experience. It takes 30 seconds. Do it!
Alternatives & Substitutions
- Ground Turkey: No chicken? No problem! Ground turkey works perfectly here, giving you a similar lean protein option.
- Breadcrumb Swap: Ran out of panko? Crushed crackers (Ritz, anyone?), oats, or even a little almond flour (for a low-carb twist) can sub in.
- Spice It Up: Want a kick? Add a pinch of red pepper flakes, a dash of smoked paprika, or a splash of hot sauce to the mix. Gochujang, if you’re feeling fancy!
- Veggie Boost: Finely grate some zucchini or carrots into the mix for a stealthy veggie addition. Your secret’s safe with me.
- Sauce Boss: Ditch the plain ketchup. Try sriracha mayo, a homemade secret sauce (mayo + ketchup + pickle relish + a little mustard), or even a tangy BBQ sauce. IMHO, a good sauce makes all the difference!
FAQ (Frequently Asked Questions)
- “Can I bake these instead of pan-frying?” Absolutely! Place formed patties on a parchment-lined baking sheet and bake at 375°F (190°C) for 15-20 minutes, flipping halfway. Easy peasy!
- “My patties are falling apart! What gives?” You might need a bit more binder. Add another tablespoon of panko or half an egg, mix gently, and try again. Or, maybe your patties were too loose from the start. Press ’em firmly, but not too aggressively.
- “Can I make these ahead of time?” Yes, you smarty-pants, you can! Form the patties and store them in the fridge, separated by parchment paper, for up to 24 hours. Cook when ready. You can also cook them fully and reheat gently.
- “What’s the best way to prevent dry chicken sliders?” Two main things: 1) Don’t overcook them! Chicken dries out quickly. Use a meat thermometer if you’re unsure (it should reach 165°F/74°C). 2) Don’t overmix your initial mixture. That develops gluten and makes things tough.
- “Can I freeze uncooked patties?” You bet! Freeze them on a baking sheet until solid, then transfer to a freezer-safe bag for up to 3 months. Thaw in the fridge before cooking.
- “What about gluten-free options?” Easy! Just use gluten-free panko or crushed gluten-free crackers, and make sure your buns are GF too. Boom, problem solved.
- “Can I use margarine instead of butter for the buns?” Well, technically yes, but why hurt your soul like that? Butter just tastes better. You deserve butter.
Final Thoughts
And there you have it, folks! Your new go-to recipe for delicious, fuss-free ground chicken sliders. You just conquered the kitchen, made something ridiculously tasty, and probably have leftovers (if you’re strong enough to resist eating them all immediately). Now go impress someone—or yourself—with your new culinary skills. You’ve earned it! Seriously, pat yourself on the back. You’re a kitchen superstar. Now, what are you waiting for? Get cooking!


