Alright, kitchen adventurers! Ever stare at a pack of chicken drumsticks and think, “You beautiful, budget-friendly little things, what magic can we conjure today?” But also, “Please don’t make me work too hard.” Yeah, same. Good news: your Dutch oven is about to become your best friend, again, making those drumsticks sing a delicious song without you breaking a sweat.
Why This Recipe is Awesome
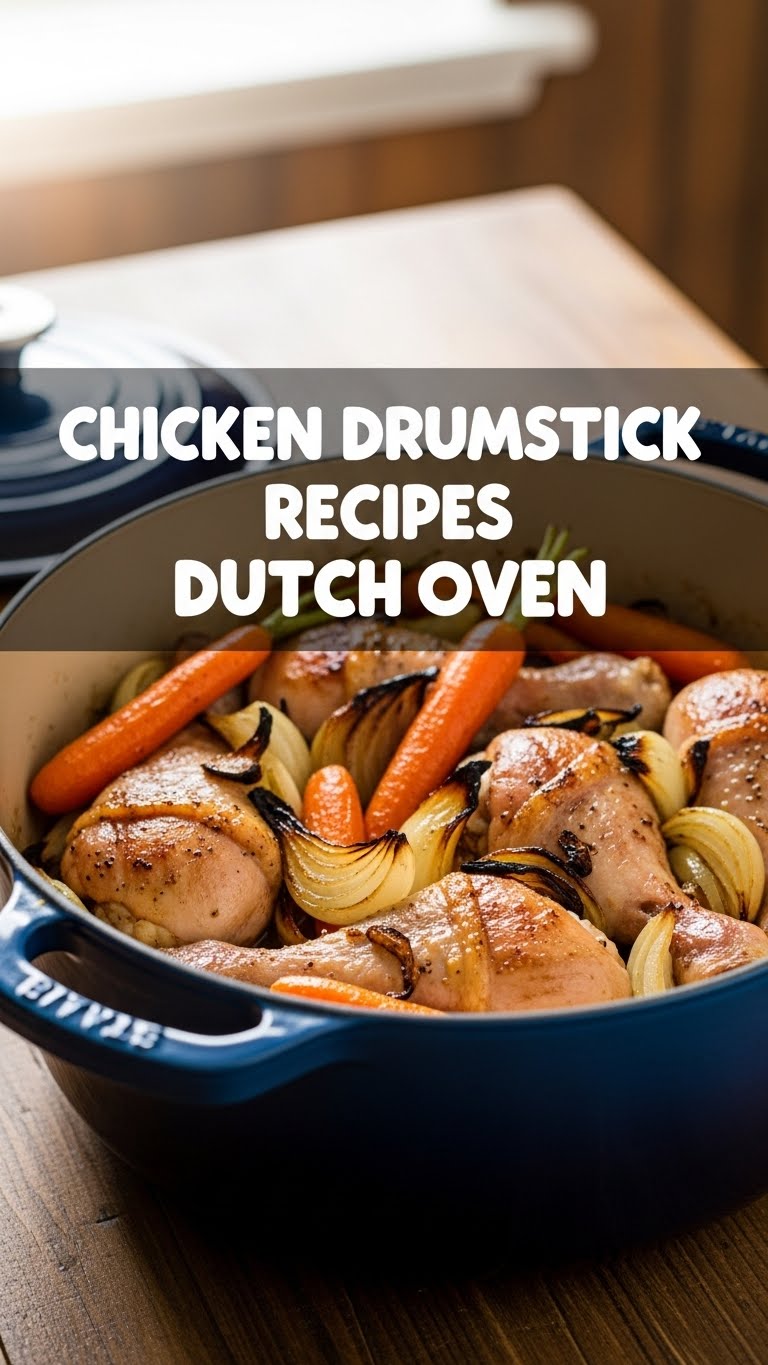
First off, it’s a one-pot wonder. Less dishes = more couch time. Secondly, it takes those humble drumsticks and transforms them into fall-off-the-bone, flavor-packed superstars. We’re talking crispy skin (hello!), tender meat, and veggies swimming in a savory sauce. Even *I* can’t mess this up, and my track record with anything more complex than toast is… patchy, shall we say? It’s basically **culinary wizardry without the actual magic wand.** Plus, it makes your house smell ridiculously good, which is a bonus. Win-win-win, if you ask me!
Ingredients You’ll Need
Gather your troops! Here’s what you’ll need to make this magic happen:
- Chicken Drumsticks: About 6-8 of ’em. The stars of our show, obviously.
- Olive Oil: Just a glug. For getting things nice and crispy.
- Onion: One medium, chopped. Don’t cry, it’s worth it.
- Garlic: 4-5 cloves, minced. Because garlic makes everything better, **no arguments allowed!**
- Chicken Broth: 2 cups. The liquid gold that keeps things juicy and makes a killer sauce.
- Potatoes: 2 medium, cubed (about 1-inch pieces). Yukon Golds or red potatoes work great. **Carbs are friends, not foes.**
- Carrots: 2 medium, chopped. For color, sweetness, and *maybe* a tiny bit of nutrition (don’t tell anyone).
- Spices: 1 tablespoon smoked paprika, 1 teaspoon dried thyme, salt, and freshly ground black pepper to taste. Your flavor squad, bringing the cozy vibes.
- Fresh Parsley (optional, but makes you look fancy): A sprinkle at the end for a pop of color and freshness.
Step-by-Step Instructions
- **Preheat & Season:** Get that oven nice and toasty to 375°F (190°C). Pat those drumsticks super dry with paper towels – this is **key for crispy skin** later! Sprinkle them generously with salt, pepper, and about half of that smoked paprika.
- **Sear for Glory:** Heat a good glug of olive oil in your Dutch oven over medium-high heat. Once shimmering, add the drumsticks in batches (if needed). **Don’t overcrowd the pot!** Sear them for about 3-4 minutes per side until beautifully golden brown. Remove the seared drumsticks and set them aside on a plate.
- **Aromatics Time:** Toss in your chopped onion and cook, stirring occasionally, until softened and translucent, about 5 minutes. Then, add the minced garlic and cook for another minute until it’s fragrant. Mmm, smell that? That’s flavor developing!
- **Build the Flavor:** Pour in a splash of chicken broth to deglaze the pot, scraping up all those delicious browned bits from the bottom with a wooden spoon. That’s pure flavor right there. Stir in the remaining smoked paprika and dried thyme.
- **Veggies & Chicken Return:** Add your cubed potatoes and chopped carrots to the pot, giving them a good stir to combine with the aromatics and broth. Nest your seared drumsticks back on top of the veggies. Pour in the rest of the chicken broth.
- **Oven Magic:** Cover your Dutch oven with its lid. Carefully pop it into the preheated oven and let it do its thing for 45 minutes.
- **Uncover & Finish:** After 45 minutes, carefully remove the lid. This allows the chicken skin to get extra crispy. Continue cooking for another 15-20 minutes, or until the chicken is cooked through (a meat thermometer should read 165°F / 74°C) and the veggies are tender.
- **Serve It Up:** Garnish with fresh parsley if you’re feeling fancy. Serve hot and bask in the glory of your delicious creation!
Common Mistakes to Avoid
We’ve all been there, friend. Learn from my oopsies:
- **Overcrowding the Pot:** Trying to fit all 8 drumsticks in at once like it’s a clown car. You won’t get that beautiful sear, just sad, steamed chicken. Do it in batches, **patience is a virtue (and leads to better food)!**
- **Skipping the Browning:** Thinking the initial browning step is “optional.” It’s not! That sear locks in flavor and makes the skin irresistible. Don’t be a chicken browning-skipper. It’s a non-negotiable for flavor town.
- **Lifting the Lid Too Often:** Every time you peek, you let out heat and steam, extending cooking time and messing with the magical cooking environment inside. Treat it like a surprise birthday party; **no peeking until it’s ready!**
- **Forgetting to Pat Dry:** If your chicken is damp, it steams instead of sears. Dry chicken = crispy skin. End of story.
Alternatives & Substitutions
Flexibility is key in the kitchen, right? Here are some ideas to mix things up:
- No Drumsticks? **Chicken thighs are a fantastic swap** – similar cooking time and often even juicier. Bone-in, skin-on is usually best for this recipe.
- Veggies Galore: Feel free to swap in sweet potatoes, bell peppers, parsnips, or even some zucchini towards the end of the cooking time. Just be mindful of cooking times – softer veggies go in later. Frozen peas or green beans can be added for the last 10 minutes.
- Herb Power: Rosemary or oregano can step in for thyme if that’s what you have. Want a kick? Add a pinch of red pepper flakes with the garlic. A bay leaf also adds a nice depth of flavor.
- Smoky Swap: If you don’t have smoked paprika, regular paprika works, but you’ll miss that lovely smoky depth. A tiny dash of liquid smoke (and I mean TINY) can help, but smoked paprika is definitely preferred.
FAQ (Frequently Asked Questions)
Got questions? I probably asked them too, so here are some answers:
- Can I make this ahead of time? Absolutely! It often tastes even better the next day as the flavors meld. Just reheat gently on the stove or in the oven until warmed through.
- My chicken skin isn’t crispy enough! What gives? Did you pat them dry? Did you sear them well until golden? Did you leave the lid off for the final 15-20 minutes? **Those are the crispy secrets!** Also, make sure your oven is truly at temperature.
- Can I use boneless chicken? Sure, but adjust cooking time downwards, maybe 30-40 minutes total, and be careful not to dry it out. And you lose the fun of gnawing on a bone, **just sayin’.**
- What if I don’t have a Dutch oven? A heavy, oven-safe pot with a tight-fitting lid will work, but a Dutch oven really excels at even heat distribution and retaining moisture. If you don’t have one, **IMO, it’s a worthy investment for your kitchen!**
- Can I add more spice? Heck yes! A pinch of cayenne, more paprika, or even a dash of your favorite hot sauce will kick things up a notch. This recipe is super adaptable, so **you do you!**
- What should I serve with this? It’s a meal in itself with the potatoes and carrots! But a simple green salad, some crusty bread for soaking up the sauce, or a side of rice would be delightful.
Final Thoughts
See? Told you it was easy! Now you’ve got a ridiculously flavorful, comforting meal that looks impressive but required minimal effort. Go ahead, pat yourself on the back. You’ve earned it! This Dutch oven chicken drumstick recipe is truly a weeknight (or any night) hero. Now, go forth and devour!


