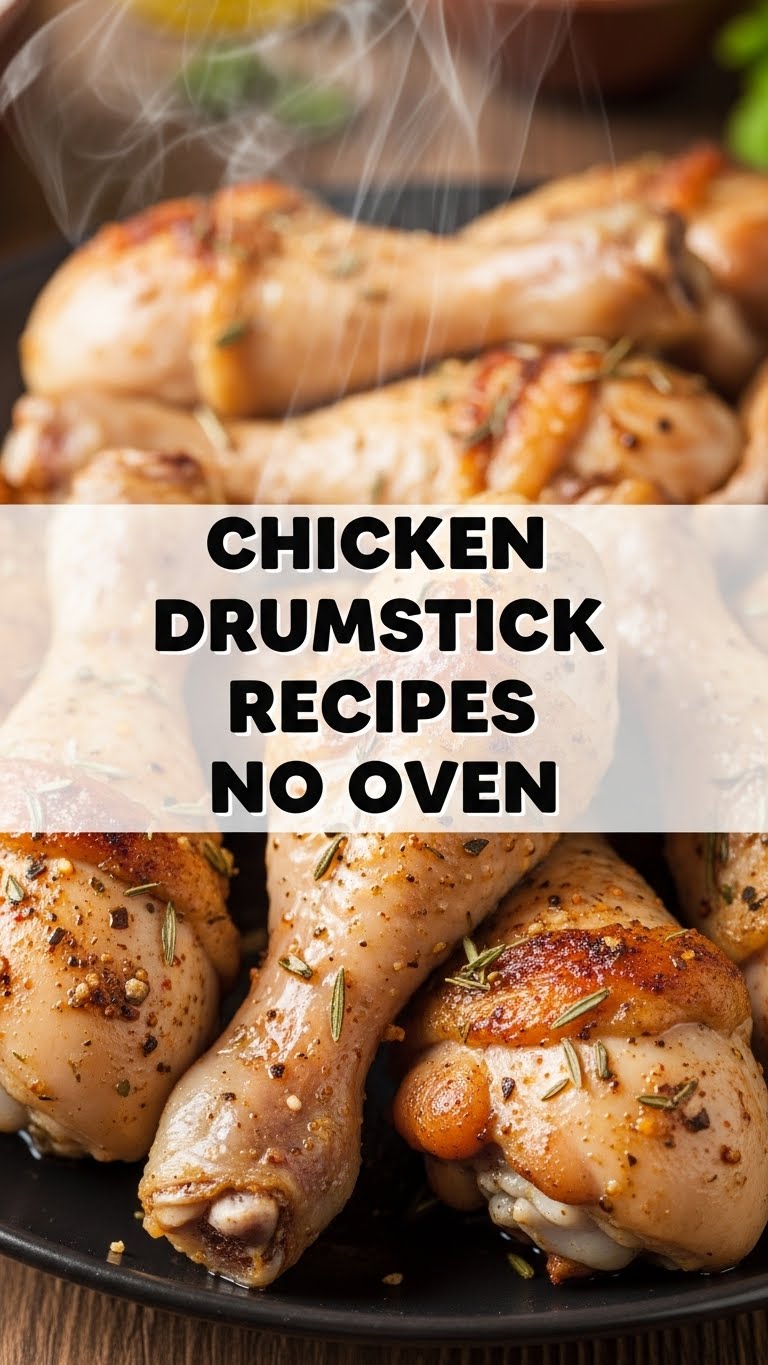
So you’re craving something tasty, comforting, and utterly delicious but too lazy to spend forever in the kitchen (and definitely not turning on that oven, especially if it’s hot out)? Same. High five! You’ve landed in the right spot, because today we’re tackling chicken drumsticks without even glancing at that big, electricity-guzzling box. Get ready for some seriously good, pan-fried, sticky-glazed goodness that’ll make you wonder why you ever bothered with an oven for these beauties.
Why This Recipe is Awesome
Let’s be real, sometimes you just want dinner to happen without a grand production. This recipe is your culinary superhero for those exact moments. It’s **fast, flavor-packed, and requires minimal effort**, which, let’s face it, is my kind of cooking. Plus, no oven means no preheating, no heating up your entire kitchen, and fewer dishes (usually just one pan!). It’s practically idiot-proof – and trust me, if I can nail it after a long day, you definitely can too. It’s also incredibly versatile, so you can tweak it to your heart’s content. **Winner, winner, chicken dinner**, literally!
Ingredients You’ll Need
Gather ’round, my friend, and let’s get these pantry heroes ready. This isn’t a gourmet shopping trip; these are your everyday champions!
- **6-8 Chicken Drumsticks:** The star of our show! Pat ’em dry – this is key for crispy skin, trust me.
- **1 tbsp Oil:** Any neutral oil (vegetable, canola, even light olive oil) will do. We’re searing, not deep-frying.
- **For the Sticky Sauce/Marinade:**
- **1/4 cup Soy Sauce:** Low sodium if you’re watching the salt, but original works too.
- **2 tbsp Honey (or Maple Syrup):** For that glorious sticky sweetness. Don’t skimp!
- **1 tbsp Rice Vinegar (or Apple Cider Vinegar):** Adds a nice tang to balance the sweet and savory.
- **2-3 cloves Garlic:** Minced, because garlic makes everything better, **IMO**.
- **1 tsp Ginger:** Grated fresh or half a teaspoon of powder. It’s the zing we need.
- **1/2 tsp Sriracha or Chili Flakes (Optional):** If you like a little kick. Go wild, or don’t!
- **1/4 cup Water or Chicken Broth:** To help create that lovely sauce.
- **Salt & Pepper:** To taste, before and after.
- **Sesame Seeds & Chopped Green Onions (Optional Garnish):** For looking fancy without trying.
Step-by-Step Instructions
Alright, let’s get cooking! This is so straightforward, you’ll be done before you know it.
- **Prep the Drumsticks:** First things first, pat those drumsticks **super dry** with paper towels. Seriously, this step is important for crispy skin. Season them generously with salt and pepper.
- **Whip Up the Sauce:** In a small bowl, whisk together the soy sauce, honey (or maple syrup), rice vinegar, minced garlic, ginger, sriracha (if using), and water/broth. Set it aside.
- **Sear ‘Em Good:** Heat your oil in a large skillet (preferably cast iron or heavy-bottomed) over medium-high heat. Once hot, add the drumsticks in a single layer. Don’t crowd the pan! You might need to do this in batches. Sear for about 4-5 minutes per side until beautifully golden brown and crispy.
- **Sauce Time!:** Once all sides are seared, pour the glorious sticky sauce over the drumsticks. Bring it to a gentle simmer.
- **Cover & Cook:** Reduce the heat to medium-low, cover the skillet, and let those drumsticks cook for about 20-25 minutes, flipping them halfway through. This allows them to cook through and absorb all that amazing flavor.
- **Uncover & Glaze:** Remove the lid and increase the heat back to medium-high. Let the sauce bubble and thicken, turning the drumsticks occasionally, until the sauce reduces to a beautiful, sticky glaze. This usually takes another 5-10 minutes. **Keep an eye on it so it doesn’t burn!**
- **Rest & Serve:** Remove from heat, let the drumsticks rest for a few minutes (this keeps them juicy). Garnish with sesame seeds and green onions if you’re feeling fancy.
Common Mistakes to Avoid
Even the easiest recipes have their little pitfalls. Avoid these, and you’ll be golden!
- **Not Drying the Chicken:** This is probably the biggest rookie mistake. Wet chicken steams, dry chicken sears. You want sear!
- **Crowding the Pan:** I know, I know, you want to cook it all at once. But stuffing too many drumsticks in means the temperature drops, and they’ll steam instead of getting that gorgeous crispy skin. Do it in batches, **FYI**.
- **Forgetting to Flip:** You want even cooking and an all-around sticky glaze, right? Don’t just leave them on one side.
- **Burning the Sauce:** That delicious honey/sugar in the sauce can burn quickly once it starts to thicken. Keep an eye on it and stir/flip frequently during the glazing stage.
Alternatives & Substitutions
Feeling adventurous or missing an ingredient? No worries, we can totally improvise!
- **Chicken Thighs:** Don’t have drumsticks? Boneless, skinless chicken thighs work wonderfully here. Adjust cooking time down to about 15-20 minutes covered, then glaze.
- **Different Flavors:**
- **Lemon-Herb:** Skip the soy/honey, and go for lemon juice, olive oil, dried oregano, thyme, and a dash of white wine or broth.
- **Smoky BBQ:** Use your favorite BBQ sauce mixed with a bit of water and a dash of liquid smoke.
- **Spicy Garlic Butter:** Melted butter, lots of minced garlic, a good hit of hot sauce, and a squeeze of lime.
- **Sweeteners:** Brown sugar works perfectly in place of honey or maple syrup for the glaze.
- **Vinegar:** If you don’t have rice vinegar, apple cider vinegar is the next best choice. Lemon juice can also pinch-hit for a different tang.
FAQ (Frequently Asked Questions)
Got questions? I’ve got answers! (Mostly.)
- **”How do I know if the chicken is cooked through?”** Are you brave enough to cut into one to check? Or, if you’re fancy, use a meat thermometer! It should read 165°F (74°C) at the thickest part. No pink!
- **”Can I make the sauce ahead of time?”** Absolutely! Mix it up, stash it in the fridge. One less thing to do later. You’re a meal prep genius!
- **”What if my sauce isn’t thickening?”** Crank up the heat a bit and let it simmer uncovered for longer. The sugar will caramelize and thicken. Patience, grasshopper!
- **”Can I freeze leftovers?”** You bet! Once completely cooled, store them in an airtight container for up to 2-3 months. Reheat gently on the stove or in the microwave.
- **”What should I serve with these awesome drumsticks?”** Oh, the possibilities! Steamed rice (to soak up all that extra sauce), a simple green salad, roasted broccoli, or even some quick noodles.
- **”My chicken skin isn’t crispy enough, help!”** Did you pat it dry? Did you sear on high enough heat initially? And did you overcrowd the pan? Go back and check those “Common Mistakes”!
- **”Can I use chicken breasts instead?”** Technically yes, but chicken breasts are leaner and can dry out more easily. If you do, sear for less time and be extra careful not to overcook. Thighs are generally a better substitute for drumsticks.
Final Thoughts
And there you have it! A plate of perfectly cooked, sticky-glazed drumsticks, all without turning on the oven. Pretty sweet, right? You just conquered dinner with minimal fuss and maximum flavor. Go ahead, pat yourself on the back, you culinary wizard! Now go impress someone – or just yourself – with your new no-oven skills. You’ve earned it! Enjoy every glorious bite.


