So, you’re craving something ridiculously tasty but also kinda want to chill on the couch instead of slaving away in the kitchen, huh? Yeah, I get it. We’ve all been there. Good news, my friend: I’ve got the perfect solution that screams “effortless deliciousness.” We’re talking oven-baked chicken drumsticks! It’s the kind of dish that makes you look like a culinary genius without actually requiring genius-level skills. Pinky promise.
Why This Recipe is Awesome
Let’s be real, who needs stress when you can have crispy, juicy, flavorful drumsticks with minimal fuss? This isn’t just a recipe; it’s a lifestyle choice for the busy, the hungry, and the slightly lazy (no judgment here!). Here’s the lowdown on why this one’s a winner:
- It’s practically idiot-proof. Seriously, if I can do it without setting off the smoke alarm, you can too.
- Minimum dishes, maximum flavor. We’re talking one pan, people. One. Pan. Your future self scrubbing dishes will thank you.
- Budget-friendly. Drumsticks are like the unsung heroes of the poultry world – cheap, cheerful, and full of flavor. Score!
- Customizable AF. Want to go spicy? Garlicky? Herby? The world is your oyster… or, well, your drumstick.
Ingredients You’ll Need
Gather ’round, my aspiring chef. Here’s what you’ll need for your drumstick masterpiece. Don’t worry, nothing too fancy, just good ol’ kitchen staples:
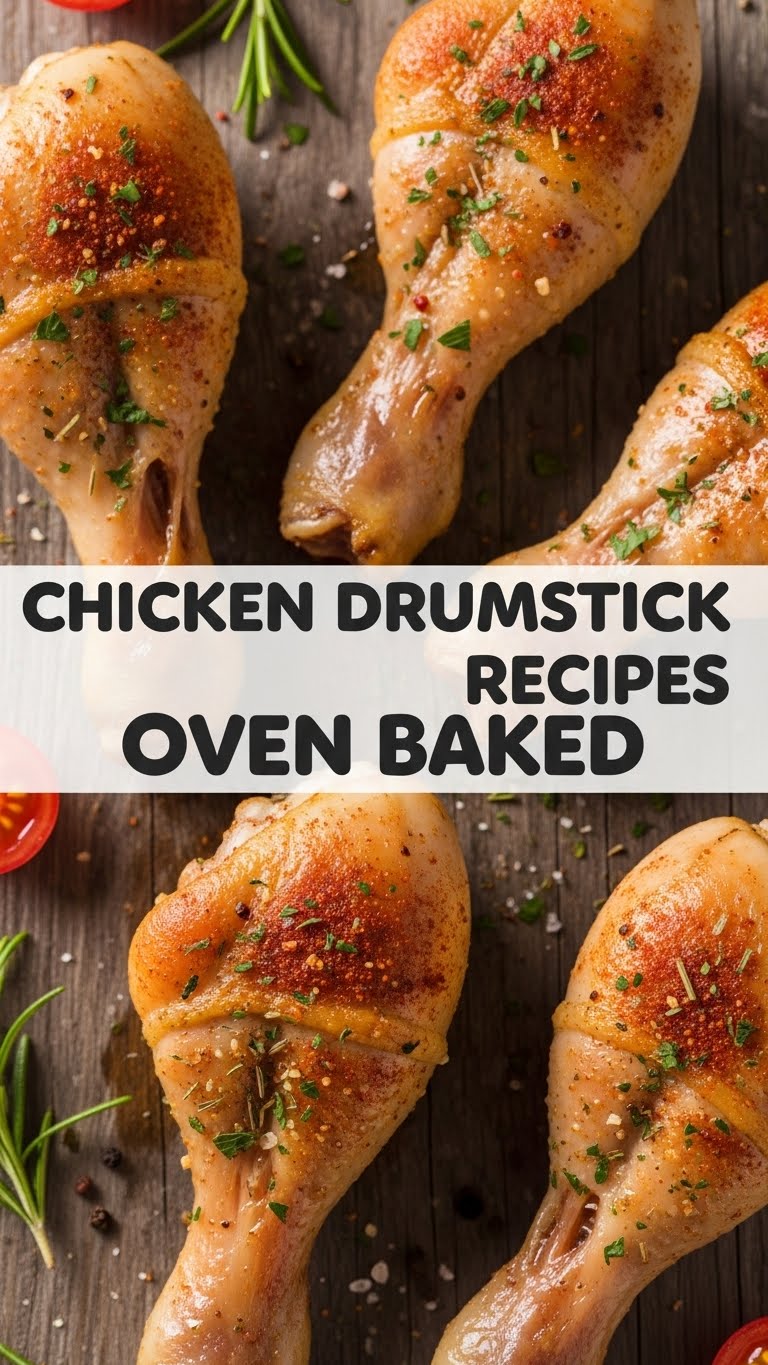
- 10-12 Chicken Drumsticks: The stars of our show. Look for ones that are plump and happy.
- 2 Tablespoons Olive Oil (or avocado oil): Your drumsticks need a little spa treatment to get that golden glow.
- 1 Teaspoon Salt: Don’t skimp, it makes everything pop!
- ½ Teaspoon Black Pepper: Freshly ground is always better, but hey, don’t sweat it if you only have pre-ground.
- 1 Tablespoon Smoked Paprika: This is your secret weapon for that beautiful color and smoky depth. Don’t use regular paprika unless you want to miss out on the fun.
- 1 Teaspoon Garlic Powder: Because everything is better with garlic, right?
- ½ Teaspoon Onion Powder: Garlic’s trusty sidekick, adding another layer of yum.
- (Optional) ½ Teaspoon Dried Herbs: Think oregano, thyme, or an Italian blend. Adds a nice aromatic touch.
- (Optional) ¼ Teaspoon Cayenne Pepper: If you like a little kick in your step (and your chicken).
Step-by-Step Instructions
Alright, apron on (or not, your call!), let’s get cooking. These steps are so simple, you could probably do them in your sleep.
- Preheat & Prep Your Pan: First things first, get that oven screaming hot to 400°F (200°C). Line a baking sheet with parchment paper or foil for easy cleanup. Your future self will thank you for this genius move.
- Pat ‘Em Dry: This is super important! Grab some paper towels and pat those drumsticks until they’re as dry as a desert. Dry skin = crispy skin. It’s science.
- Oil ‘Em Up: Toss the drumsticks into a large bowl. Drizzle with the olive oil and get in there with your hands (or tongs, if you’re fancy) to make sure every drumstick is lightly coated.
- Season Like a Pro: Sprinkle your salt, pepper, smoked paprika, garlic powder, onion powder, and any optional herbs/cayenne over the oiled drumsticks. Again, use your hands to rub that glorious seasoning all over. Make sure every crevice gets some love.
- Arrange & Bake (Part 1): Place the seasoned drumsticks on your prepared baking sheet in a single layer. Make sure they’re not touching each other; they need their personal space for optimal crispiness. Pop them into the preheated oven for 20 minutes.
- Flip & Bake (Part 2): After 20 minutes, carefully flip each drumstick over. Stick them back in the oven for another 15-20 minutes, or until they’re golden brown and the internal temperature reaches 165°F (74°C) at the thickest part. Use a meat thermometer, unless you’re a wizard who can tell doneness just by looking (I’m not, so I use a thermometer, FYI).
- Rest (The Hardest Part): Once they’re perfectly cooked, remove the baking sheet from the oven. Let those beauties rest for about 5 minutes before serving. This allows the juices to redistribute, keeping them super moist.
Common Mistakes to Avoid
Even though this recipe is pretty foolproof, there are a few rookie errors that can turn your crispy dreams into soggy nightmares. Don’t be that person!
- Forgetting to Preheat the Oven: This isn’t a suggestion, it’s a command! A cold oven means uneven cooking and less crispiness. Rookie mistake!
- Not Patting Dry: Seriously, I cannot stress this enough. If the skin is wet, it steams instead of crisps. And nobody wants steamed chicken skin, IMO.
- Overcrowding the Pan: Give those drumsticks some room! If they’re packed too tightly, they’ll steam each other and won’t get that glorious all-around crisp. Use two baking sheets if you need to.
- Eyeballing Doneness: Unless you’re a seasoned chef with years of experience, invest in a meat thermometer. Undercooked chicken is no fun, and overcooked chicken is dry and sad.
Alternatives & Substitutions
Feeling a little rebellious? Want to switch things up? Go for it! This recipe is super adaptable. Here are a few ideas:
- Spice Blends: Ditch my spice blend (blasphemy, I know!) and use your favorite pre-made seasoning. Cajun, Lemon-Pepper, Shawarma seasoning – all great choices!
- Sauce It Up: Last 10 minutes of baking, brush your drumsticks with BBQ sauce, teriyaki, or a spicy buffalo sauce. Be warned: this will make the skin less crispy, but potentially more sticky-delicious.
- Different Cuts: This method works great for chicken thighs too! Just adjust cooking time slightly (thighs might need a little longer).
- Fresh Herbs: Instead of dried herbs, throw in some finely chopped fresh rosemary or thyme with the oil. The aroma alone is worth it!
FAQ (Frequently Asked Questions)
Got questions? I’ve got answers! (Mostly.)
- Do I really need to use parchment paper/foil? Well, technically no, but do you *really* want to scrub burnt chicken bits off your pan? It’s a lifesaver for cleanup.
- Can I use skinless drumsticks? You *can*, but why would you want to deny yourself the crispy skin experience? If you do, they might dry out a bit quicker, so keep an eye on them.
- How long do leftovers last? Cooked chicken is good in the fridge for 3-4 days. Perfect for meal prep!
- Can I marinate them beforehand? Absolutely! A quick marinade (30 mins to overnight) in yogurt, lemon juice, or soy sauce can add even more flavor and tenderness. Just pat them dry again before baking!
- My chicken isn’t crispy! What did I do wrong? Likely culprits: not patting dry, overcrowding the pan, or your oven wasn’t hot enough. Don’t worry, try again! Practice makes perfect (and delicious chicken).
- What should I serve with these? Oh, the possibilities! Roasted veggies, a simple side salad, mashed potatoes, rice, mac and cheese… you name it.
Final Thoughts
See? That wasn’t so hard, was it? You just whipped up some seriously tasty, perfectly crispy chicken drumsticks. You’re practically a culinary wizard now! So go ahead, bask in the glory, enjoy your delicious creation, and maybe even take a picture for the ‘gram. You’ve earned it! Now go impress someone—or yourself—with your new culinary skills. You’re amazing!


