So, you’re craving something ridiculously tasty but the thought of spending hours slaving over a hot stove makes you want to just order takeout, huh? Same. High five! But what if I told you there’s a way to get that incredible, sticky-sweet, savory chicken magic with minimal effort? Yeah, I know, it sounds too good to be true. But trust your culinary fairy godparent (that’s me!) on this one. We’re diving into the glorious world of Sweet Baked Chicken, and it’s about to become your new weeknight hero.
Why This Recipe is Awesome
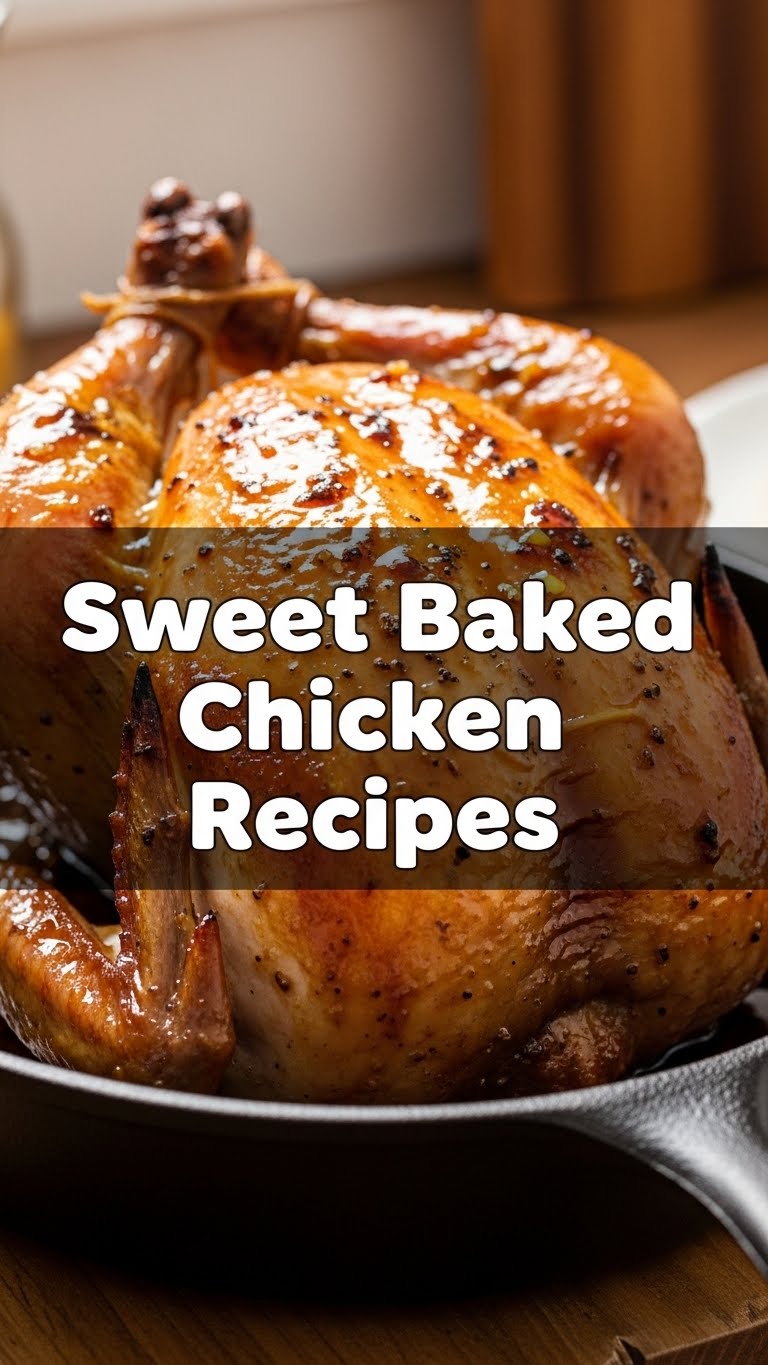
Okay, first things first: why *this* sweet baked chicken recipe? Because it’s literally **idiot-proof**. I’ve made this while distracted by cat videos, and it still turned out phenomenal. It requires minimal active cooking time, which means more time for you to do important things like… well, anything but standing over a stove. Plus, it uses ingredients you probably already have lurking in your pantry, saving you a dreaded extra trip to the grocery store. It’s sweet, it’s savory, it’s got that addictive glaze, and it makes your kitchen smell like a five-star restaurant. You’ll impress your family, your friends, or most importantly, your hungry self. Also, cleanup is usually a breeze, especially if you follow my genius foil-lining tip. You’re welcome.
Ingredients You’ll Need
Get ready for a lineup of everyday heroes. No fancy, impossible-to-find stuff here, promise!
- **Chicken Pieces (about 2-3 lbs):** Thighs are my absolute faves for juiciness, but drumsticks or even breasts (boneless, skinless, if you must) work. Just adjust cooking times.
- **Honey or Maple Syrup (1/2 cup):** The sticky-sweet backbone of our operation. Use whichever your heart (and pantry) desires.
- **Soy Sauce (1/4 cup):** Hello, umami bomb! Don’t skip this, it’s crucial for depth.
- **Garlic (3-4 cloves, minced):** Because everything is better with garlic. Don’t even try to argue.
- **Fresh Ginger (1 tbsp, grated) or Ground Ginger (1 tsp):** Adds a lovely warmth. Fresh is boss, but powdered gets the job done if you’re in a pinch.
- **Apple Cider Vinegar or Rice Vinegar (1 tbsp):** A little tang to cut through all that sweetness. It’s like a flavor referee.
- **Sriracha or Red Pepper Flakes (1/2 tsp to 1 tsp, or more to taste):** For a subtle kick that makes things interesting. Totally optional, but highly recommended unless you’re a spice-phobe.
- **Salt & Black Pepper:** Just a pinch, to taste.
- **Sesame Seeds & Sliced Green Onions (for garnish):** Optional, but they make it look all fancy. You know, for the ‘gram.
Step-by-Step Instructions
Time to get your hands a little dirty (but not *too* dirty, we hope!).
- **Preheat Your Oven & Prep Your Pan:** First things first, get that oven screaming hot to **400°F (200°C)**. While it’s heating up, line a baking sheet or an oven-safe dish with foil. Seriously, **do this**. It’s the secret to easy cleanup and keeps that glorious sticky sauce from gluing itself to your pan forever.
- **Whip Up That Dreamy Sauce:** In a medium bowl, whisk together the honey (or maple syrup), soy sauce, minced garlic, grated ginger, apple cider/rice vinegar, Sriracha/red pepper flakes, salt, and pepper. Give it a good whisk until everything is happily combined. This is where the magic happens!
- **Pat Down Your Chicken:** Take your chicken pieces and pat them super dry with paper towels. **Why dry?** Because dry chicken skin gets crispy and absorbs flavor better. Nobody wants soggy chicken, IMO.
- **Coat ‘Em Up:** Place the chicken pieces in your prepared foil-lined baking dish. Pour about **two-thirds of the sauce** over the chicken, making sure each piece gets a nice coating. Save the remaining third for basting later.
- **Bake Until Golden:** Pop the dish into your preheated oven. Bake for about 30-35 minutes. Halfway through, around the 15-20 minute mark, you might want to flip the chicken pieces and baste them with some of the pan sauce for even coating and flavor.
- **The Grand Finale Baste & Broil:** After 30-35 minutes, pull the chicken out. Now, pour the **remaining reserved sauce** over the chicken pieces. If you’re feeling extra, crank your oven to broil for the last 3-5 minutes (keep a very close eye on it!) to get that skin extra crispy and caramelized. Your goal is an internal temperature of 165°F (74°C).
- **Rest & Garnish:** Take the chicken out of the oven. Let it rest for 5-10 minutes before serving. This lets the juices redistribute, making your chicken super tender. Garnish with sesame seeds and sliced green onions if you’re feeling fancy.
Common Mistakes to Avoid
We’ve all been there, friend. Learn from my culinary mishaps!
- **Skipping the Foil Lining:** I know, it feels like an extra step. But if you don’t do it, you’ll spend more time scrubbing than eating. You’ve been warned.
- **Overcrowding the Pan:** Give your chicken some space! If the pieces are too close together, they’ll steam instead of roast, and you’ll miss out on that glorious crispy skin. Use two pans if needed.
- **Not Patting the Chicken Dry:** Again, soggy skin is a sad skin. A quick pat with a paper towel makes a world of difference for crispiness.
- **Forgetting to Preheat the Oven:** You wouldn’t jump into a cold pool, right? Don’t make your chicken do it either. A hot oven ensures even cooking and a good sear.
- **Not Letting it Rest:** Patience, young grasshopper! Resting the chicken for a few minutes allows the juices to settle back into the meat, resulting in a more tender and juicy bite.
Alternatives & Substitutions
Life’s too short for rigid recipes. Here’s how to play around!
- **Chicken Cuts:** Thighs are awesome for beginners because they’re super forgiving and stay juicy. Drumsticks are also great. If you use boneless, skinless breasts, reduce the cooking time significantly (think 20-25 minutes) to avoid dry chicken.
- **Sweeteners:** No honey? Maple syrup works beautifully. Out of both? Brown sugar dissolved in a little hot water can do the trick, but it might not be as thick.
- **Spice Level:** If you’re a fire-breathing dragon, add more Sriracha or a pinch of cayenne pepper. If you’re sensitive to heat, skip it entirely or use a tiny dash of black pepper for warmth.
- **Veggies in the Pan:** Want a one-pan meal? Toss some chopped broccoli florets, bell pepper strips, or thick-sliced onions with a tiny bit of olive oil, salt, and pepper, and add them to the pan during the last 15-20 minutes of cooking. Instant side dish!
- **Gluten-Free Option:** Use tamari instead of regular soy sauce for a gluten-free version.
FAQ (Frequently Asked Questions)
Got questions? I’ve got (casual) answers!
- **Can I marinate the chicken beforehand?** Oh heck yes! Marinating it in the sauce for a few hours or even overnight in the fridge will take the flavor to a whole new level. Just save some of the fresh sauce for basting, don’t use the raw marinade from the chicken.
- **My sauce isn’t thickening up, what gives?** Sometimes it happens! You can carefully remove the chicken after it’s cooked, then pour the pan sauce into a small saucepan. Bring it to a simmer, and if it’s still too thin, mix a teaspoon of cornstarch with a tablespoon of cold water, then whisk it into the simmering sauce until it thickens.
- **What do I serve this with?** Rice is always a winner to soak up that glorious sauce. Steamed broccoli, a simple side salad, or some roasted asparagus would also be fantastic.
- **Can I use frozen chicken?** Not directly. You absolutely **must** thaw your chicken completely before cooking. Pat it dry like your life depends on it!
- **How long do leftovers last?** Stored properly in an airtight container in the fridge, it’ll be good for 3-4 days. It’s awesome for meal prep!
- **Is this recipe kid-friendly?** Absolutely! Just go easy (or omit) the Sriracha/red pepper flakes if your kiddos are sensitive to spice. The sweetness is usually a big hit.
Final Thoughts
See? I told you it was easy peasy! You’ve just unlocked a new level of home cooking that’s big on flavor and low on stress. This sweet baked chicken is a guaranteed crowd-pleaser and, let’s be real, a lifesaver on busy nights. So go forth, my friend, conquer that kitchen, and prepare for some serious deliciousness. Now go impress someone—or yourself—with your new culinary skills. You’ve earned it!


