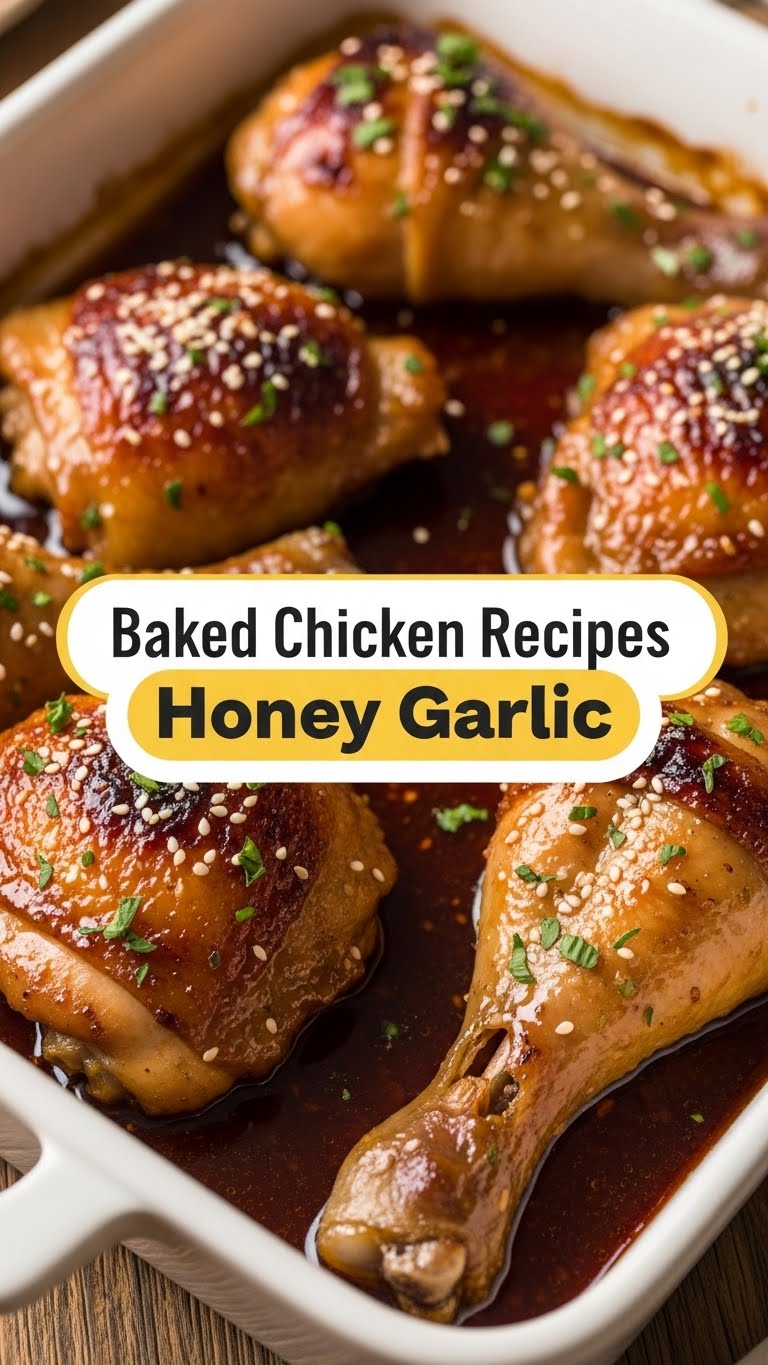
So, you’re staring blankly into the fridge, dreaming of something ridiculously tasty but dreading the whole “actually cooking it” part? Yeah, I feel you. We’ve all been there – that sweet spot between “I’m starving!” and “Ugh, effort.” Good news, my friend, because today we’re whipping up a Honey Garlic Baked Chicken that’s so easy, it practically makes itself. Well, almost. 😉
Why This Recipe is Awesome
Listen up, because this isn’t just *another* chicken recipe; it’s a culinary hug in a pan. Why is it awesome? Let me count the ways:
- It’s idiot-proof. Seriously, if I can do it without setting off the smoke alarm (which is a personal best, FYI), you can too.
- Minimal effort, maximum flavor. You toss a few things together, shove it in the oven, and boom! Dinner is served. It’s like magic, but with actual ingredients.
- The sauce? Oh, the sauce! It’s that perfect blend of sweet, savory, and garlicky goodness that will have you licking the plate clean. Don’t deny it.
- It makes you look like a kitchen wizard without actually having to master any complicated spells. Impress your friends, family, or just your hungry self. You’ve earned it!
- Cleanup is surprisingly minimal. Nobody wants to spend their post-dinner bliss scrubbing pans.
Ingredients You’ll Need
Gather your troops, young chef! Here’s what you’ll need for this glorious creation. Keep it simple, keep it fun!
- Chicken: About 1.5 – 2 lbs boneless, skinless chicken thighs or breasts. Thighs are more forgiving, but breasts work if you’re watching your calories. Your call!
- Honey: ½ cup. The sticky, sweet star of our show. Don’t use the sad, old crystallized stuff, please.
- Soy Sauce: ¼ cup. The umami champion. Use low-sodium if you’re feeling virtuous.
- Garlic: 4-5 cloves, minced. Yes, that much. No, don’t skimp. This is honey *garlic* chicken, after all!
- Rice Vinegar: 2 tablespoons. A little tang to cut through the sweetness. Trust me on this.
- Ginger: 1 teaspoon fresh grated ginger. If you’re feeling lazy, ½ tsp ground ginger works, but fresh is SO much better.
- Cornstarch: 1 tablespoon (optional, but highly recommended for a glorious glaze).
- Olive Oil: 1 tablespoon. Just a little drizzle.
- Salt & Black Pepper: To taste. The OG flavor enhancers.
- Garnish (Optional): Sesame seeds and chopped green onions for that fancy restaurant vibe.
Step-by-Step Instructions
Alright, apron on (or not, we don’t judge), let’s get cooking! These steps are so easy, you can probably do them with one eye closed.
- Preheat & Prep: First things first, crank that oven up to 375°F (190°C). Line a baking dish with parchment paper or foil for easier cleanup. Pat your chicken pieces dry with paper towels. This is a crucial step, friends, for that lovely sear! Season both sides with a pinch of salt and pepper.
- Whip Up the Magic Sauce: In a medium bowl, whisk together the honey, soy sauce, minced garlic, rice vinegar, and ginger. If you’re using cornstarch for a thicker glaze (and I highly recommend it!), add it now and whisk until smooth.
- Marinate (or Don’t!): Place your chicken in the baking dish. Pour about ¾ of the sauce over the chicken, making sure each piece is nicely coated. Save the remaining ¼ cup of sauce for later basting! If you have time, let it marinate for at least 30 minutes in the fridge, or even overnight for max flavor. No time? No worries, it’ll still be delicious!
- Bake It ‘Til Golden: Pop that dish into your preheated oven. Bake for 20 minutes.
- Baste & Broil: After 20 minutes, pull the dish out. Baste the chicken generously with the reserved sauce (the ¼ cup you saved). Return to the oven and bake for another 10-15 minutes, or until the internal temperature of the thickest part of the chicken reaches 165°F (74°C). For an extra gorgeous, caramelized finish, switch your oven to broil for the last 2-3 minutes, keeping a very close eye on it so it doesn’t burn!
- Rest & Garnish: Once cooked, remove the chicken from the oven. Let it rest for 5-10 minutes. This allows the juices to redistribute, keeping your chicken moist and tender. Garnish with sesame seeds and green onions if you’re feeling fancy.
Common Mistakes to Avoid
We all make mistakes, darling. But with this recipe, we’re going to try and minimize the “oops” moments. Here are a few things to steer clear of:
- Not preheating the oven: Rookies! Your oven needs to be hot to start cooking properly. It’s like trying to run a race without a warm-up.
- Overcrowding the pan: Give your chicken some personal space! If the pan is too full, the chicken will steam instead of getting that lovely caramelization. Use two pans if needed.
- Skipping the pat dry step: Wet chicken equals rubbery chicken. You want a nice, golden crust, right? Pat it dry!
- Forgetting to save sauce for basting: That glorious glaze won’t magically appear, my friend. You need that extra sauce for brushing on during the bake.
- Overcooking the chicken: Nobody likes dry chicken. Invest in a meat thermometer; it’s your best friend in the kitchen. 165°F is the magic number!
Alternatives & Substitutions
Feeling a little rebellious? Want to try something new? Here are some ideas for shaking things up:
- Chicken Cuts: This sauce works wonderfully with bone-in chicken pieces (just adjust baking time), chicken wings (hello, game day!), or even pork chops or salmon if you’re not in a chicken mood.
- Sweetener Swap: Out of honey? Maple syrup or brown sugar can step in, though the flavor profile will be slightly different (but still delish!).
- Vinegar Variety: No rice vinegar? Apple cider vinegar or even a squeeze of fresh lemon juice can work as a stand-in for that acidic zing.
- Spicy Kick: If you like a little heat, add a pinch of red pepper flakes to the sauce. Just don’t say I didn’t warn you if you overdo it!
- Gluten-Free: Swap out regular soy sauce for Tamari or coconut aminos. Easy peasy!
FAQ (Frequently Asked Questions)
Got questions? I’ve got answers! (Mostly.)
- Can I use frozen chicken? Well, technically yes, but please thaw it completely first! Trying to bake it frozen will lead to uneven cooking and a sad, watery mess. Nobody wants that.
- How long can I marinate the chicken? For best flavor, 30 minutes to 4 hours is great. You can go overnight (up to 12-24 hours), but the acid in the vinegar can start to break down the chicken if left too long.
- My sauce isn’t thickening enough, what gives? Did you remember the cornstarch? If so, you might just need to let it reduce a bit more. When basting, scrape some of the pan juices back onto the chicken. If it’s still too thin after resting, you can always pour the pan drippings into a small saucepan and simmer until it thickens to your liking.
- What should I serve with this deliciousness? Oh, the possibilities! Steamed rice (white or brown), roasted broccoli, a simple side salad, or some fluffy mashed potatoes would all be fantastic.
- Is this recipe spicy? Nope, not inherently! It’s sweet and savory. If you want heat, you’ll need to add those chili flakes yourself. You’re the boss!
- Can I make this ahead for meal prep? Absolutely! It’s fantastic for meal prep. Cook it, let it cool, then portion it out into containers with your favorite sides. It reheats beautifully.
Final Thoughts
See? You just transformed some humble chicken into a glorious, crave-worthy meal with minimal fuss and maximum fun. You’re practically a culinary genius! Now go forth and impress someone—or better yet, just yourself—with your new cooking prowess. You’ve earned those bragging rights (and that delicious meal). Enjoy every sticky, garlicky, sweet bite!


