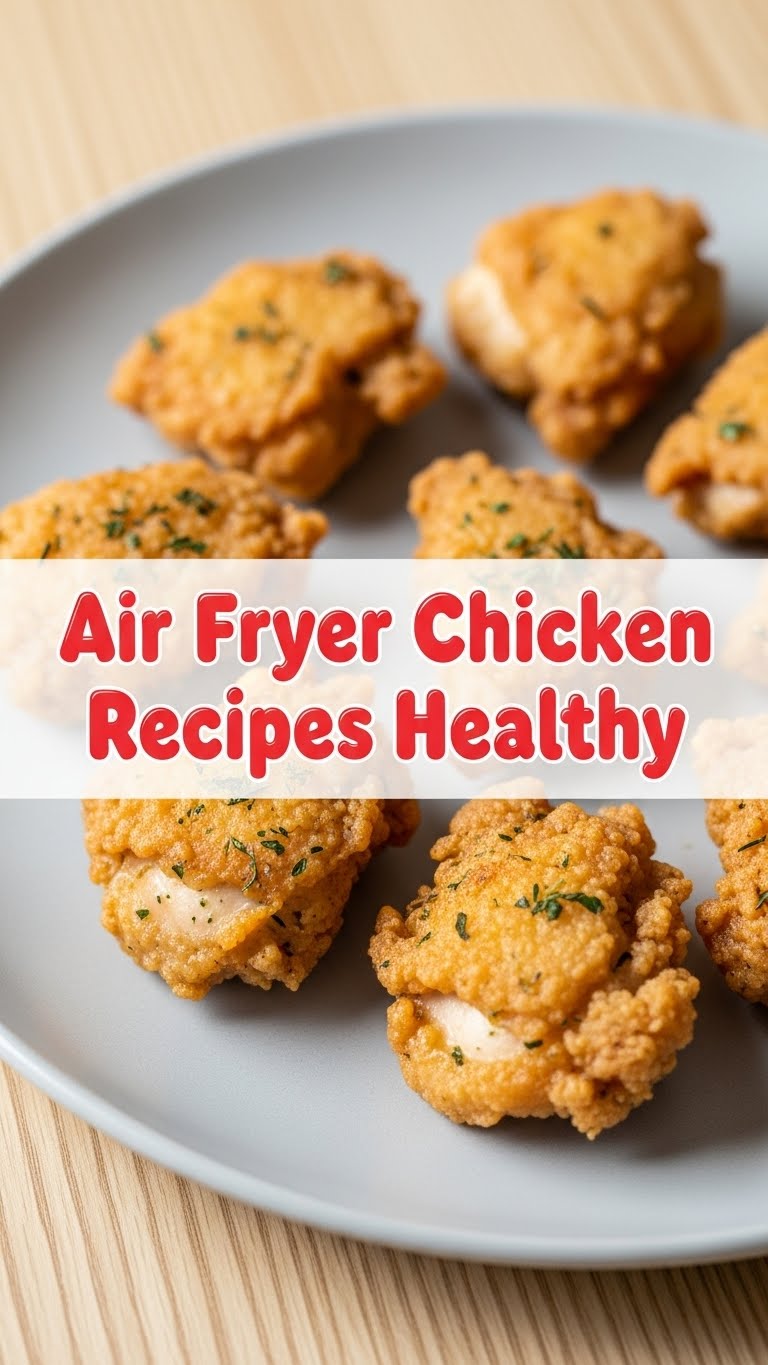
So, your stomach is rumbling, but your motivation for cooking is doing a disappearing act? Same, friend, same. Especially when “healthy” feels like a synonym for “boring” or “takes forever.” But what if I told you there’s a magical contraption that makes crispy, juicy, *actually healthy* chicken in minutes, no deep-frying required? Enter: The Air Fryer. Your new best kitchen buddy for literally everything, but especially for chicken that doesn’t taste like cardboard. Let’s make some delicious, guilt-free magic happen!
Why This Recipe is Awesome
Okay, let’s be real. Nobody wants bland, rubbery chicken. This recipe is awesome because it’s the exact opposite of that. It’s so simple, even my goldfish could probably follow along (if it had opposable thumbs and an air fryer, obvs). It gives you perfectly tender, juicy chicken on the inside with that glorious, slightly crispy exterior we all crave, all without a mountain of oil. Plus, minimal cleanup! You get to feel like a culinary genius without actually breaking a sweat. It’s practically **idiot-proof**, even I didn’t mess it up.
Ingredients You’ll Need
Get ready for a super short shopping list! Most of these are probably already lurking in your pantry.
- Chicken: 1-1.5 lbs boneless, skinless chicken breasts or thighs. The star of our show, probably wondering why it’s not a rotisserie chicken yet. Don’t worry, it’ll get there.
- Oil: 1 tablespoon olive oil or avocado oil. Just a drizzle, not a swimming pool. We’re keeping it healthy, remember?
- Spice Blend (our secret weapon):
- 1 teaspoon smoked paprika (for that gorgeous color and hint of smokiness)
- 1 teaspoon garlic powder (because garlic makes everything better)
- 1/2 teaspoon onion powder
- 1/2 teaspoon dried oregano or Italian seasoning (optional, but highly recommended)
- 1/2 teaspoon salt (or to taste)
- 1/4 teaspoon black pepper (freshly ground, if you’re feeling fancy)
- Optional Garnish: Fresh lemon wedges and chopped parsley. For when you’re feeling extra, or want to pretend you are.
Step-by-Step Instructions
- Prep Your Chicken: First things first, pat that chicken dry with a paper towel. This is a crucial step for crispy results, don’t skip it! If your breasts are super thick, slice them horizontally to make two thinner cutlets, or pound them to an even thickness (about 1-inch) so they cook evenly.
- Season Like a Pro: Drizzle the olive oil over the chicken in a bowl. Then, sprinkle all your glorious spices (paprika, garlic powder, onion powder, oregano, salt, pepper) over the chicken. Get in there with your hands and rub it all over, making sure every piece is coated. This isn’t a beauty contest; it’s about flavor!
- Preheat Your Air Fryer: Turn on your air fryer and set it to 375°F (190°C). Let it preheat for 3-5 minutes. **Don’t skip this step!** It’s key for that initial sear and even cooking.
- Air Fry Time! Arrange the seasoned chicken in a single layer in your air fryer basket. Seriously, do not overcrowd it! If you have too much chicken, cook it in batches.
- Cook and Flip: Air fry for 8 minutes. Then, flip each piece of chicken over with tongs and cook for another 6-10 minutes, depending on the thickness of your chicken.
- Check for Doneness: The chicken is ready when its internal temperature reaches 165°F (74°C) using a meat thermometer inserted into the thickest part. No pink bits, please!
- Rest, You Deserve It: Transfer the cooked chicken to a plate or cutting board and let it rest for 5 minutes before slicing or serving. This allows the juices to redistribute, keeping your chicken super moist and delicious. Nobody likes dry chicken, IMO.
- Serve It Up: Garnish with fresh parsley and a squeeze of lemon juice if you’re feeling extra fancy. Enjoy your perfectly healthy and delicious air fryer chicken!
Common Mistakes to Avoid
We’ve all been there, making silly kitchen blunders. Learn from my mistakes, friend!
- Overcrowding the Basket: Your air fryer isn’t a clown car, folks. Give that chicken some personal space. Overcrowding leads to steaming instead of crisping, and nobody wants soggy chicken.
- Not Preheating: Thinking you don’t need to preheat your air fryer? Rookie mistake! It’s like jumping into a cold shower—unpleasant for everyone involved, especially your chicken. Preheating ensures even cooking and that gorgeous crispy exterior.
- Skipping the Pat Dry: Wet chicken means less crispy chicken. Take the extra 30 seconds to pat it dry; it makes a huge difference.
- Forgetting the Meat Thermometer: Playing Russian roulette with your dinner? Nah, fam. A meat thermometer is your best friend for perfectly cooked, safe chicken every single time.
- Not Resting the Chicken: Impatient? I get it. But slicing immediately lets all those precious juices escape. Let it rest for 5 minutes, trust me.
Alternatives & Substitutions
Feeling adventurous? Here are some ways to switch things up!
- Chicken Cuts: Instead of breasts, use boneless, skinless chicken thighs! They’re usually more forgiving and stay incredibly juicy. Just note they might need a minute or two longer to cook.
- Spice Blends: Get creative with your seasonings! Try a quick taco seasoning for Mexican night, a spoonful of curry powder for an Indian twist, or some jerk seasoning for a Caribbean vibe. Your kitchen, your rules!
- Oil Alternatives: If olive or avocado oil isn’t your jam, any neutral high-heat oil like grapeseed or canola will work just fine. Just a light coating is all you need.
- Sauce It Up: Feeling saucy? Toss the cooked chicken in a sugar-free BBQ sauce, a light peanut sauce, or a homemade honey-mustard dressing for extra flavor.
- Add Veggies: For a super easy one-pan (almost) meal, throw some quick-cooking veggies like broccoli florets, bell pepper strips, or asparagus spears into the air fryer for the last 5-7 minutes of cooking. Drizzle them with a little oil and the same seasoning blend. Dinner done!
FAQ (Frequently Asked Questions)
Got questions? I’ve got (casual and humorous) answers!
- Do I really need to preheat the air fryer?
Oh, absolutely! Think of it like preheating your regular oven. It ensures even cooking and that gorgeous crispy exterior we’re all after. Plus, it usually shaves a little time off the total cook, so win-win!
- Can I use frozen chicken breasts?
Technically, yes, but I highly recommend thawing them first. Frozen chicken will take significantly longer to cook, won’t cook as evenly, and might not get that same crispy magic. For best results (and food safety!), thaw ’em out.
- My chicken isn’t crispy! What did I do wrong?
Most likely, you overcrowded the basket. Air needs to circulate around each piece for proper crisping. Also, ensure you’ve patted the chicken dry and used a little oil. **A single layer and a bit of oil are your crispy chicken BFFs!**
- How do I know the chicken is cooked through? No thermometer, just vibes?
While vibes are great, food safety is better! A meat thermometer is truly your bestie here. Insert it into the thickest part of the chicken; it should read **165°F (74°C)**. No thermometer? Cut into the thickest part—if there’s no pink and the juices run clear, you’re good to go. But seriously, get a thermometer.
- Can I marinate the chicken beforehand?
Heck yes! Marinating for 30 minutes to a few hours will infuse even more flavor and keep your chicken extra tender. Just remember to pat off any excess marinade before air frying to help with browning and crisping.
- My air fryer is smoking! What gives?
This usually happens if there’s old oil or food bits left in the bottom of the basket/drawer from previous cooks (so clean it, you rebel!). It can also happen with high-fat ingredients where the fat drips and burns. A little trick is to add a tablespoon or two of water to the bottom of the air fryer drawer (under the basket) to help prevent smoke.
Final Thoughts
So there you have it, folks! Healthy, delicious air fryer chicken that actually tastes good and won’t make you want to throw your kitchen out the window. You’ve officially leveled up your weeknight dinner game with minimal effort and maximum flavor. Now go forth and conquer your cravings, impress someone (or just yourself, because you’re worth it!) with your new culinary skills. You’ve earned it! **Don’t forget to tell me how it went!**


