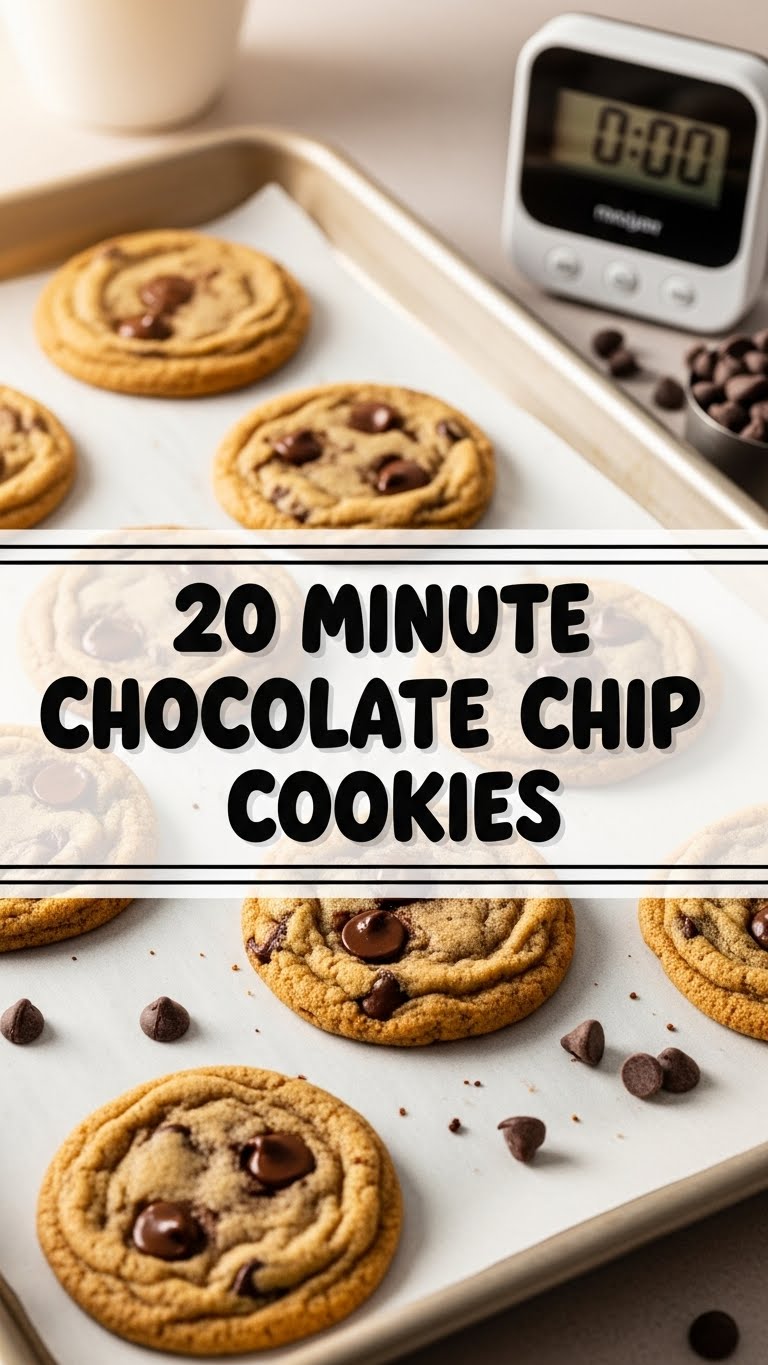
So you’re craving something tasty but too lazy to spend forever in the kitchen, huh? Same. We’ve all been there: that sudden, intense, ‘I need chocolate chips RIGHT NOW’ kind of feeling, usually hitting around 9 PM when all the good bakeries are closed. Fret not, my friend, because I’ve got your back with a cookie recipe so quick, so delicious, it’s practically magic. And guess what? It’s done in about 20 minutes flat. Yes, you read that right. Your sweet tooth is about to send you a thank-you card.
Why This Recipe is Awesome
Okay, let’s be real. Most cookie recipes demand a commitment. Chilling dough for hours? Pffft. Who has that kind of patience when a chocolate emergency is looming? This recipe is the anti-commitment cookie. It’s **fast AF**, meaning from zero to warm, gooey cookies in less time than it takes to scroll through your ex’s vacation photos.
Plus, it’s pretty much **idiot-proof**. Seriously, even if your culinary skills peak at instant ramen, you can nail these. It’s perfect for impressing unexpected guests, satisfying a sudden craving, or just proving to yourself that you are, in fact, capable of creating pure joy. No fancy equipment needed, just basic kitchen stuff. BOOM!
Ingredients You’ll Need
- **1/2 cup (1 stick) unsalted butter, softened.** (Or slightly melted, if you’re impatient like me. Just don’t nuke it into a liquid mess.)
- **1/2 cup packed light brown sugar.** (The ‘packed’ part is important, otherwise, your cookies might be sad and less chewy. Don’t let them be sad!)
- **1/4 cup granulated sugar.** (Because balance, darling.)
- **1 large egg.** (Preferably at room temp, but if you forgot, a quick warm water bath for a minute works wonders. Who has time to wait?)
- **1 teaspoon vanilla extract.** (Don’t skimp! Good vanilla makes *all* the difference. Fake vanilla is just… wrong.)
- **1 1/4 cups all-purpose flour.** (No need for fancy stuff, just your regular flour. Sifting? Optional, if you’re feeling extra.)
- **1/2 teaspoon baking soda.** (This is our little leavening hero. Don’t confuse it with baking powder, please.)
- **1/4 teaspoon salt.** (Essential for balancing the sweetness and making everything pop!)
- **1 cup semi-sweet chocolate chips.** (Or milk chocolate, dark chocolate, a mix, chunks, whatever your chocolate-loving heart desires. More is always better, IMO.)
Step-by-Step Instructions
- **Preheat & Prep:** First things first, get that oven fired up to **375°F (190°C)**. Line a baking sheet (or two, if you’re a multi-tasker) with parchment paper. This is key for easy cleanup and preventing stuck cookies. Trust me.
- **Cream the Goods:** In a medium bowl, cream together your softened butter, brown sugar, and granulated sugar. Beat them until they’re light and fluffy. A hand mixer makes this quick, but a good old whisk and some arm power work too.
- **Egg & Vanilla Time:** Add the large egg and the glorious vanilla extract to your creamy sugar mix. Beat ’em in until everything is just combined. Don’t overmix here; we’re making cookies, not soufflés.
- **Dry Ingredients Unite:** In a separate, smaller bowl (or just dump them on top if you’re feeling rebellious), whisk together the flour, baking soda, and salt. Make sure it’s all nicely mixed so you don’t get a salty patch in one cookie and a bland patch in another.
- **Combine & Conquer:** Gradually add your dry ingredients to the wet ingredients, mixing on low speed (or by hand) **just until no streaks of flour remain**. Overmixing develops gluten, and we want tender cookies, not hockey pucks.
- **Chocolate Chip Party!** Now for the best part: fold in your chocolate chips. Use a spatula for this, gently distributing them evenly. We want chocolate in every bite, obviously.
- **Scoop & Bake:** Drop rounded tablespoons of dough onto your prepared baking sheets, leaving a couple of inches between each cookie. They will spread!
- **Golden Goodness:** Bake for **8-10 minutes**, or until the edges are golden brown and the centers still look slightly soft. Remember, cookies continue to cook a bit after they come out of the oven.
- **Cool Down (If You Can Wait):** Let them cool on the baking sheet for about 5 minutes before transferring them to a wire rack to cool completely. Or, if you’re like me, eat one (or three) straight off the tray, burning your tongue slightly, but totally worth it.
Common Mistakes to Avoid
- **Not preheating the oven:** Rookie mistake! Cold ovens lead to flat, sad cookies that don’t spread properly. Don’t be that person.
- **Overmixing the dough:** Remember what I said about gluten? Overmixing makes tough cookies. We want tender, chewy bliss. Mix just until combined.
- **Using cold butter:** Your butter needs to be soft for proper creaming. If it’s rock-hard, microwave it for 10-15 seconds, flipping halfway. Don’t melt it into a puddle, though!
- **Baking too long:** Watch those cookies! They go from perfectly chewy to crunchy hockey pucks faster than you can say “chocolate chip.” Pull them out when the edges are golden and the centers are still soft.
- **Eating all the dough before baking:** I mean, I get it, but then you won’t have actual cookies. Exercise some self-control, friend!
Alternatives & Substitutions
- **Butter Battle:** Can’t do butter? Some folks swear by shortening for extra soft cookies, but honestly, **real butter is king** for flavor. Margarine? Well, technically yes, but why hurt your soul like that? If you absolutely must use it, opt for a good quality one.
- **Sugar Swaps:** Want to play with sugar? You can adjust the ratio of brown to white sugar. More brown sugar = chewier cookies. More white sugar = crispier cookies. It’s your cookie, you do you!
- **Chocolate Choices:** Go wild! Milk chocolate, dark chocolate, white chocolate, chocolate chunks, mini chips, even M&Ms or chopped nuts. Just don’t tell the purists I said that.
- **Gluten-Free Fun:** For a GF version, simply swap out the all-purpose flour for a good quality 1:1 gluten-free baking flour blend. Make sure it has xanthan gum!
FAQ (Frequently Asked Questions)
- **”Do I really need to use parchment paper?”** Look, you *can* grease the pan, but then you risk sticking and a messy cleanup. Parchment paper is your BFF here – no sticking, no scrubbing. Worth it, trust me.
- **”My cookies spread too much! What happened?”** A few things could be at play: your butter might have been too soft (or melted), your oven temp could be off (get an oven thermometer!), or you might have added too much leavening. Next time, try chilling the dough for 10-15 minutes before baking.
- **”Can I make the dough ahead of time?”** Absolutely! This dough doesn’t *require* chilling, but if you want to prep, cover it and stick it in the fridge for up to 3 days. Just let it sit out for 10-15 minutes before scooping.
- **”Help, my cookies are too cakey!”** This usually means too much flour or overmixing. Remember, measure flour by spooning it into the cup and leveling, not scooping directly from the bag. And mix *just* until combined!
- **”What’s the best way to store these?”** Pop them in an airtight container at room temperature for up to 3-4 days. But let’s be real, they rarely last that long.
- **”Can I freeze the dough balls?”** Oh, hell yes! Scoop the dough onto a parchment-lined tray, freeze until solid, then transfer to a freezer-safe bag. Bake from frozen, adding a couple extra minutes to the bake time. Instant cookies whenever the craving strikes!
Final Thoughts
So there you have it, my friend. Your new go-to recipe for when that chocolate chip cookie craving hits hard, fast, and without warning. No fuss, no drama, just pure, unadulterated cookie joy in about 20 minutes. It’s practically a superpower, and now you possess it.
Now go impress someone—or yourself—with your new culinary skills. You’ve earned it! And maybe, just maybe, share one or two. Or don’t. I won’t tell.


